Welcome back! Today we are going to be talking about how to use our “Through the woods” workflow for Lightroom, designed primarily for editing landscape photography. More specifically, we will be focusing on how to use this workflow to bring color and light back to your landscape photographs, especially with photos where the sun or backlighting may have washed out some of the color and detail. This tutorial goes along with a great video which you can find on our YouTube channel.
Let’s get right into it. With our “Through the Woods” workflow and first photograph pulled up in Lightroom, we are going to start out by applying the All in One – Shine into the Sunset preset. Once applied, if you watch the video, you’ll see that this one preset has already brought a lot of detail and light back into this photo, as well as enhanced the dynamic range.
Another way to fix underexposed images with this workflow are the Exposure presets. For this image we are going to select Exposure – Brighten Shadows. What this did was brought more light out in the darker areas in the photograph. Then we are going to apply one of the Base presets, for this we’ll go with Base – Basic Film.
Next we are going to move over to the brushes and show how they can be used to bring some more color and light to this image. Once we have them opened up, scroll down to the “Through the Woods” brushes. The first brush that we are going to use will be Light – Add Golden Sun. We will run this brush over the sun that is peeking over the horizon, as well as the areas in the water where the sun is being reflected. Just like the name, this brush adds the nice hazy yellow tone that you would get from golden sunlight.
Note: Remember to click New before selecting a different brush. This will reset it to a fresh one.
Now let’s go back to our “Through the Woods” brushes and this time we will use the Haze – Cyan brush. For this brush, we are going to turn up the Saturation a bit, then run this brush around areas in the sky to return some more of the blue tones. We’ll also run this brush around some of the areas in the water where we can see reflections from the sky.
Now we will go back into our brush collection and select one of the Basic brushes, this time we are going to choose Basic – Contrast and Clarity. We are going to apply this brush to areas in this photo where there are groups of rocks and land sticking out from the water. We’ll use this brush to bring out more of the detail from those areas. Before we finish with this photo, we will open the Basic tab and adjust some of the sliders to tweak the image a bit more. I will turn both the Saturation and Shadows up just a little, returning just a bit more of that detail.
Our end result a photograph that shows more of the details that were hidden away in the darkness. We have brought out more light which has really improved the entire scene captured in this photo.
Let’s move right along to the second image that we have to edit today, which is a subtle ground up shot of a sparse forest. We begin this one by applying the Base – Auto Tone (Color) preset. This will get us started by adding a little more light and color. Next we will use an Exposure preset to lighten the shadows a little, that are hiding some of the details. For this we will select Exposure – Brighten Shadows. This preset really brought a lot of the detail back to the large tree in the foreground of this photograph, which was lost before.
Now, concentrating on the greens for this photo, we are going to reduce the yellows a bit. We will do this by applying the Color Correct – Reduce Yellow preset. Then going over to the Color tab, we will go into Saturation and turn up the Green some more.
Going back over to our “Through the Woods” presets, we are going to apply the Polish – Add Clarity. This really helps reveal more of the details, especially the bark on the trees, which definitely adds much more character.
Now it’s time to move over to our “Through the Woods” brushes. The first brush that we will use on this photo will be Light – Add Golden Sun. We are going to apply this brush to the area at the top, where the sun is shining through the trees. We’ll also run this brush over the areas that the sun is reflecting off of like the tree trunk in the foreground. To finish this photo we will go into the Basic tab and tweak the presets just a little more by turning up the Contrast and the Shadows.
The final result shows that the changes we made were subtle, however we did bring a lot of that lost light and detail back into this photograph, especially the details in the tree standing in the foreground.
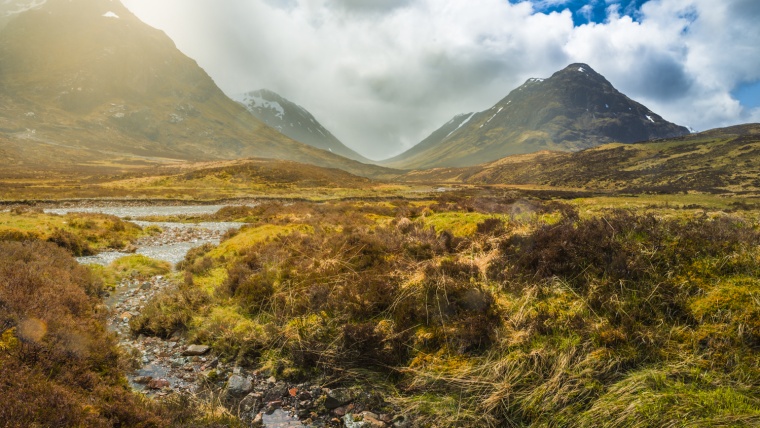
For our third photograph, we have a view looking out over some hills. Let’s use a Base preset to get this one started, We’ll use Base – Dance in the Rain. This preset will add some light back to the photo and will bring up the shadow a bit. We will follow that up by applying an Exposure preset to bring in just a little more light, for this we’ll use Exposure – Brighten.
Now scrolling down to our Tone/Tint presets, we are going to apply Tone/Tint – Warm it Up, which will give this photo a much warmer color tone. Now we’ll move over to the brushes and use the Light – Add Golden Sun brush again. This brush is really useful for photographs that have a lot of sun in them. It works great to spread the warm light throughout the affected areas, really warming up the image. We will run this brush directly over the sun in the photo, as well as the areas where the beams appear to travel and reflect.
Now we will click New to start a fresh brush, then go back into the “Through the Woods” brushes to select another. Scrolling down to the Color brushes, we are going to select Color – High Saturation. We’ll run this brush over the dirt trail and green shrubbery in the foreground, adding a little more color to those areas.
Closing the brushes, we will go back into our Basic tab and turn the Shadows and Contrast up just a bit, then we’ll turn the exposure down just slightly.
In our end result we have only applied a few changes, but made huge difference in this photograph. We have added a lot of light, as well as color, allowing more detail to show through. The original image was backlit by the sun which was drowning out the detail and color in the foreground of the photo. With workflows like “Through the Woods”, you’ll have the ability to correct and enhance colors, lighting effects, details and so much more, restoring the scene to the way you saw it through your own eyes or better.
Thanks for following along and be sure to check out the video which goes with this Through the Woods tutorial.


Please verify your software version before proceeding.
 I’ve verified my software version


 Facebook
 Google +
Comments (0)
There are no comments yet.