Using Lightroom to Make your Underexposed Images POP!www.sleeklens.com
Shooting on a whim can be fun and produce awesome results, but you may not always have what you need in terms of lighting. You may often times shoot an image where you get a great moment but your lighting and exposure are not the best, so you have to do a lot in post production to fix the image. In the photo we are about to work on, I’m going to show you a nice way to bring attention to the face and make the eyes pop by using and installing the Lightroom presets.
Table of Contents
1 – Starting Point
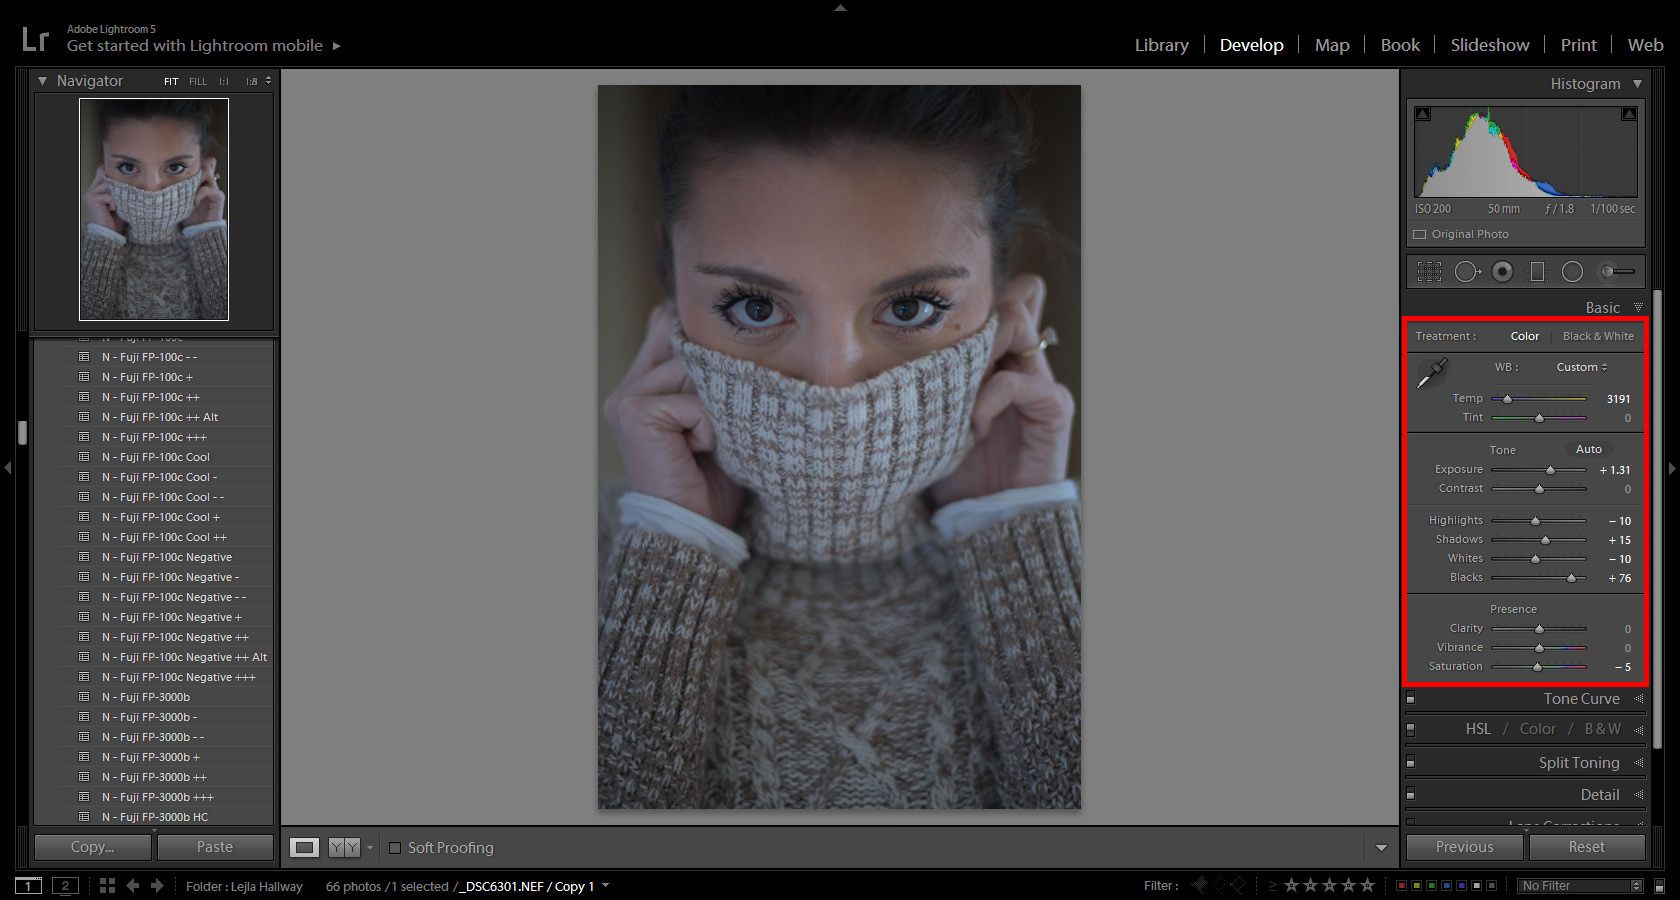
This is our starting point. We notice that in the histogram everything is pushed to the left thus giving us a very under exposed image. There is almost nothing in the highlights, so what we end up with is this flat exposure. If we look at my settings, we see that I have everything at optimal settings to be able to get as much light into my lens.. well everything but the ISO. I could have bumped the ISO up higher (my camera is very capable of handling it) but for whatever reason, that did not happen. So what todo? Well, I know that there is info in the RAW file and that all I need to do is bring it out the best I can. Our goal will be to expose the face and eyes to make the image more interesting.
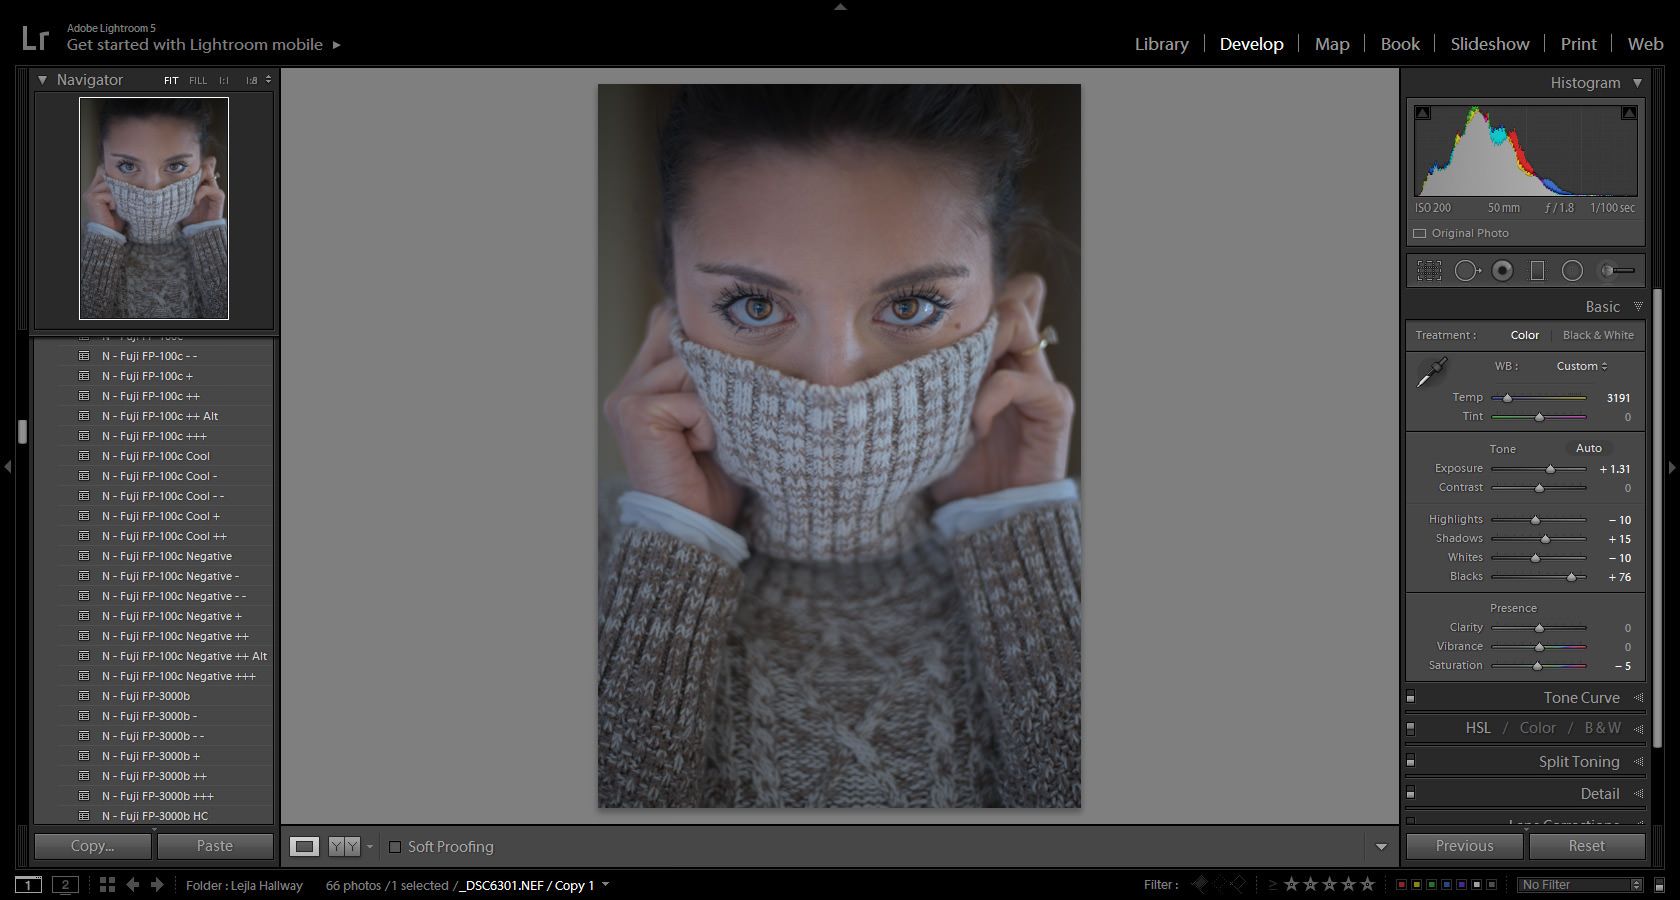
2 – Global Exposure
To start things off you will notice that I have cropped and adjusted the angle of the photo. I also did some light retouching on some of the forehead to take out some of the hair and smudges that were on the lens. If you want more of an explanation on how to retouch portraits then check out our more in-depth article. Our main concern here is the histogram and all of our exposure settings. I turned down the temperature knowing that I want my end result to have a cooler feel to it. I bumped the exposure up quite a bit to get some detail back in the overall image. I then went into the Blacks/Shadows and boosted them so that I can get some of that information from the RAW file. The eyes and the hair are one of my main concerns. I can boost the black/shadows even more, but I do not want that on the whole image, I want a more precise way to target where I brighten up the image. In the next step, we do this specific thing.
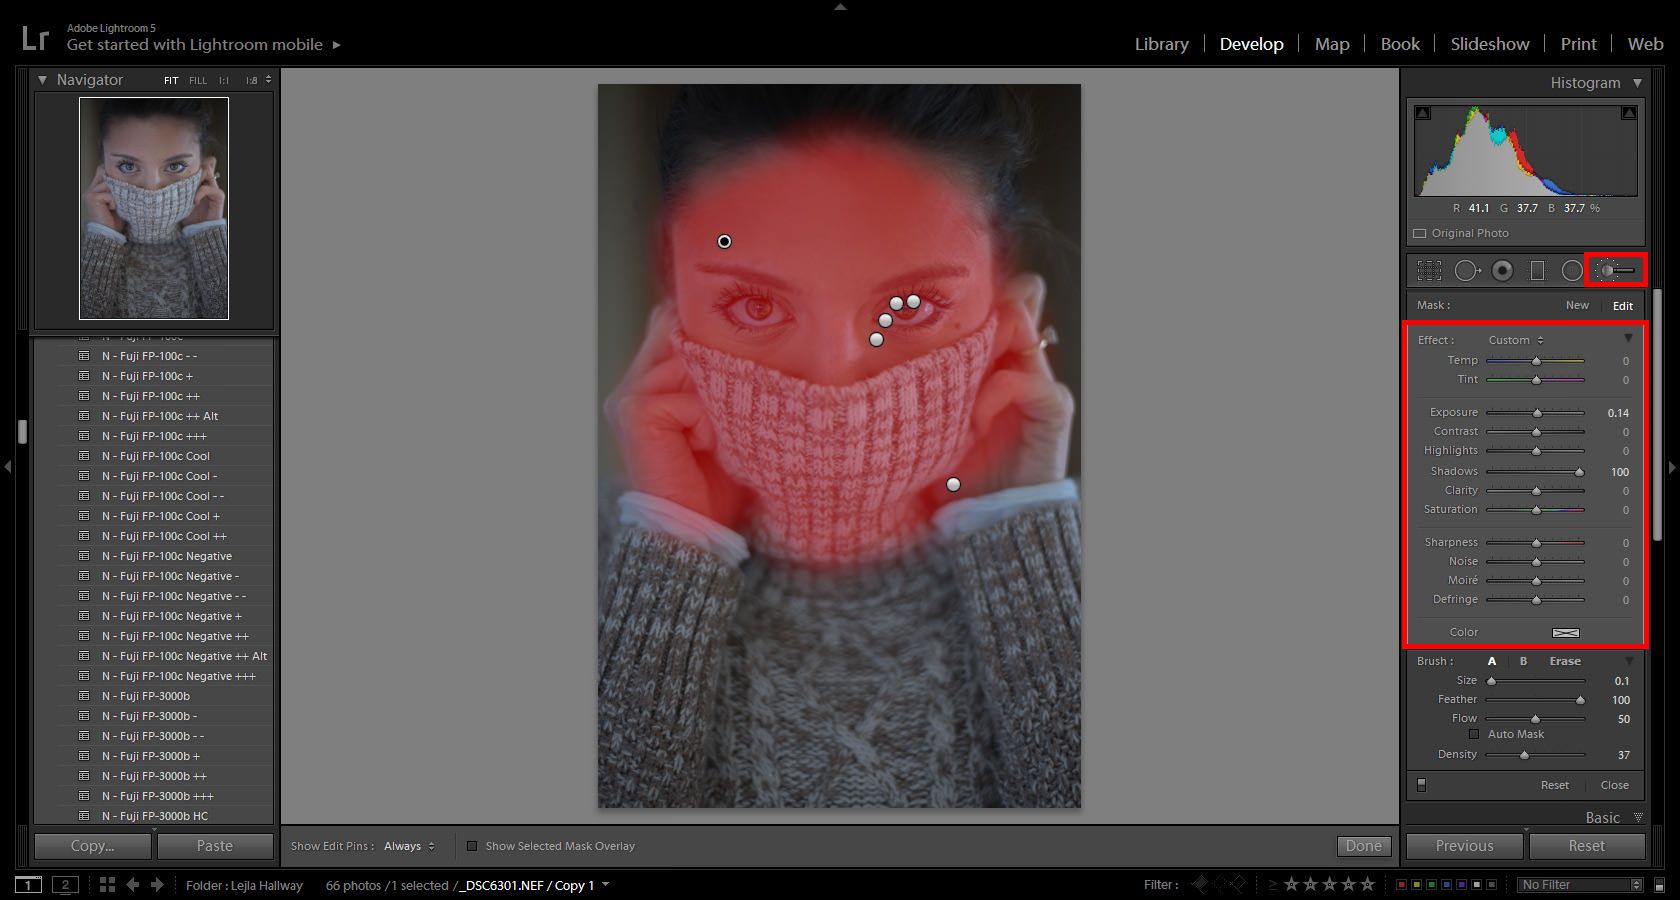
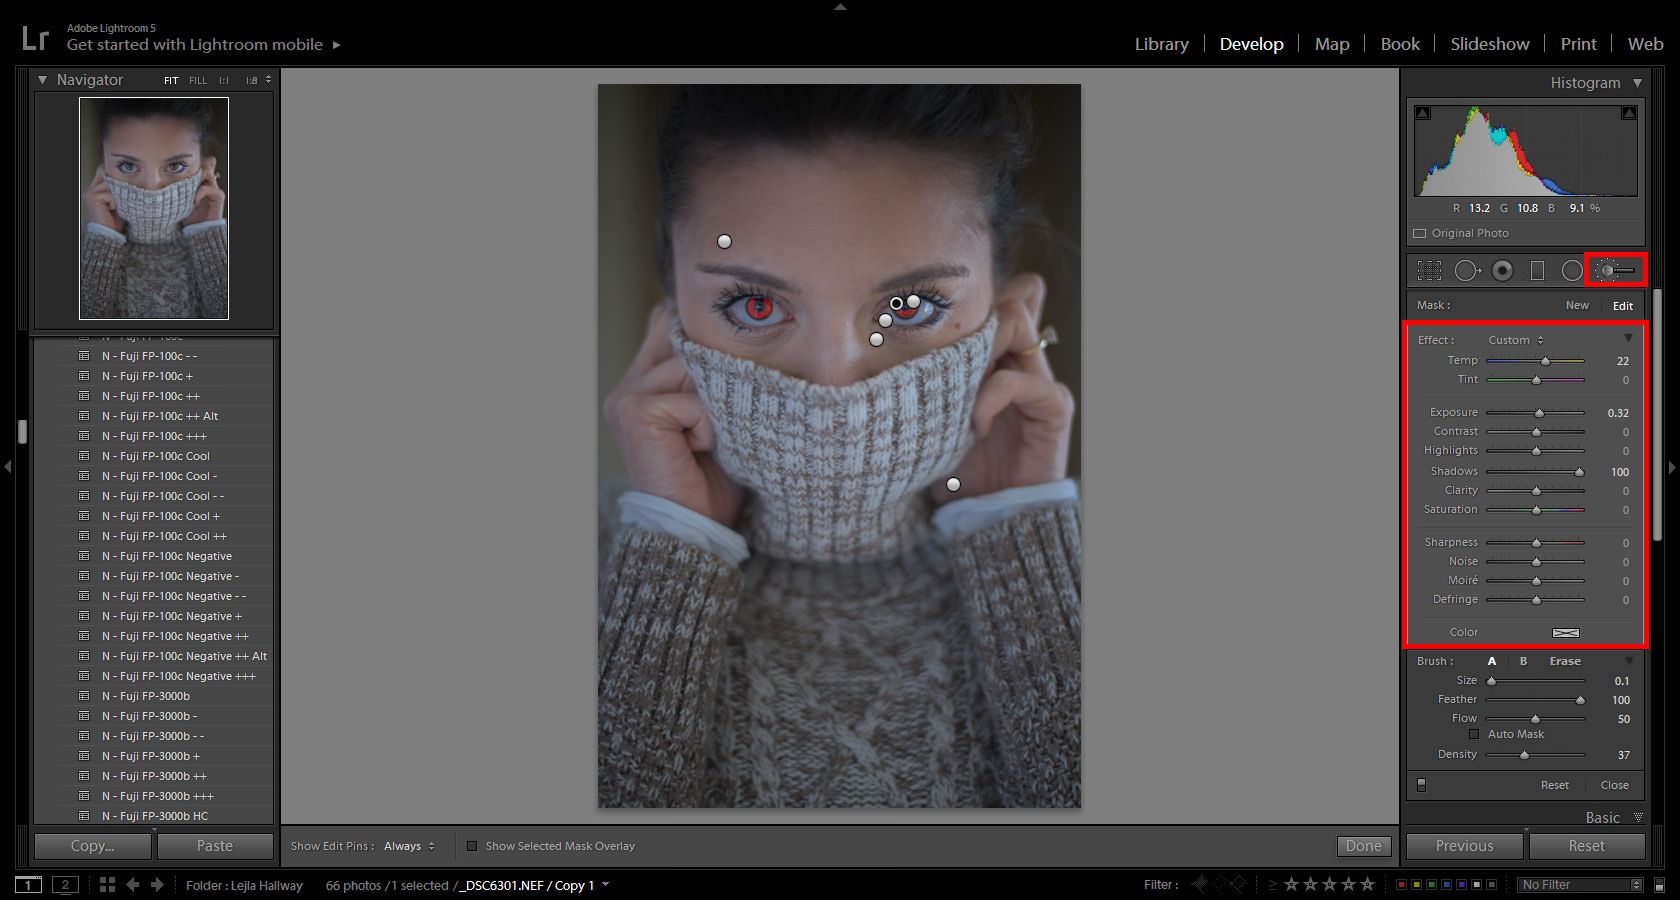
3 – Adjustment Brush
These next few images will show you the exact changes I made on all of the individual sections of the image using the adjustment brush. The way it works is that wherever you paint (the red color), is where the changes you make will take place. In case you are not familiar: The circle with a smaller black circle inside of it is the current adjustment we are looking at. This first adjustment we see below is on the whole face, hands and part of the neck. It was important to me that the eyes, face, and sweater are the focus points and that they pop out at the viewer. So, all I did in this step was to boost the shadows on just the face and push up the exposure up just a hair.
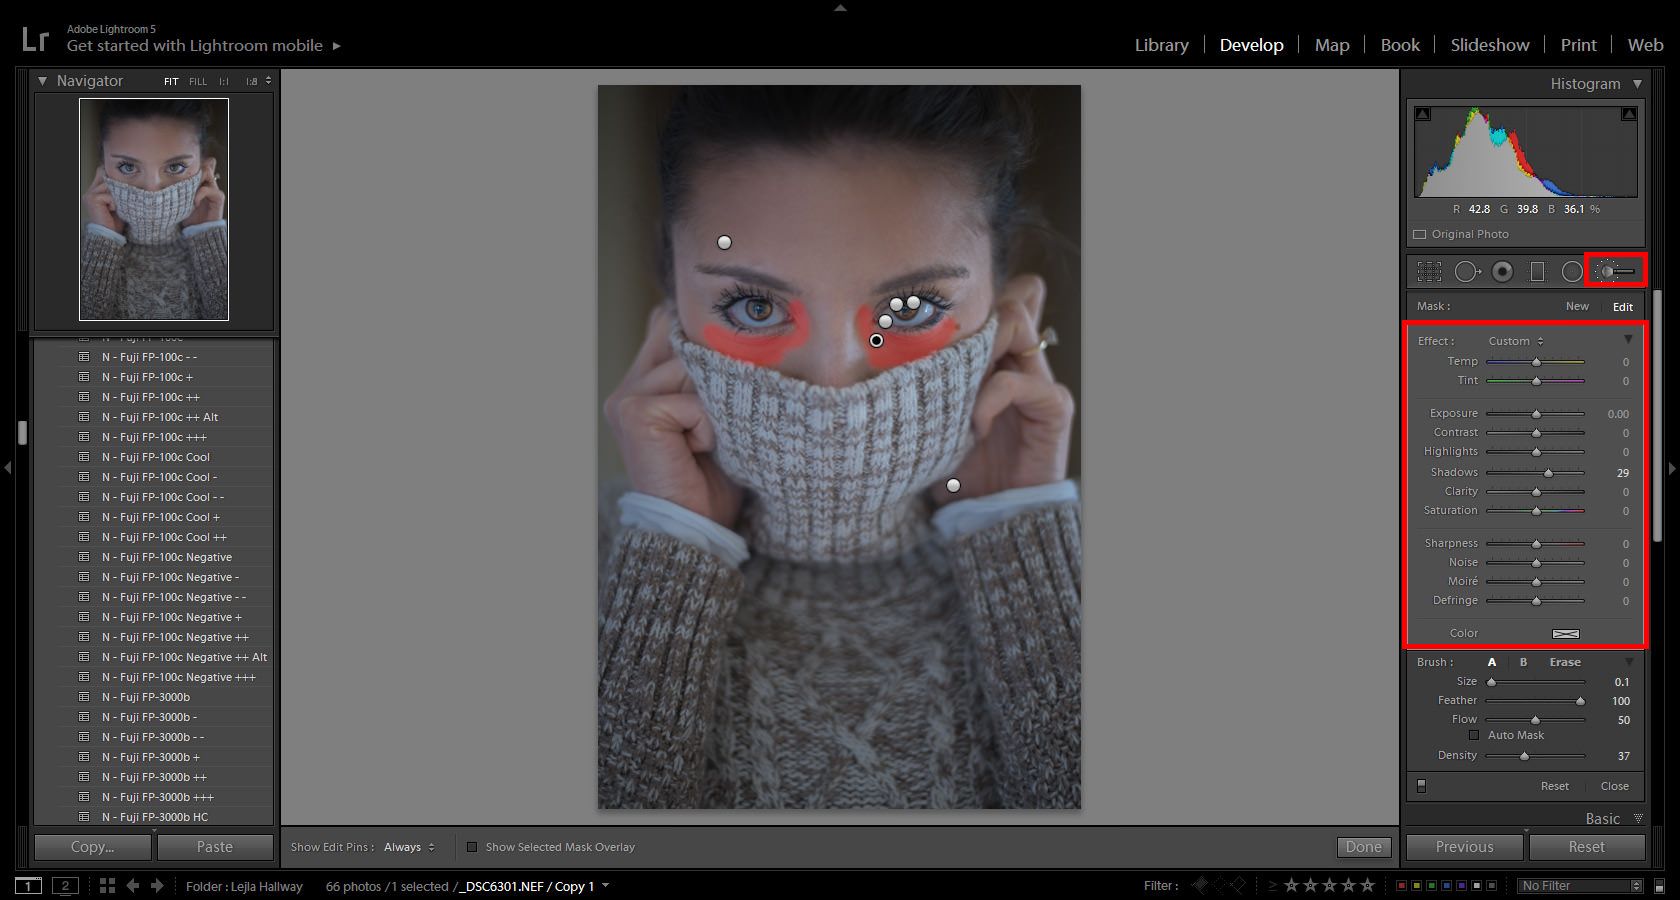
Here I boosted the temperature on the hands up a bit. I warmed up the hands because later when I do color adjustments to the whole image, they become very blue and cold looking. So this is one of those things that I would have done later in the process originally, but it makes more sense to show it to you at this stage.
The way the light was hitting her face, she was not getting a lot of light in her eyes, especially under her eyes. To combat what appeared to be dark circles, I lightened up the shadows under her eyes only very slightly.
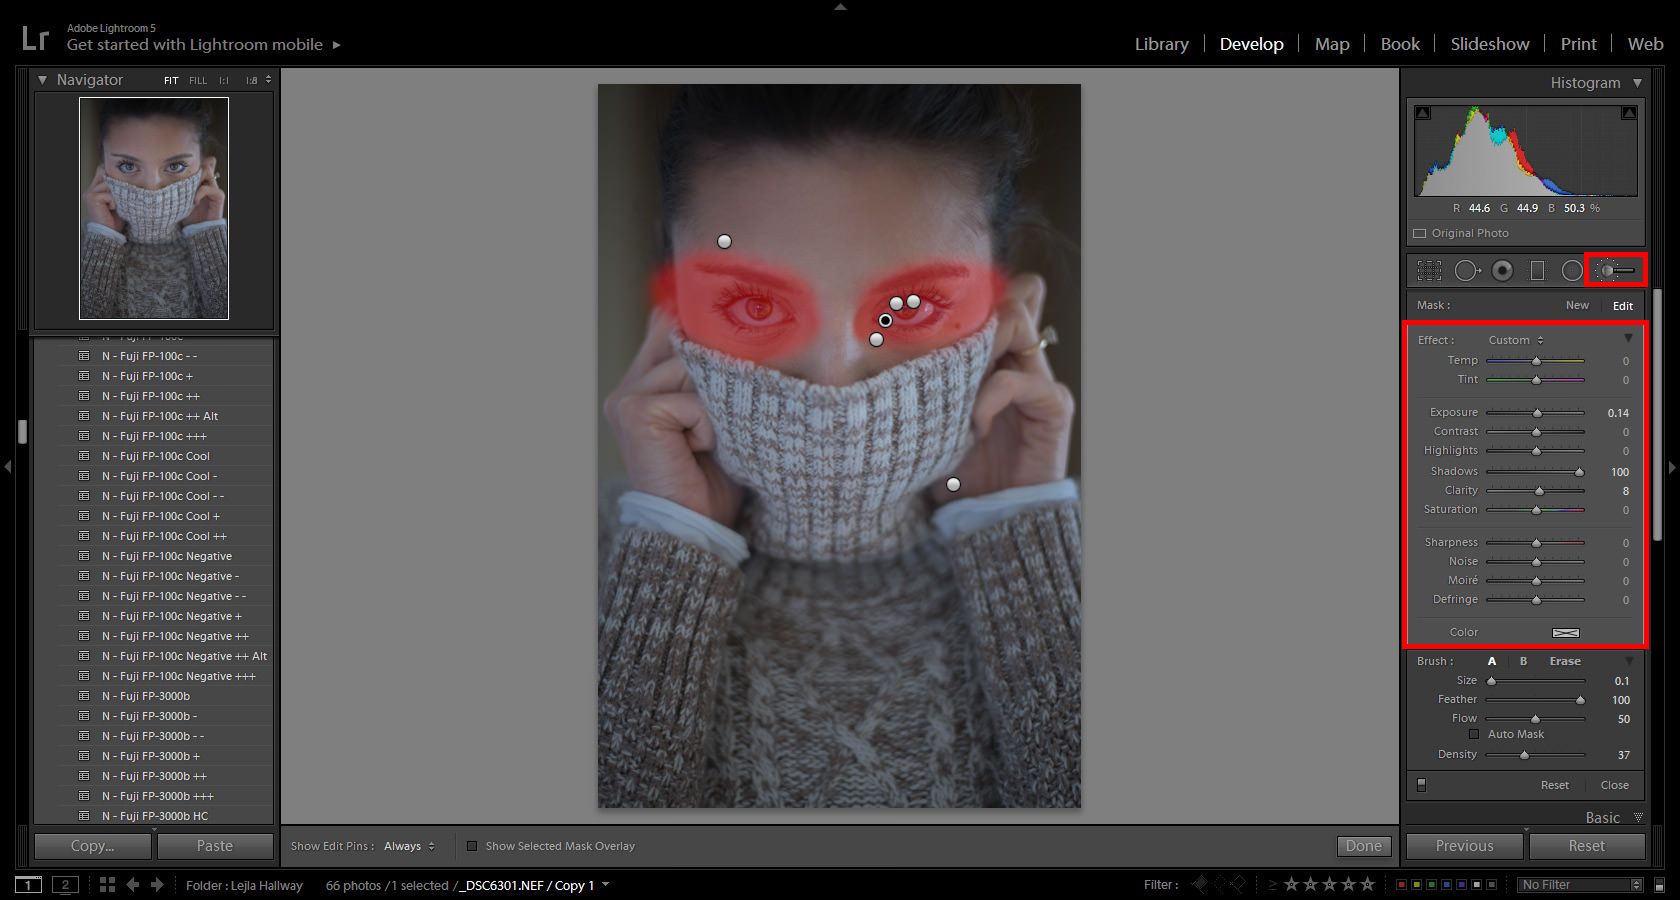
This step too is a move to brighten up the eyes and remove the shadows that were cast in her eyes. This adjustment is a little stronger than the previous one and effects the whole eye area.
If you notice in this part I focused on the iris of the eye. I boosted it and warmed it up quite a bit. In the image that follows, you will notice that I did almost the same adjustment. The reason that I did pretty much the same adjustment twice, is because I wanted the shadows to be boosted even more than I could achieve with one adjustment, so I stacked it.
Here is that adjustment, similar to the one above that I doubled up on mainly because of the shadows not going up as much as I wanted it to with one adjustment layer.
4 – Before the Color Adjustments
Here is where we stand after all of those precise and targeted edits we made to the eyes and face using the adjustment brush. It allowed us to warm up the hands, brighten the iris, lighten up the whole eye socket and turn up the brightness on the face as a whole. If we look at the histogram now it has come a long way, compared to the original settings we started with. We now have detail in the blacks/shadows which are ideal especially when printing for the look I’m going for. The other thing we can notice is that the eyes pop out a lot more and you can see color in them, as opposed us having black dots for eyes, like when we started. If you come to this point and wanted to pull back a little on the eyes then you can do that by going back into the guide on how to use adjustment brush and make changes as needed.
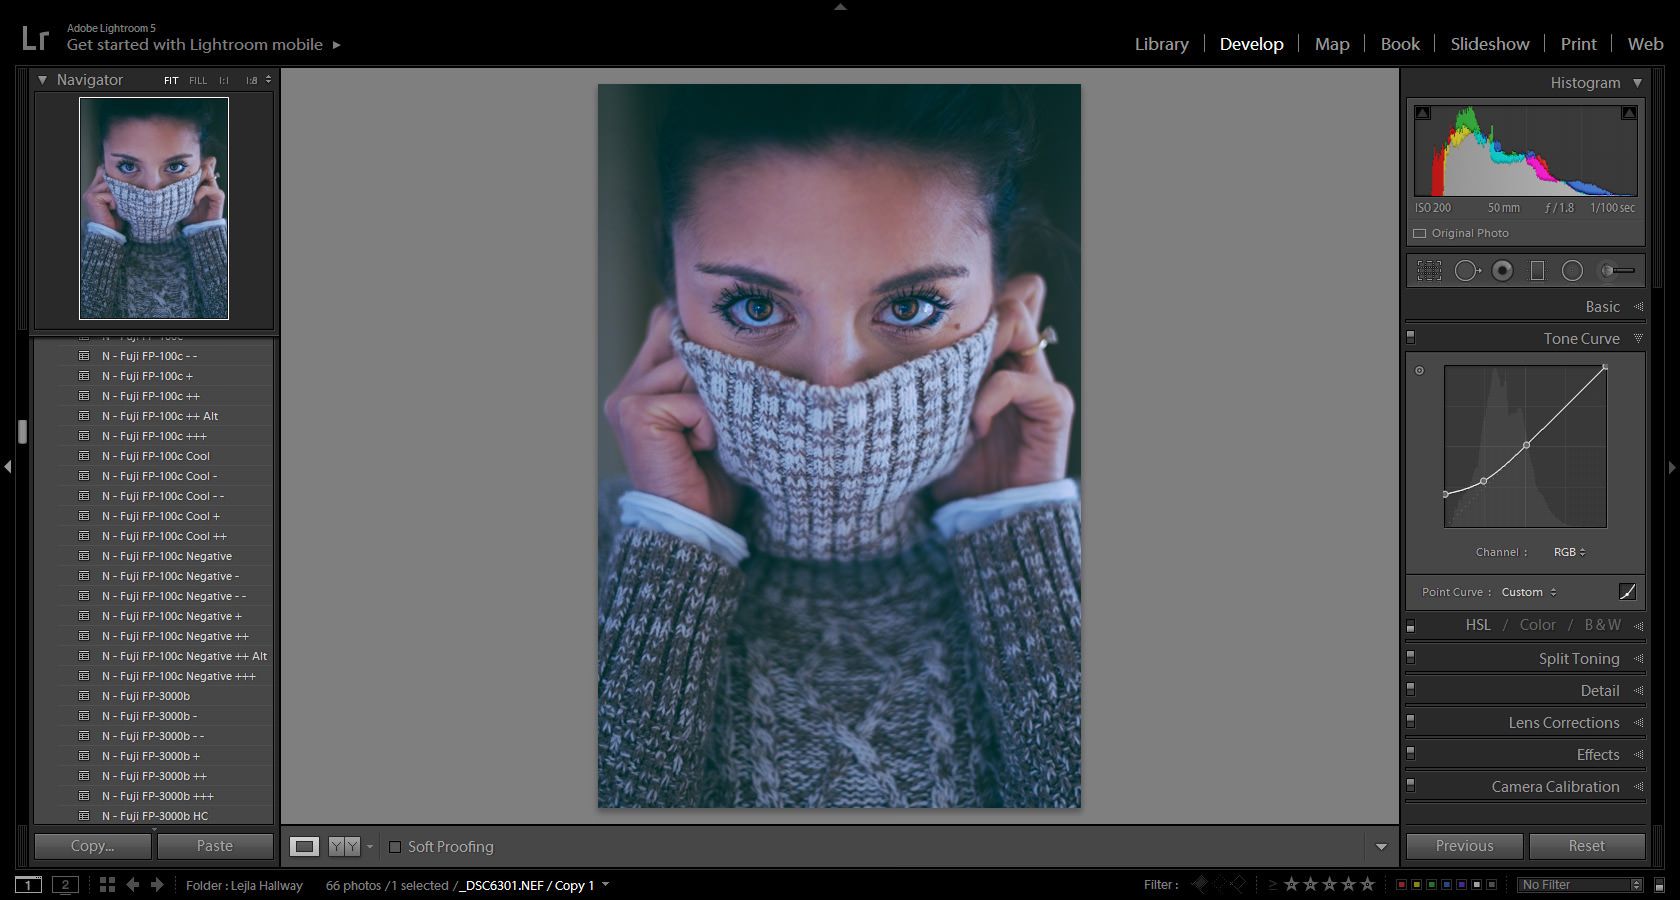
5 – Color Adjustments
I am not going into the specifics of the color adjustments I did, that will be covered in another Lightroom tutorial coming soon. I will say that I generally start out with an end feeling that I want the photo to have. If I am using presets, I then choose a preset that gets me started and make my adjustments as needed. If you do want some presets to get started with, check out some Lightroom presets from Sleeklens. At this point, we can look at the histogram and notice that there is information in most of the range. This does not always have to be the case especially for high key or low key images. I do have to say that if I was doing more retouching, I would go into Photoshop. In this image, I would maybe go in and remove some of the lines under the eyes but that is a different work flow and tutorial.
6 – Conclusion
It is not ideal to start off with an image which you have to fix a lot to get it to look great. Always keep in mind when shooting, that it’s better to get it right in camera than to say, “oh I’ll fix it later”. Remember though, that not all is lost. Always shoot RAW and if you run into liking a photo, but it isn’t perfect, you have options for makink it look better, using tools like Lightroom and Photoshop. If you enjoyed the tutorial be on the look out for more and check out my personal website and info below.
Hi! I am originally from Bosnia and Herzegovina. I currently live in Atlanta, Georgia. If it's one thing I fear (aside from heights) it's that I will be left without water. If you see me, you can bet that liquid is nearby. While I am not downing inhuman amounts of water I create images.
My go to tools for creating are my Nikon camera, Photoshop and Lightroom. My favorite images to capture are portraits and lifestyle. Aside from photography, I do graphic design and video which can be seen on my website. When I'm not creating I like to be outside exploring nature.
Currently working at companies such as CNN, HP and many startups, as well has having work featured on BuzzFeed, SkillShare, Get Inspired Magazine and much more.


 Facebook
 Google +
Comments (0)
There are no comments yet.