In this tutorial, we find ourselves in a construction like an area! I know that as photographers we are always scouting locations, looking to add places to our repository for later use. I found myself wanting to take advantage of the amazing color I knew I would get using this old shipping container. I knew this was not going to stay here forever so I took my photos in many different ways to ensure I had something to work with later. We are going to start with a photo that has too much going on and by using the crop tool select a crop that tells our story better. Obviously being around a construction area there are a lot of things that get in the way and make the photo not as polished as it could be. I like to keep my photos minimal and eliminating everything that is distracting will keep the subject the focus of the photo. So, let’s look at how we can use the crop tool to our advantage.
Table of Contents
This is what I was staring at when I looked at this location. I knew that everything around the shipping container was things I did not want. It was all too distracting. I could not shoot on the side of the container because there were things preventing me from being able to back up far enough to get everything I wanted. I was not sure how long these containers were going to be there so I took a ton of different wide shots like this to give myself full-length options. I wanted full-length options, but later when I got into post-production I ended up liking this pose, but not in full length.
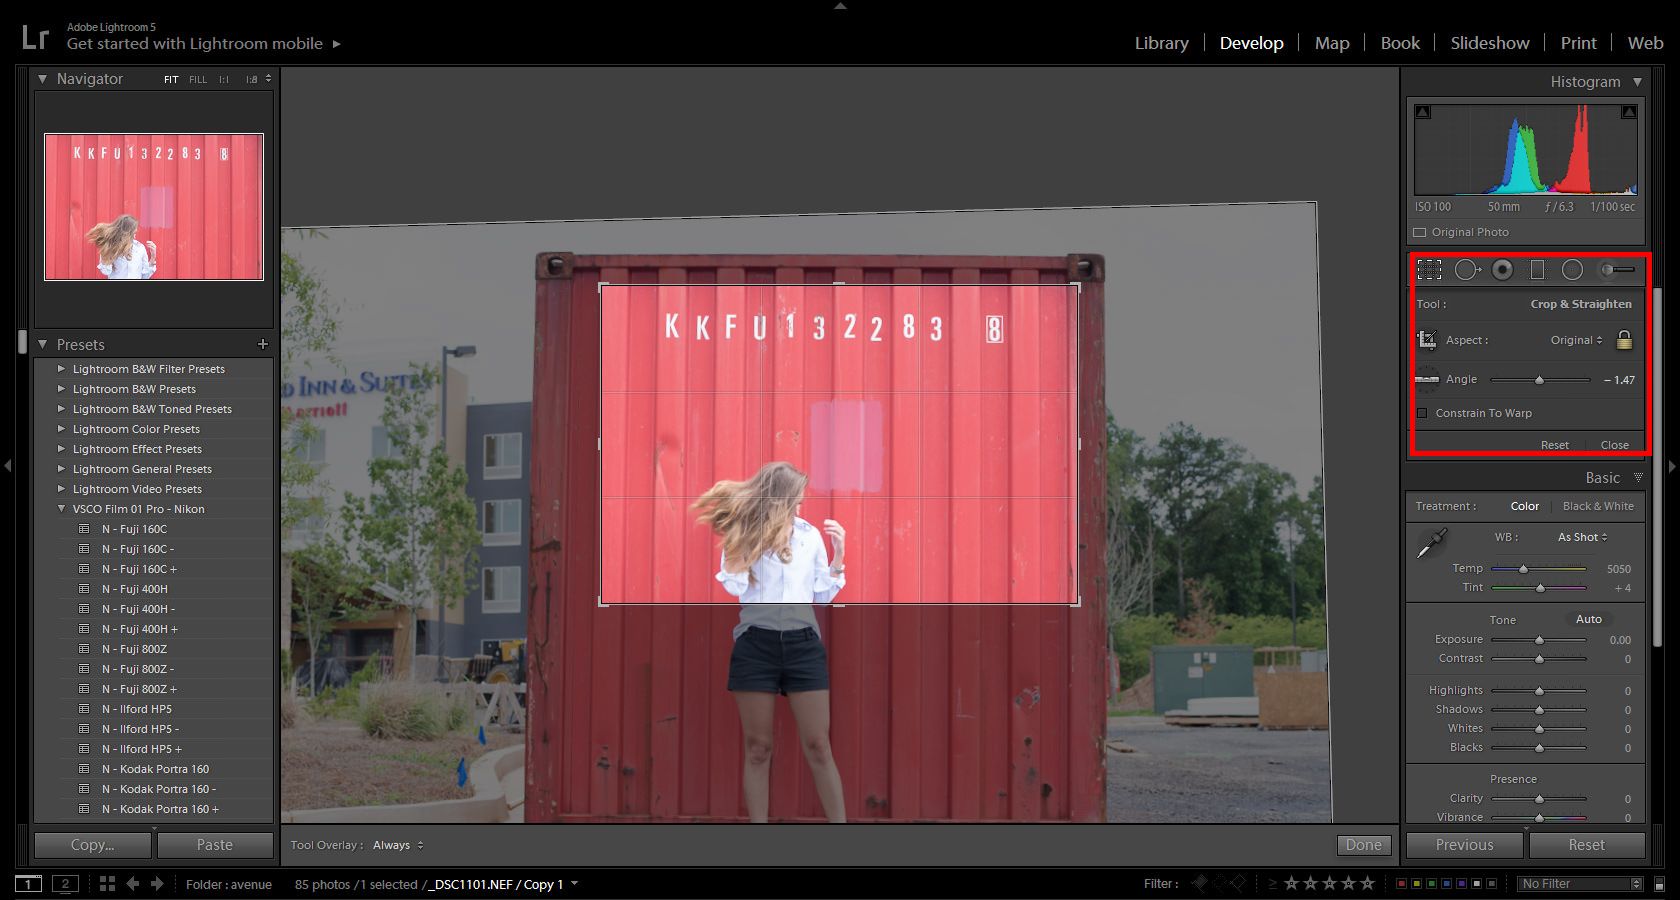
This is what I plan on using as the crop for my image. I am using the angle to even out the picture, as the original ground was uneven and giving me a weird horizon line. I kept my aspect ratio the same as the original but if you wanted a different ratio then this is the time and tool to achieve that. A nice thing to know is that with the crop tool you can set a crop, work on the image and then if you change your mind or need to make changes, you still will have the rest of the photo there with all of the edits on it. 
(as you can see in the previous image) I placed my subject to one side, allowing all that empty space for her to look towards. I liked the white letters on the container so I included that in the frame. At this point, I did my color editing. This is not as important in this tutorial as we are looking at cropping. If you are interested in color editing then a great place would be to check out the rest of the Sleeklens blog to get more tutorials.
Now that I have my crop in place and the color editing I want to bring your attention to the Lens Corrections module. In this photo, it was pretty important that I made sure Enable Profile Corrections was on (I always keep it selected). I was shooting with a 50mm and was getting slight distortion on the lines of the container. Turning on the enabled profile helped me make those lines straight.
Tip: If you go into the profile section of the Lens Correction module, you will find the ability to further manipulate the amount of distortion correction that is applied.
Here is a look at the whole scene and then an overlay of where I cropped the image. I obviously would have gotten a lot of distracting elements if I had kept the photo as I shot it. Its always great practice to frame your shot in the camera when you can. Using the crop tool should be used in situations where you must. Sometimes a great expression or movement comes at unexpected times and so we have to make a photo work for us. Framing or in this case cropping helps you focus on the story you want to tell by eliminating everything that is not essential.
Checking how other photographers frame subjects or brushing up on things like the rule of thirds will help you start to think in a way that when you look at a scene your eye is already framing the essentials to your shots.
Comments (0)
There are no comments yet.