Creating a collage is a great way to show your photos. They allow you to get a bit more creative with your work and develop your designing skills. And they are perfect both for printing and for social media!
The sizes, number of photos and design of a collage are extremely diverse. To show you how to create one, I choose the 3×3 square collage for a couple of reasons. First of all, if you have no experience with collage, this 3×3 square format is a great one to start with. You will learn the technique of creating a collage without messing with picture sizes so much (this will be the next step in your learning process). The second reason is because this collage is a great way of sharing your photos on social media, especially on Instagram. Taking into account that Instagram is one of the social platforms more suitable for photographers, I thought it might be interesting for you.
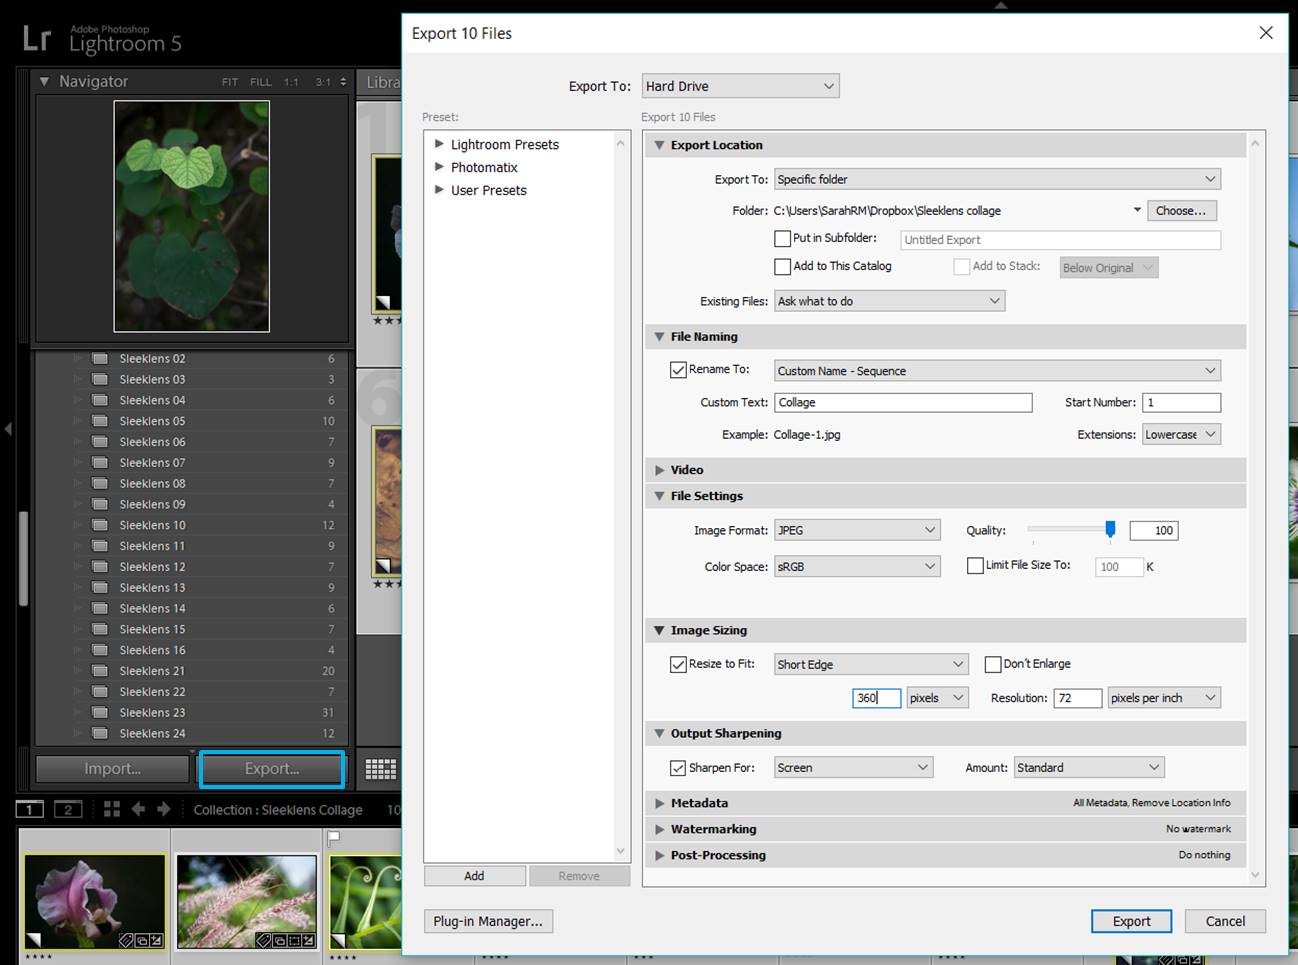
You can build your collages in different programs. Our college Arnel Hasanovic explained how to create a collage in Lightroom. Today I want to show you how I create collages in Photoshop (Or you can try an action). It takes more time than creating it in Lightroom, but it gives you much flexibility. Let’s jump into it!!
#1. Decide on the final size and resolution of your collage
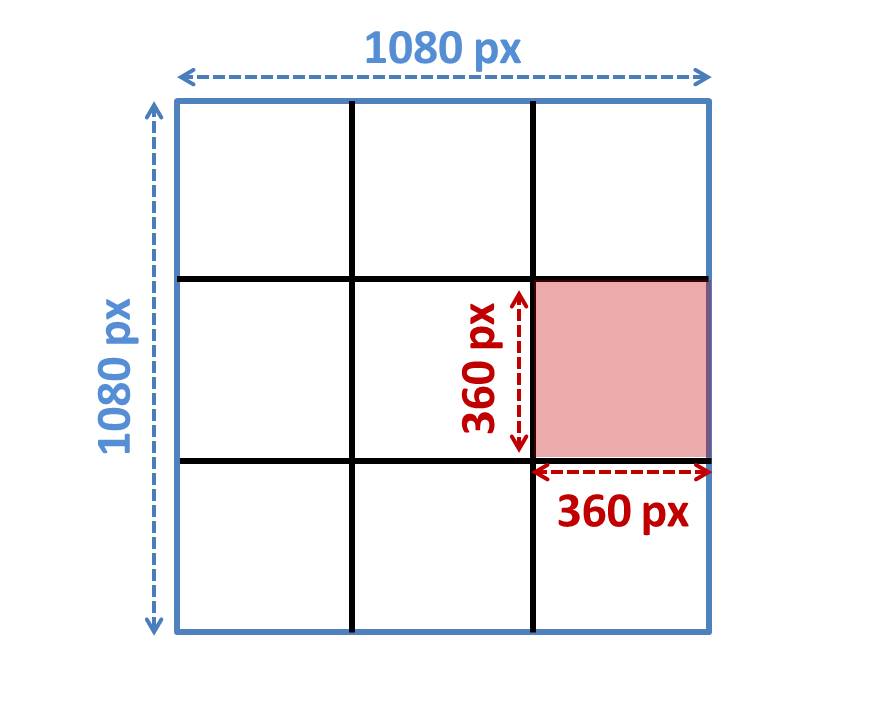
You can create a collage at any size you like. In this tutorial, I am going to give explanations for a digital collage (I am not thinking of printing it) and I will use the dimensions that are ideal for publishing it later in Instagram. In 2016, Instagram square picture size in pixels is 1080x1080px. If you prefer, you can use any other square size that will be more convenient to you. Regarding the resolution (pixels per inch, or PPI), 72ppi is considered the standard for internet images.
If you want to print it, take measurements of the place where you would like to hang or store your collage to have a better idea of the size you need. In your case, you will need to work with the size in centimeters or inches instead of pixels. Just as an example, instead of 1080×1080 px, for you it will be 20x20cm. But the steps you have to do to create the collage are exactly the same. For printing the recommended resolution is 300 dpi (dots per inch)
#2. Calculate the final size of your individual photos
Now that you know the size of your collage, you can calculate the final size of your individual photos. You just divide the length of your collage by 3 and you have it! In the Instagram collage of 1080×1080 pixels, our individual photos will be 360×360 px (the red square in the image above). Same calculation if you are working with centimeters or inches. For example, if you want a 20x20cm collage, your individual photos will be 6.7×6.7cm.
#3. Pick your individual photos for the collage
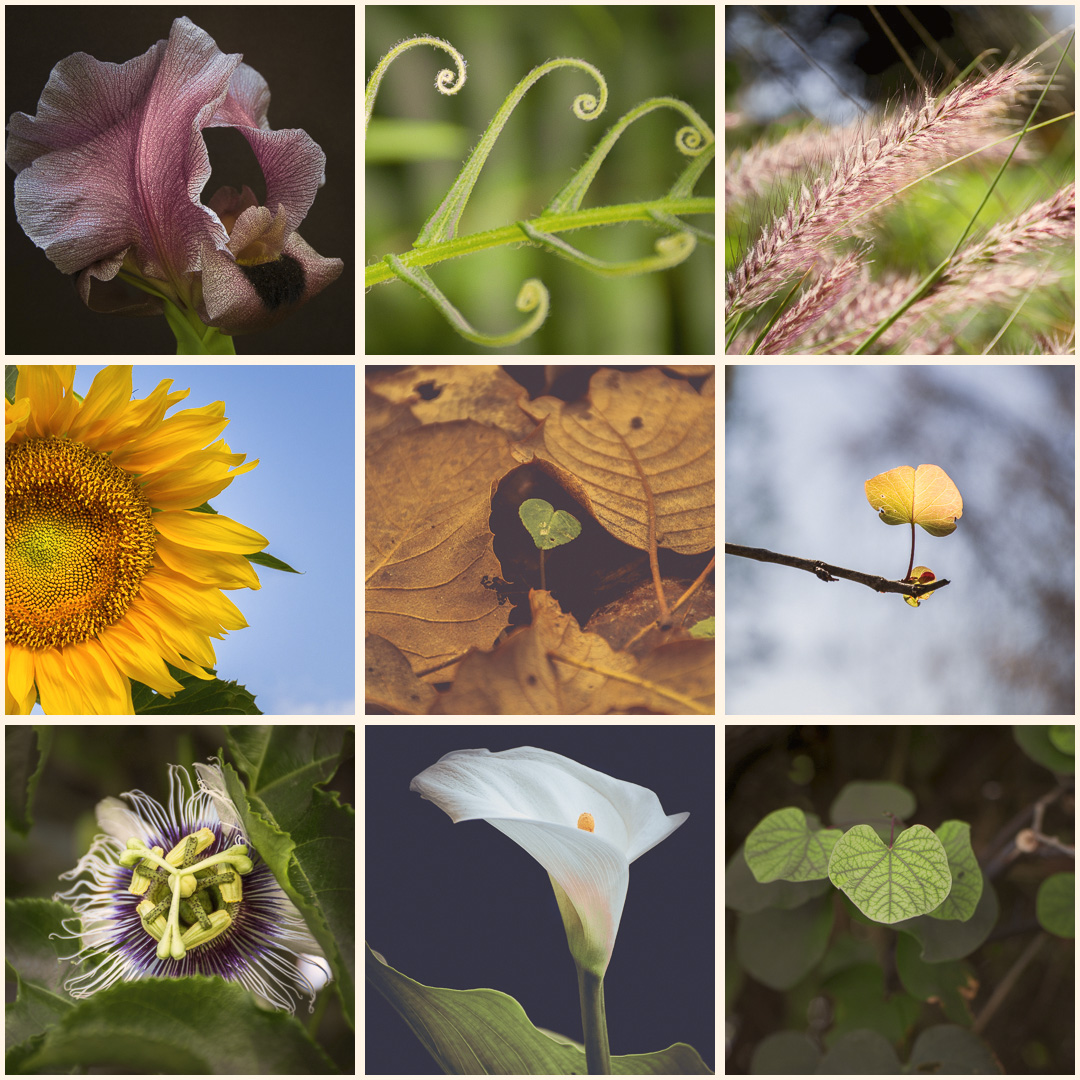
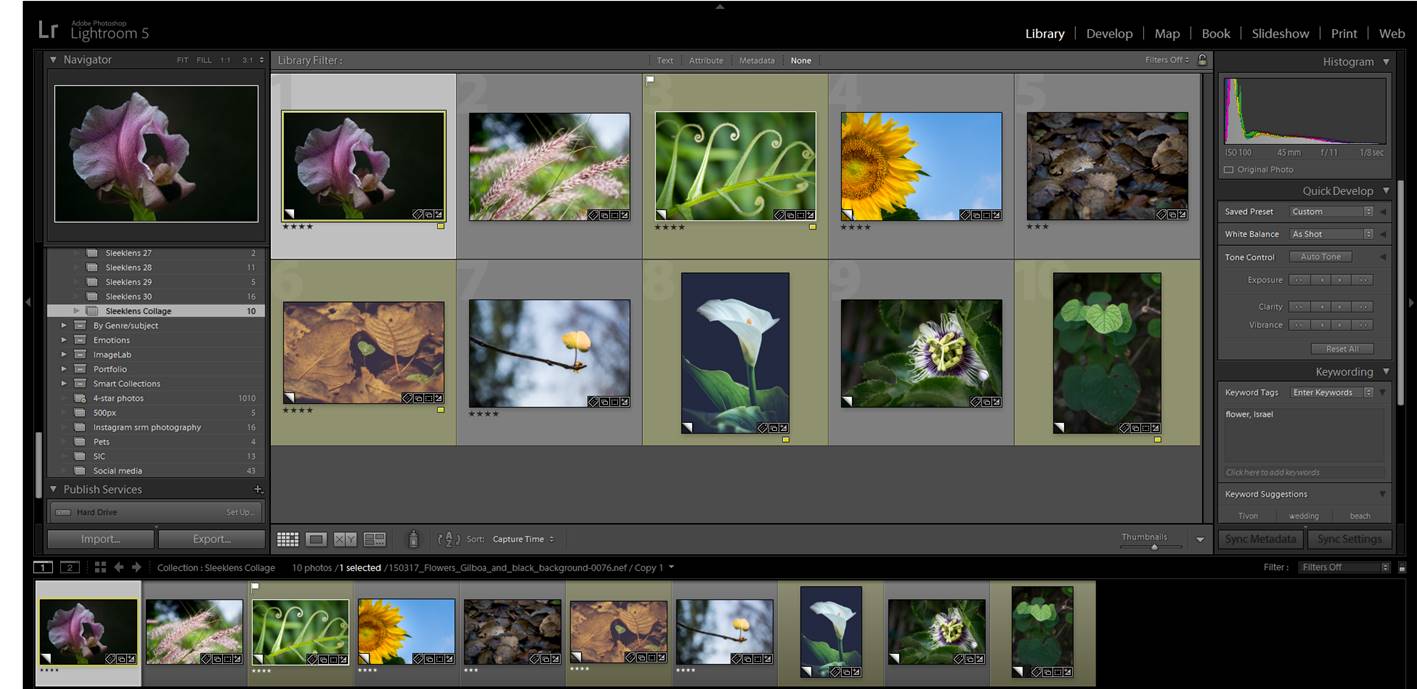
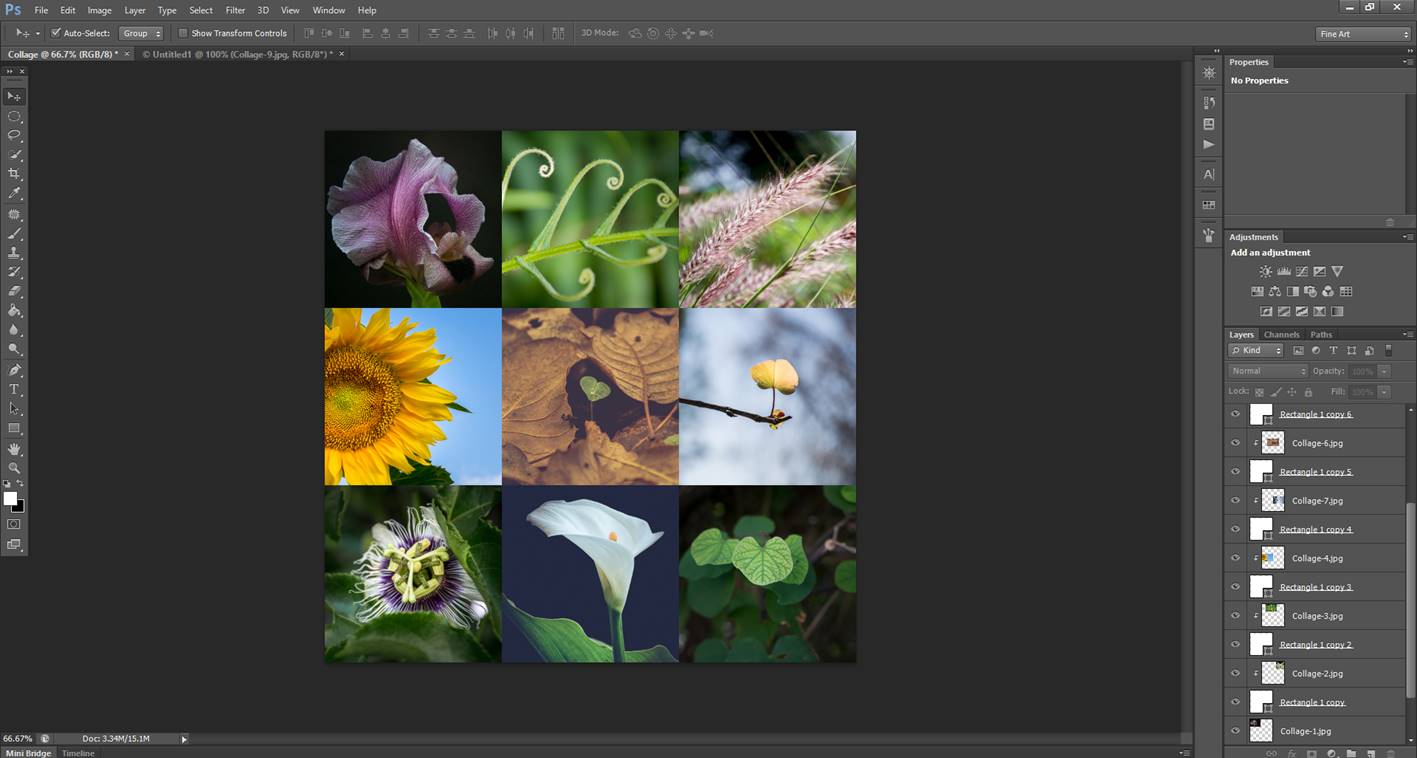
Now that we did the hard part of deciding sizes, the fun part starts! You need to pick photos from your collection. You will need just 9, but I recommend you to pick some more in case some of them doesn’t work so well in the collage. I use Lightroom to have my photos organized. What I usually do is creating a collection with the images I want to use to create the collage. If you don’t use Lightroom, you can just pick your photos and put them in a new folder in the computer.
#4. Resize your individual images
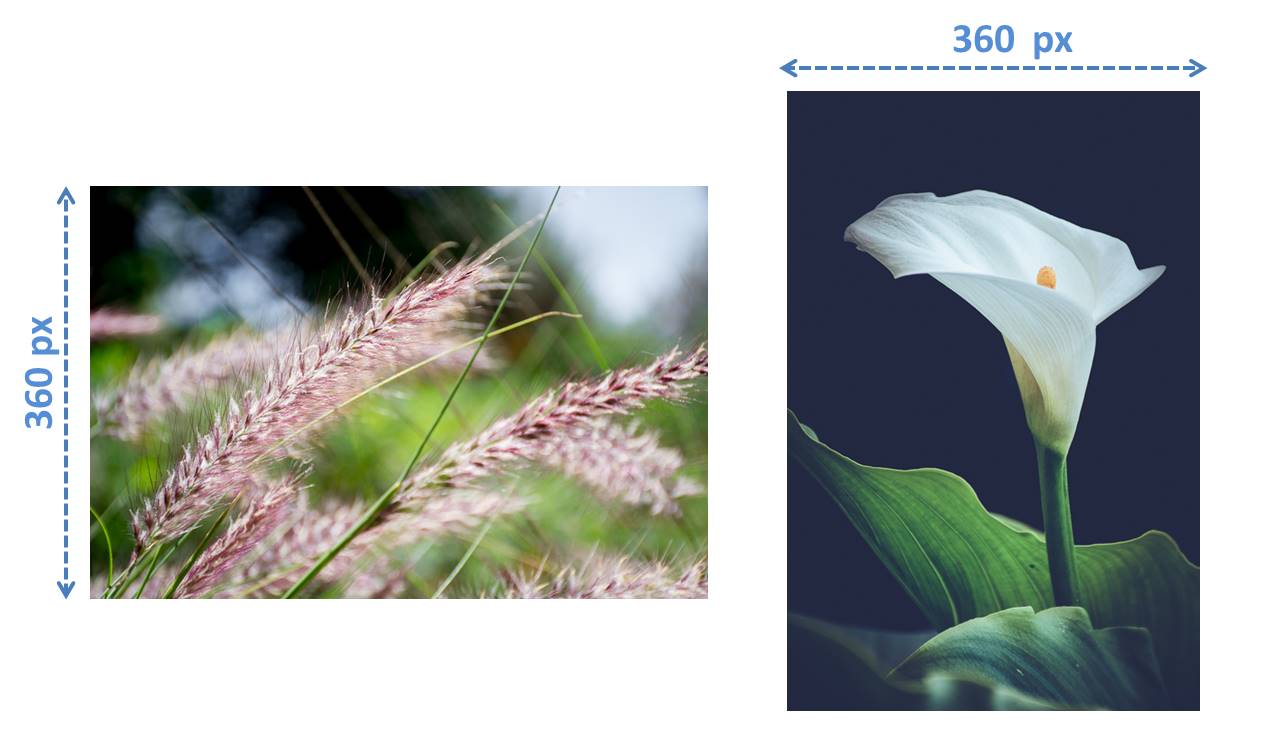
You don’t have to resize them, but doing it will make your life easier. Your final image once in the collage will be 360×360 px. I found really useful to resize my photos to have their short side like my final square (360px).
As I am coming from my LG collection, I just resize my photos meanwhile I import them to a folder on my computer. Fast and easy! You can use any other software you like to resize your images, including PS. Do this step as you prefer.
#5. Create your new canvas in PS
The time to work with PS has arrived. If you are a PS beginner, you might find helpful a series of articles written by Julian H where he explains this software from scratch. Today we will start by creating a new canvas 1080 pixels width and 1080px height with a resolution of 72 pixels/inch. I want to create a black canvas. To do so, I choose in the “Background contents” the option of “Background color” and that I have the Background color previously set to black. I also name it as “Collage”. This will be important for step 7.
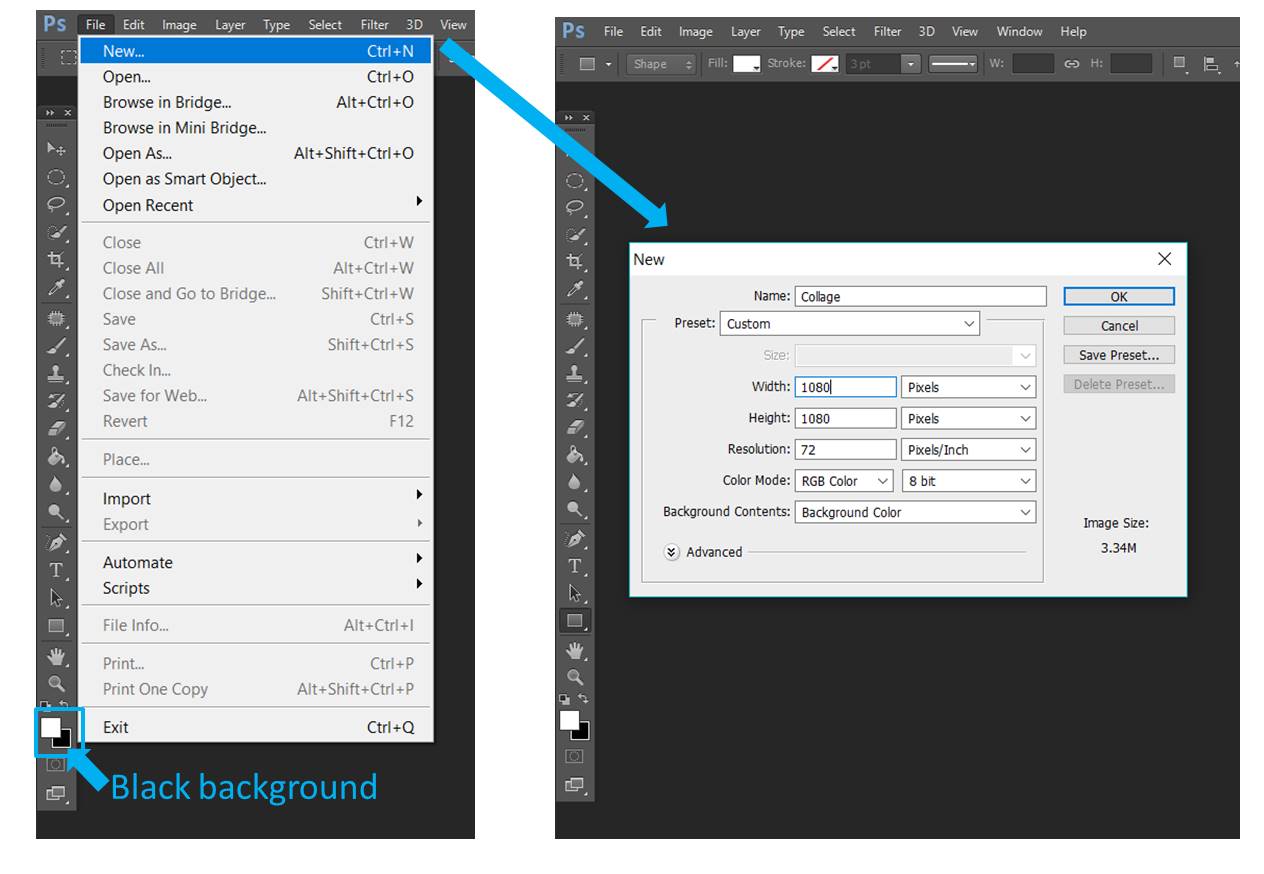
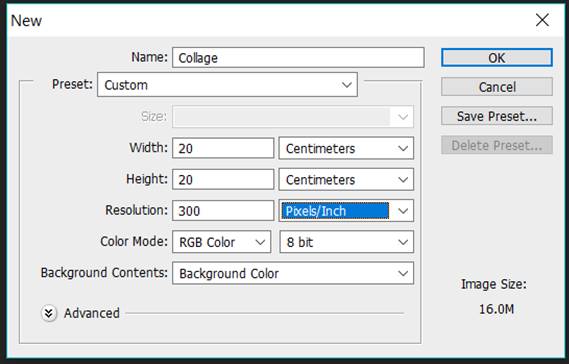
If you want to print your canvas, remember that in this step you should write 300 pixels/inch in the resolution instead of 72. Your settings will look more like this:
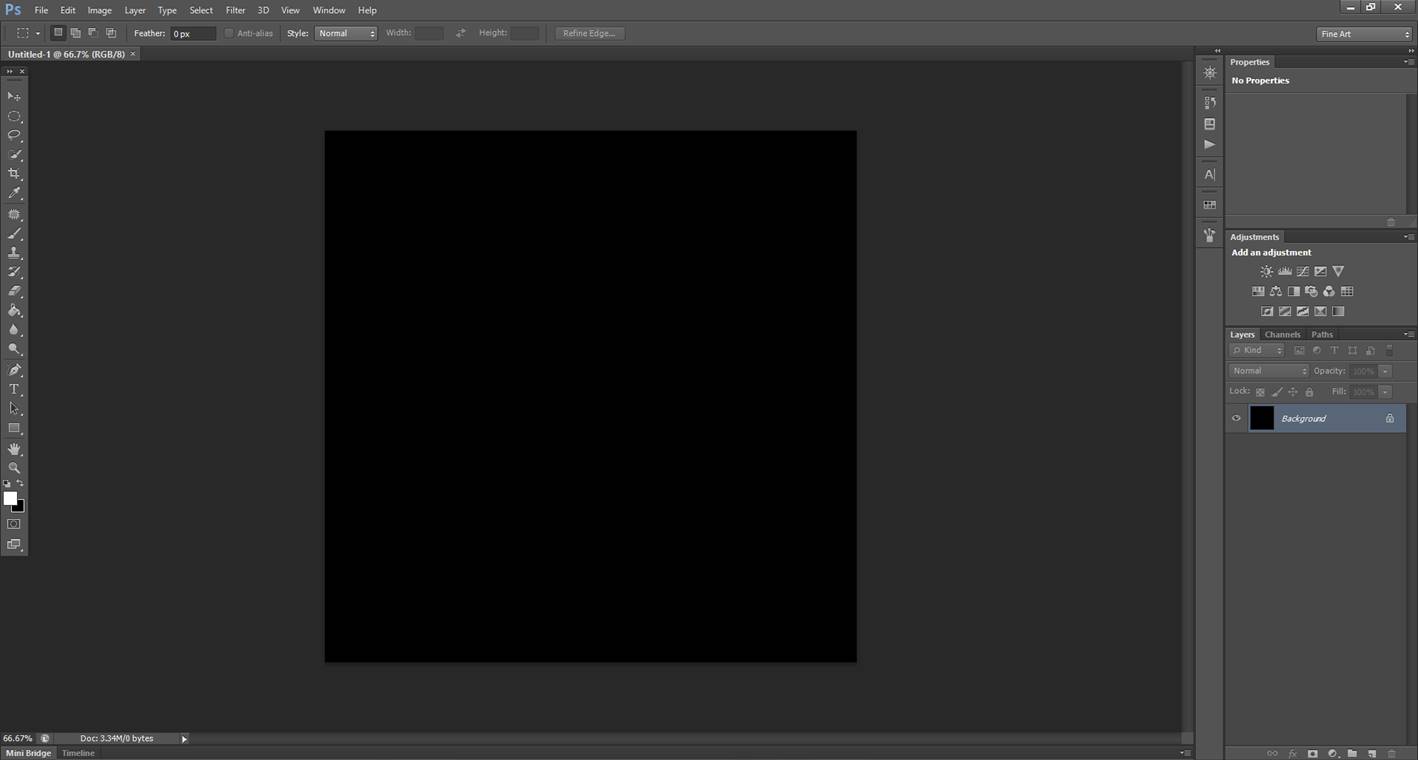
Click ok to create your brand new canvas.
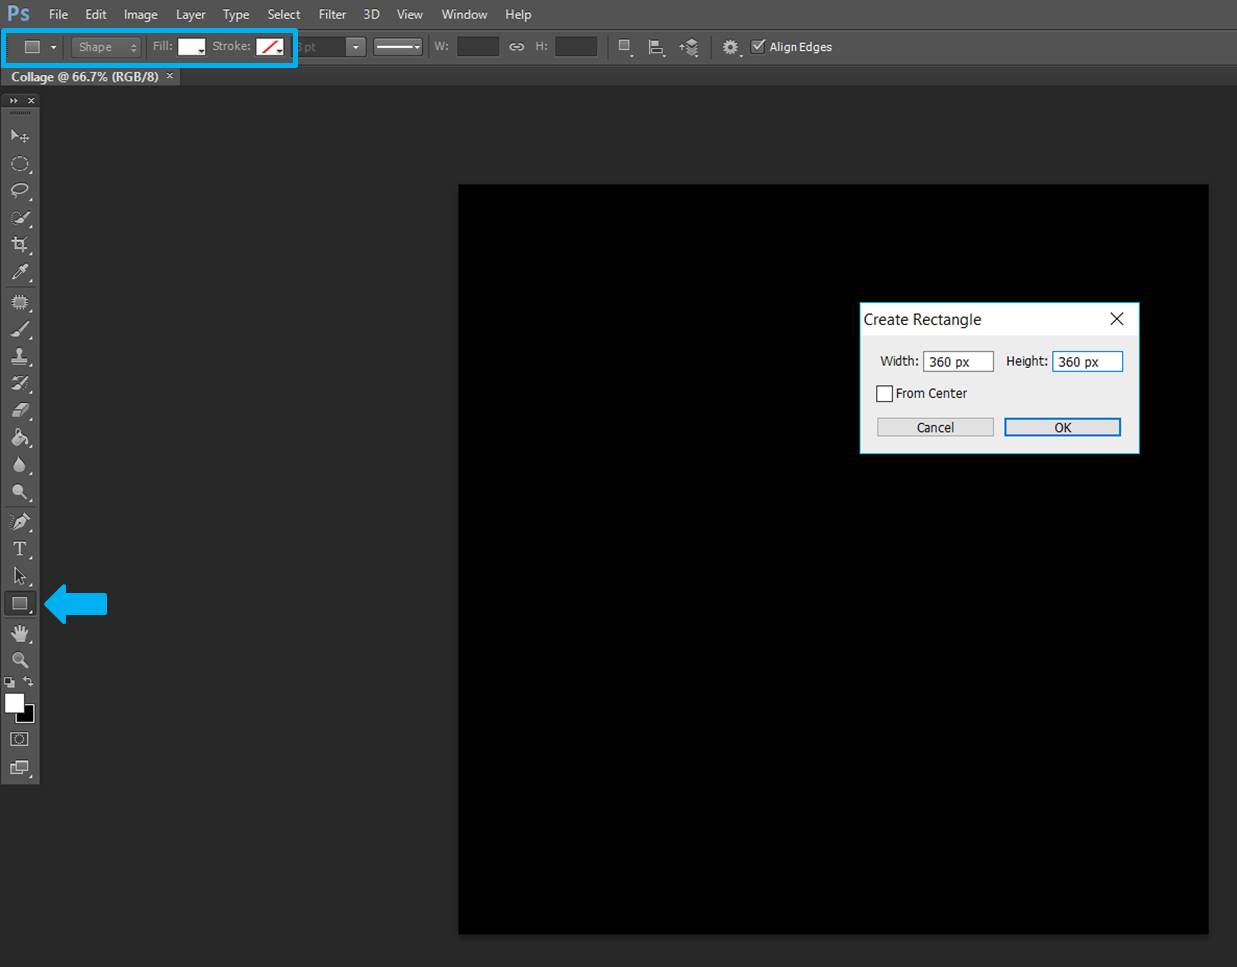
#6. Create 9 square white shapes and place them inside your canvas
Select the rectangle tool and check that you have the settings like in the image below: shape, white fill and no stroke. Then click on your canvas and a window will appear. You can then define the size of your square to 360x360px.
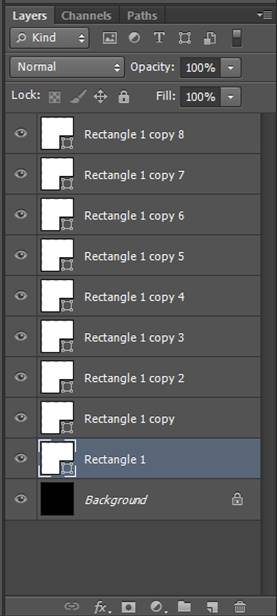
By clicking ok you will create a new layer called “Rectangle 1”. With the move tool (V) you can select the square and move it to the upper left corner.
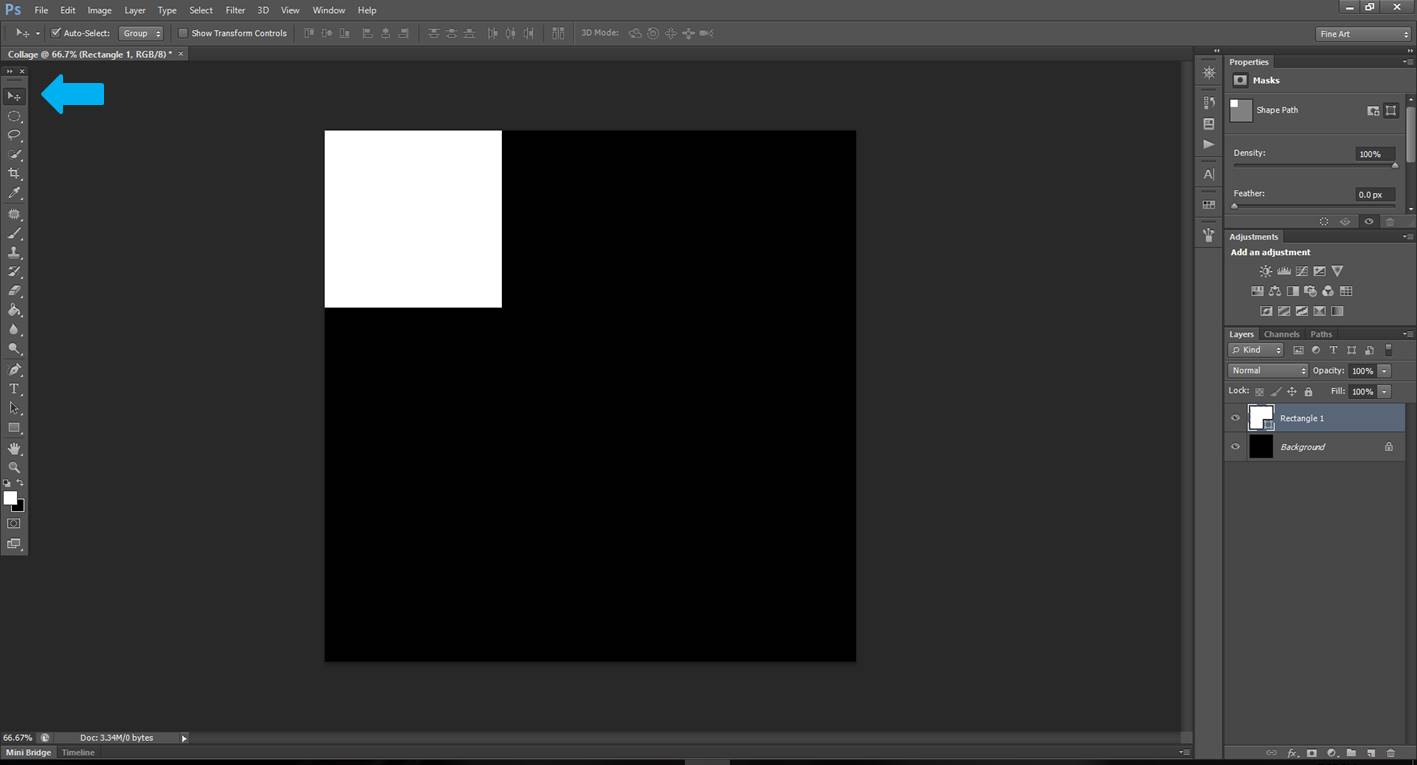
To make it faster you can duplicate your rectangle layer 2 times by selecting the layer and pressing twice Ctl+J in Windows or Cmd+J in Mac. With the move, tool arranges the squares to form the first line of your collage. There is a trick here that will make yours like easier. In the move tool, check the box “Auto-select”. This will allow you to select any layer by clicking on it in the canvas instead of moving from layer to layer in order to select the square you need to move.

Then select the 3 rectangle layers and duplicate them by pressing Ctl+J/Cmd+J. With the move, the tool moves the 3 rectangles to cover the second line of the collage.
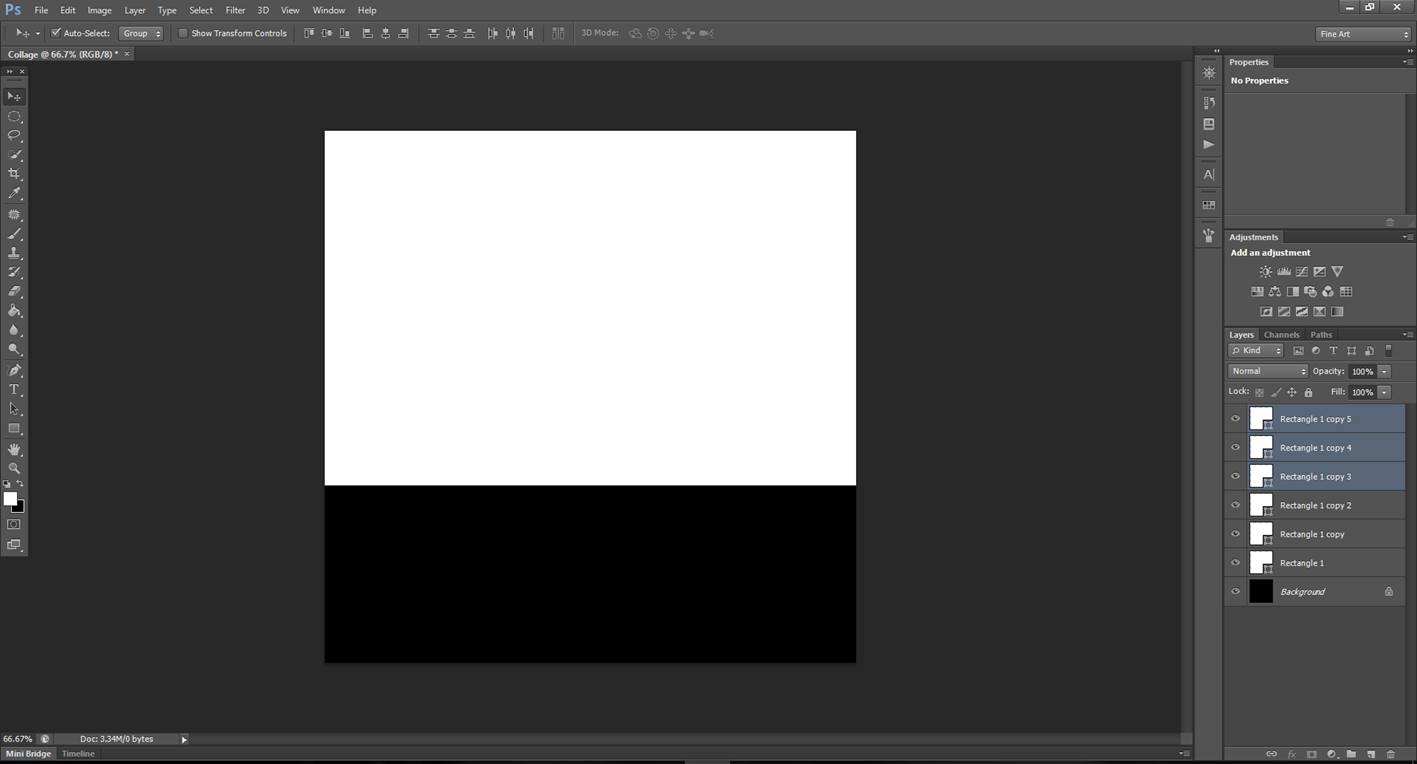
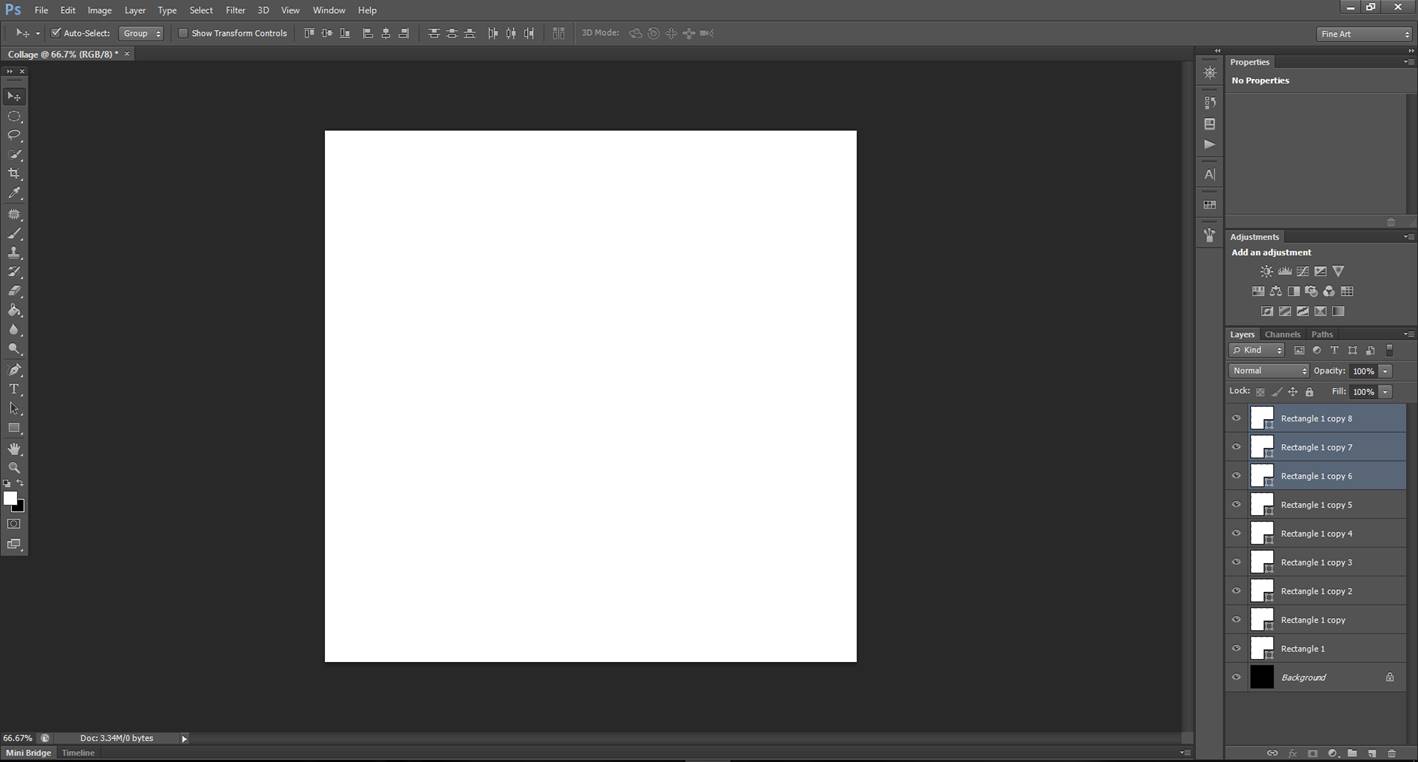
Repeat the steps to cover the 3rd line with white rectangles.
#7. Open your images in PS and place the first one in the collage
There are different ways to open your images in PS. For collages, I prefer to do Files>Scripts>Load files into Stack.
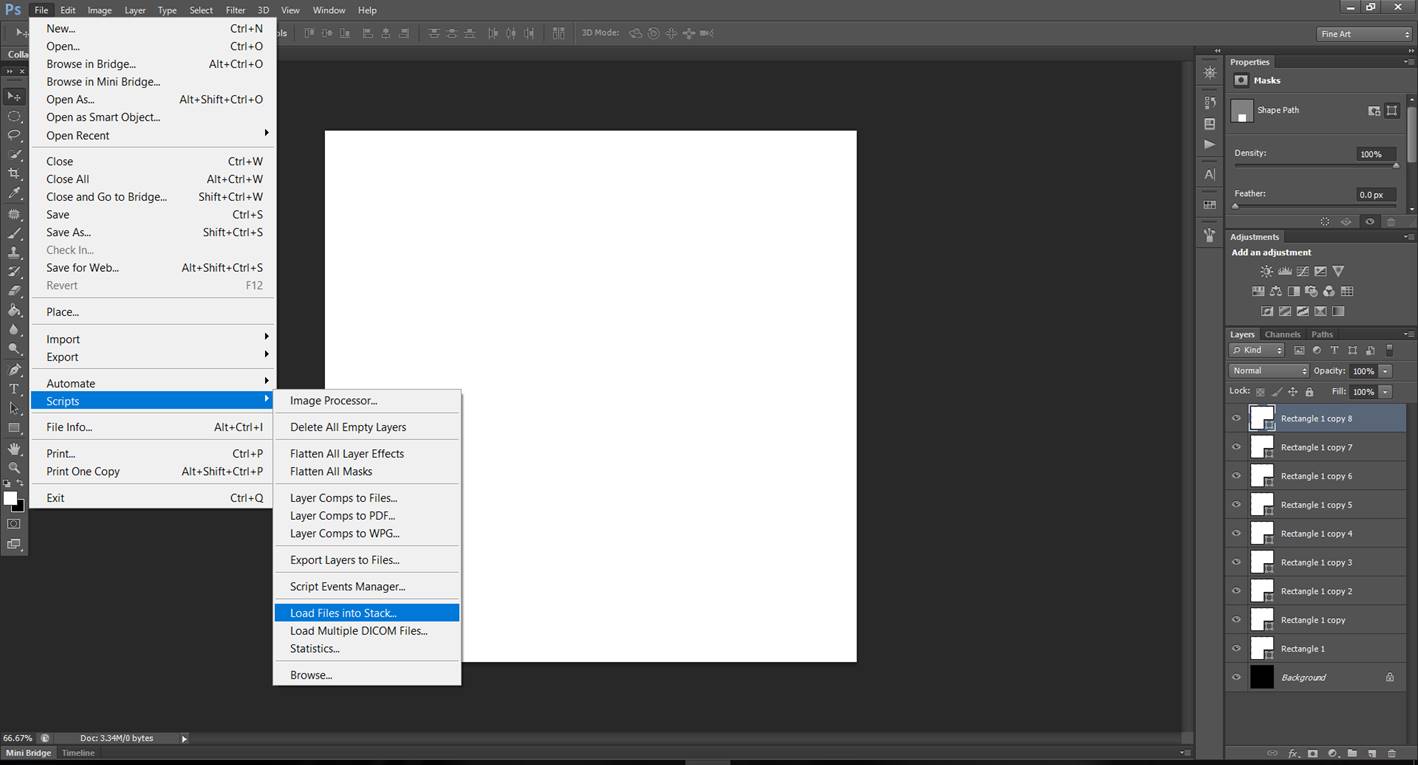
A browser will open and you can select all the images you need for the college. They will open as a layer in a new canvas.
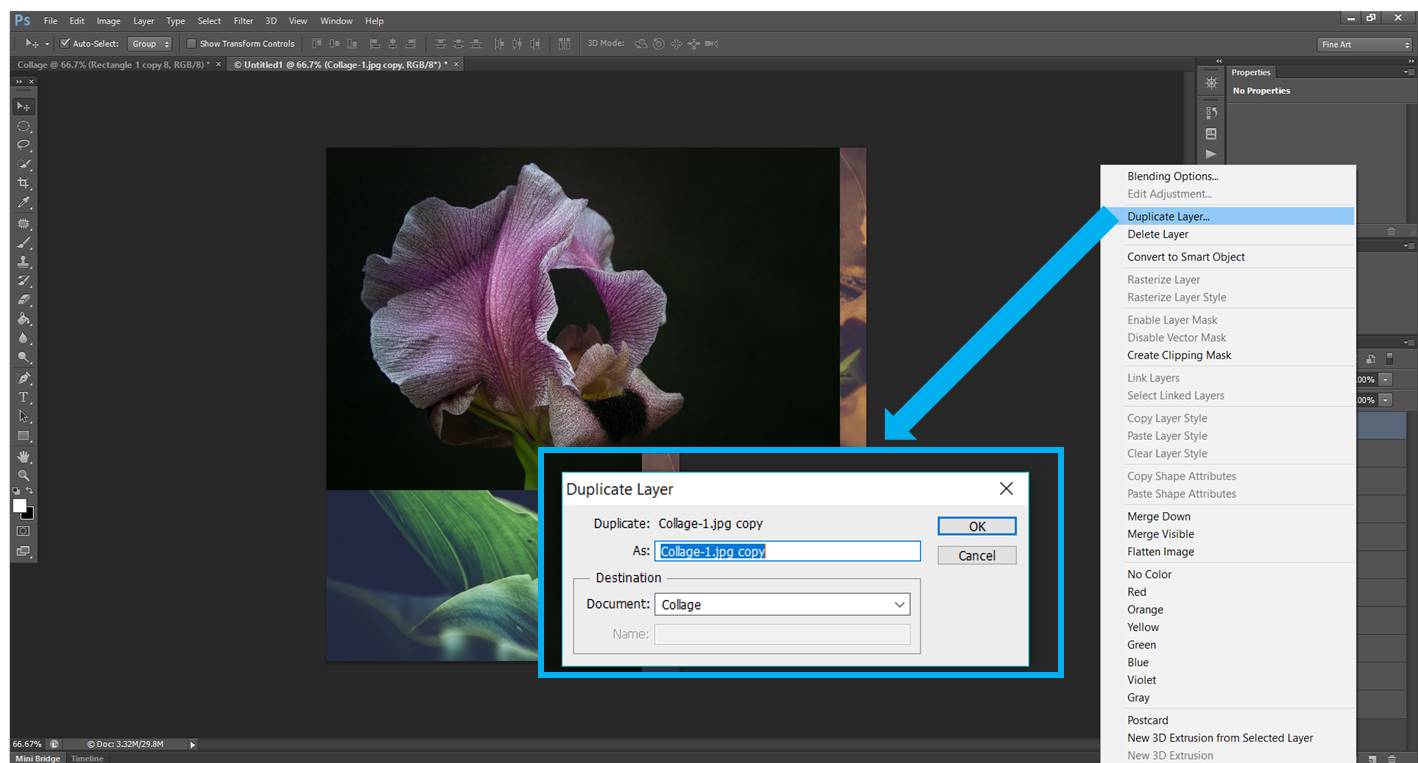
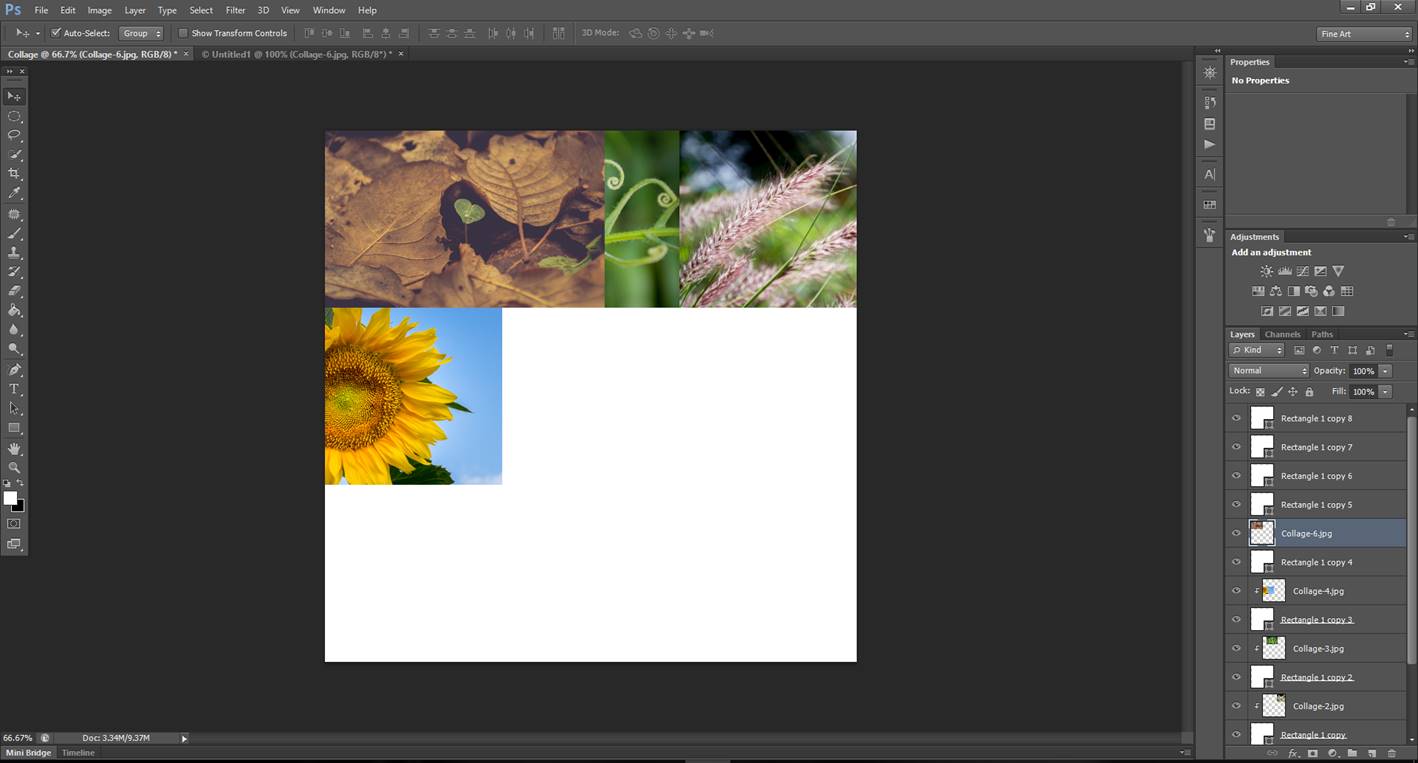
Think in which square you want to place your first image and select its corresponding layer in your “Collage”.
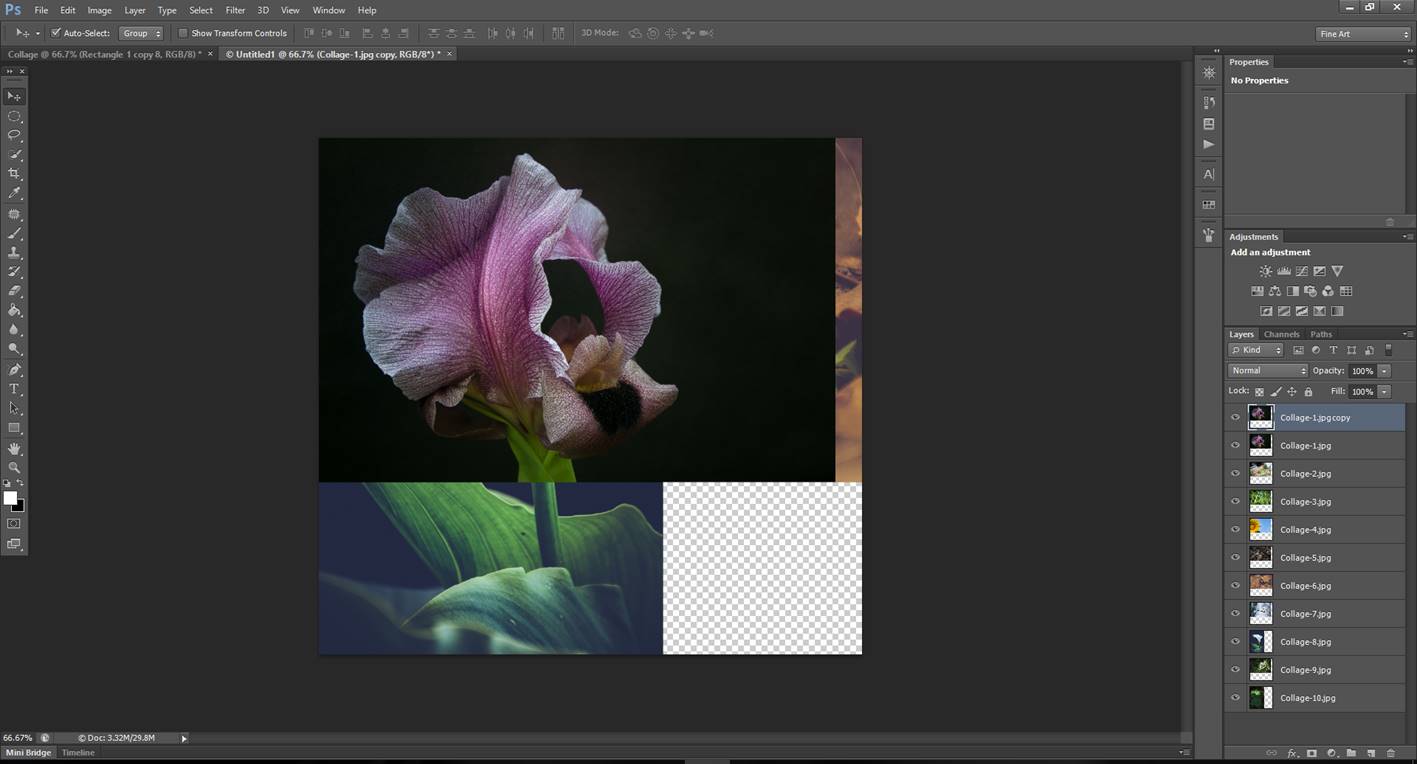
Come back to your images and right click in the layer that belongs to the image you want in the first square and duplicate layer to the document “Collage” as in the image below.
The first image is in our collage!
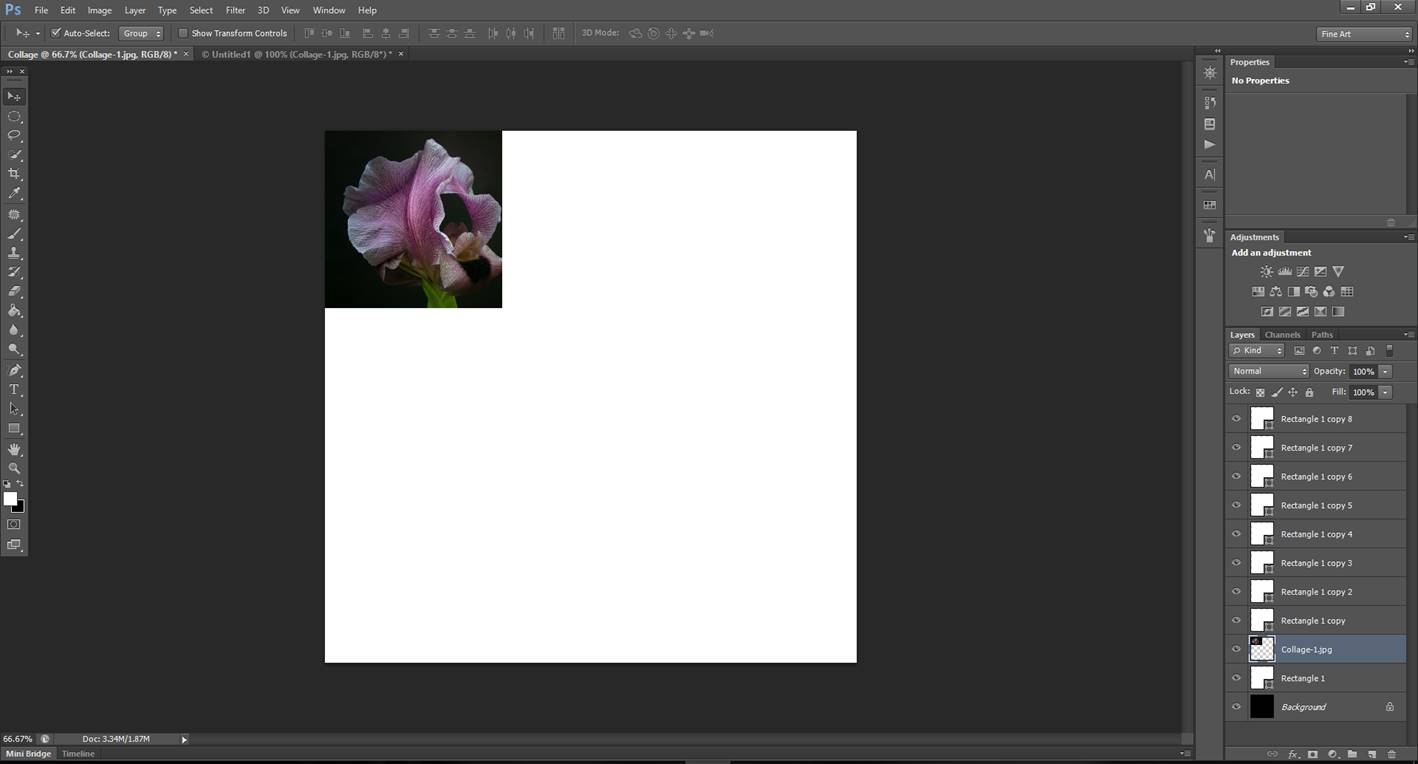
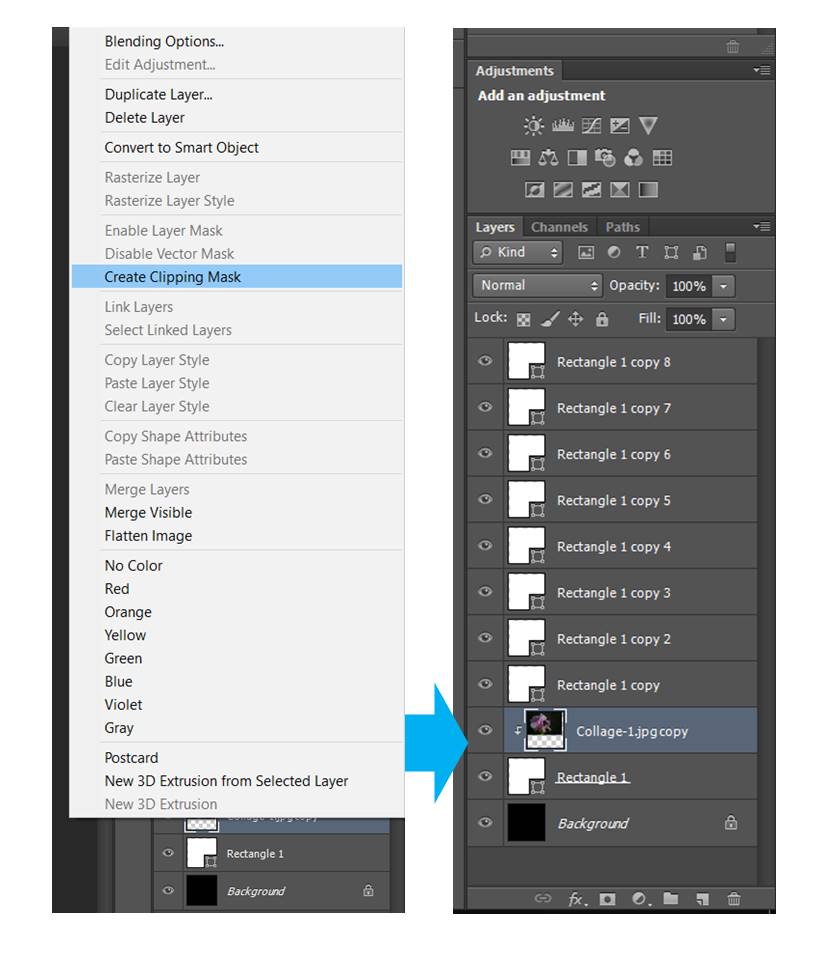
Important step now!!! Right click on the layer with your image and create a clipping mask. This will constrain the image to the little square.
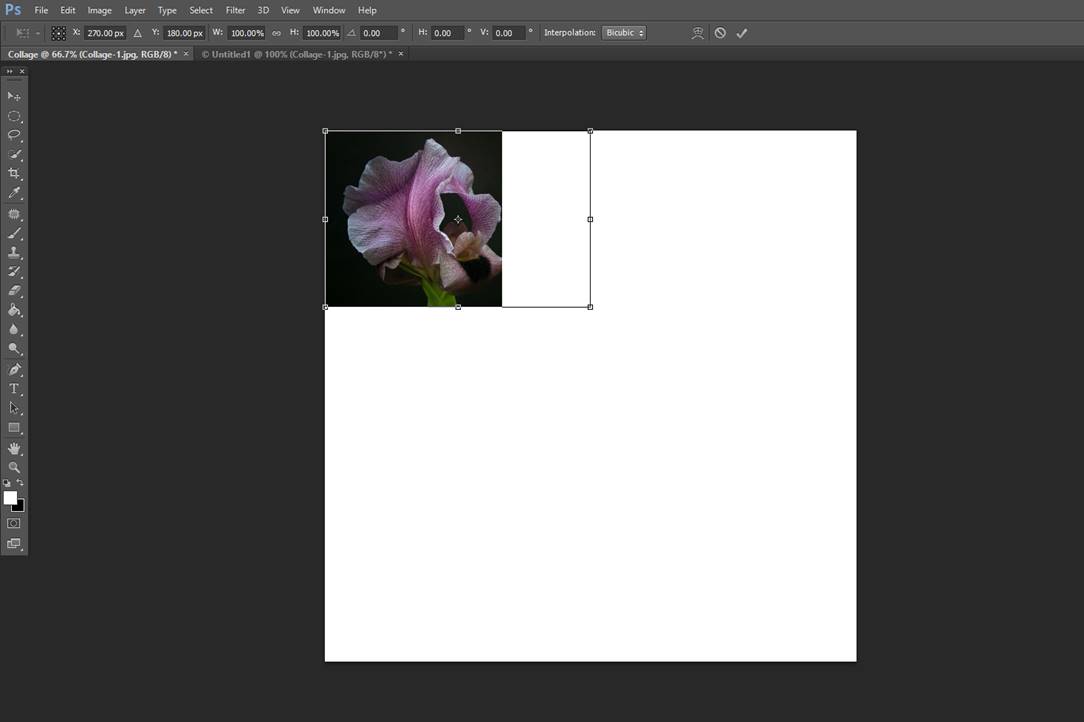
Now you can move the photo inside its little square by clicking on the photo with the move tool and drag it where you want. If you need to resize it you can do it by pressing Ctl+T in Windows and Cmd+T in Mac (transform tool) and a rectangle marking the edges of your image will appear. Meanwhile you press shift (check in mac), you can resize the image without losing its dimensions. I repeat… meanwhile you PRESS SHIFT. You need to play with the moving and resizing until you get the result you want.
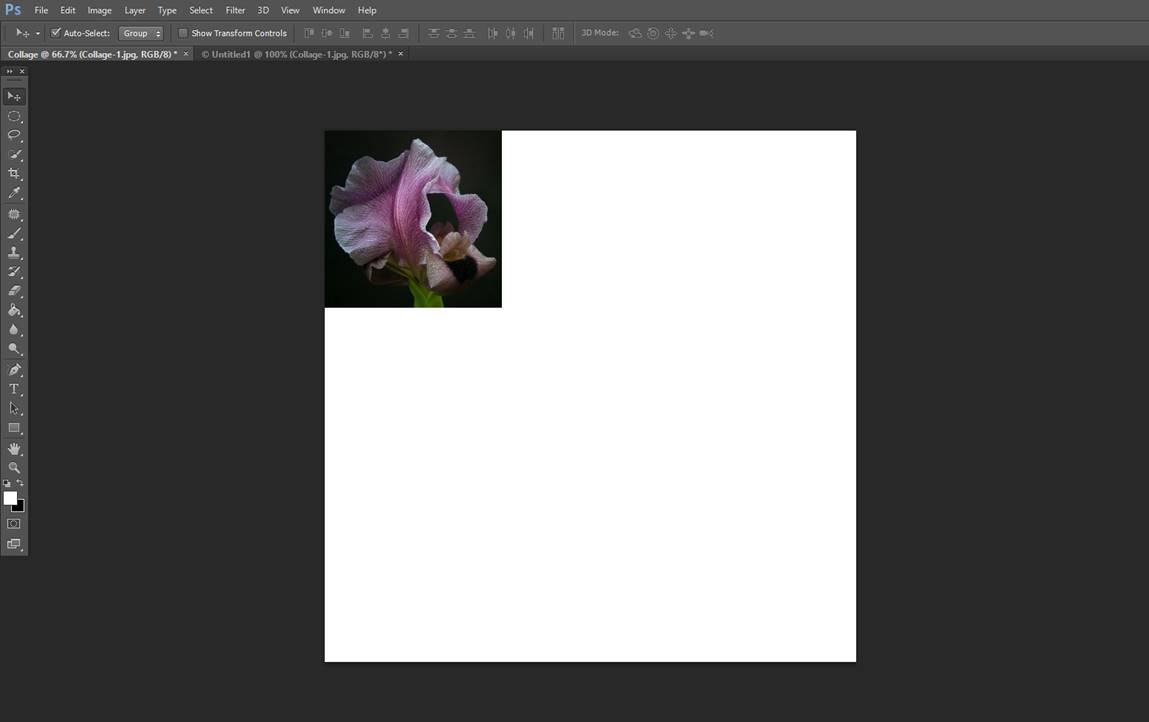
Then press Enter and you have it!
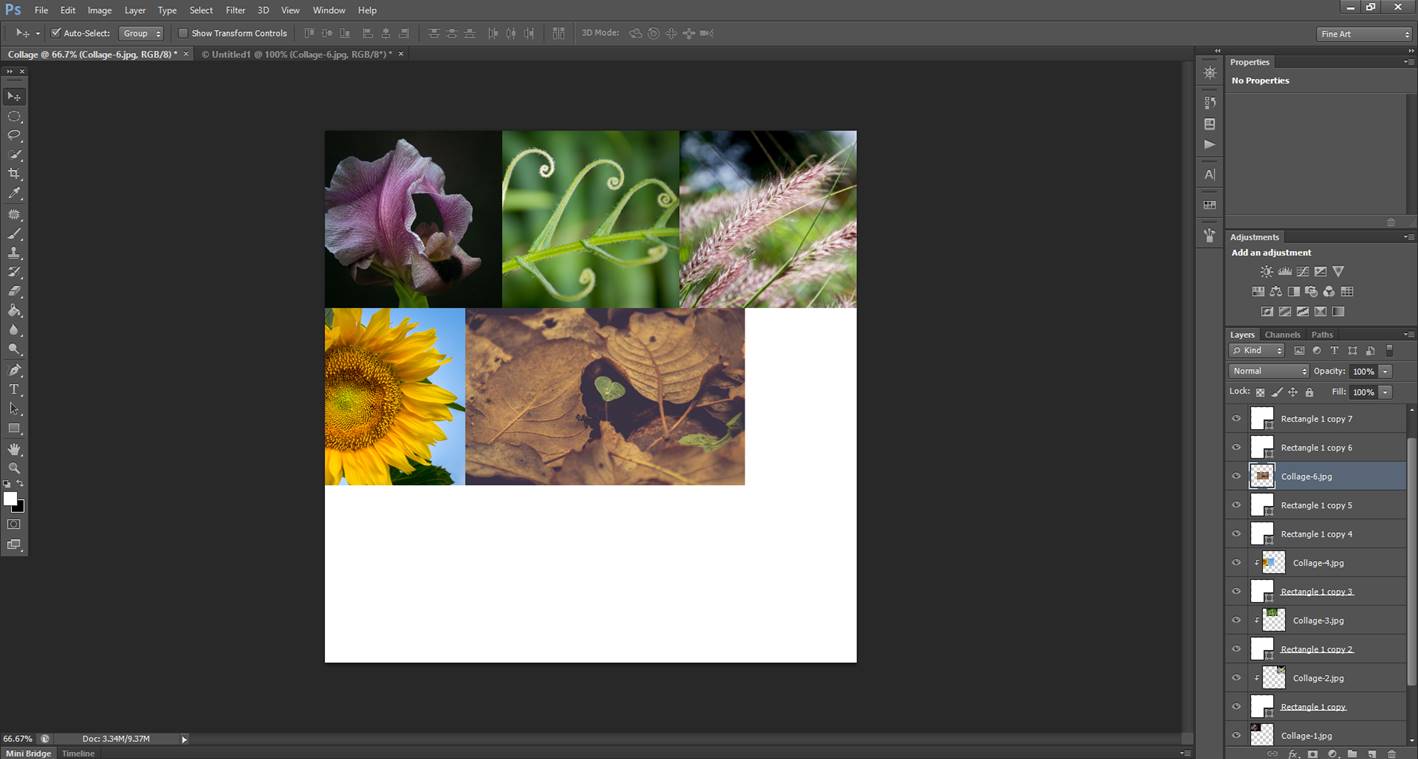
#8. Place the other 8 images
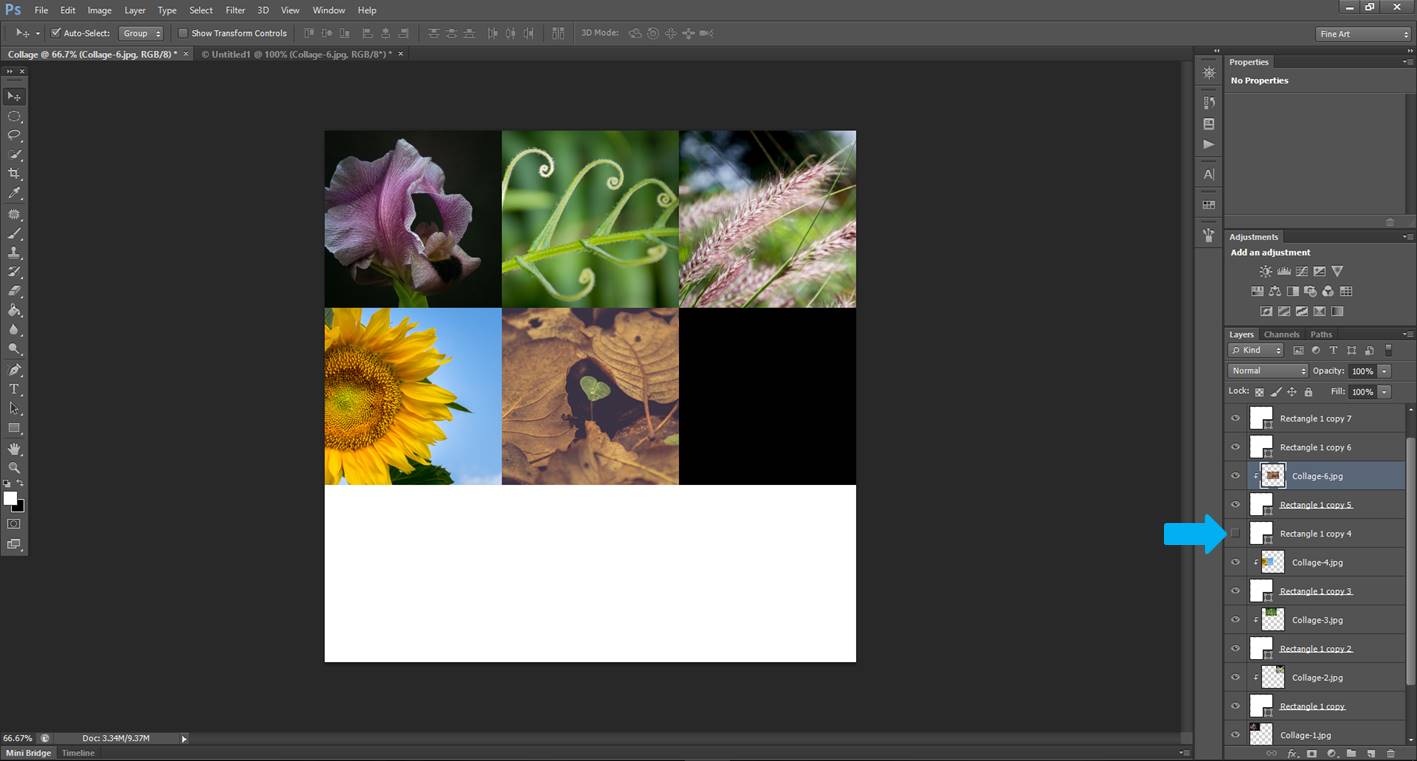
Repeat step 7 with the other photos. Remember to place the image layer on top of the square layer you want it to appear. Super important!! When you copy the layer with your image to your collage it will appear in the upper right corner.
Move it to its right square with the move tool first.
Then create the clipping mask.
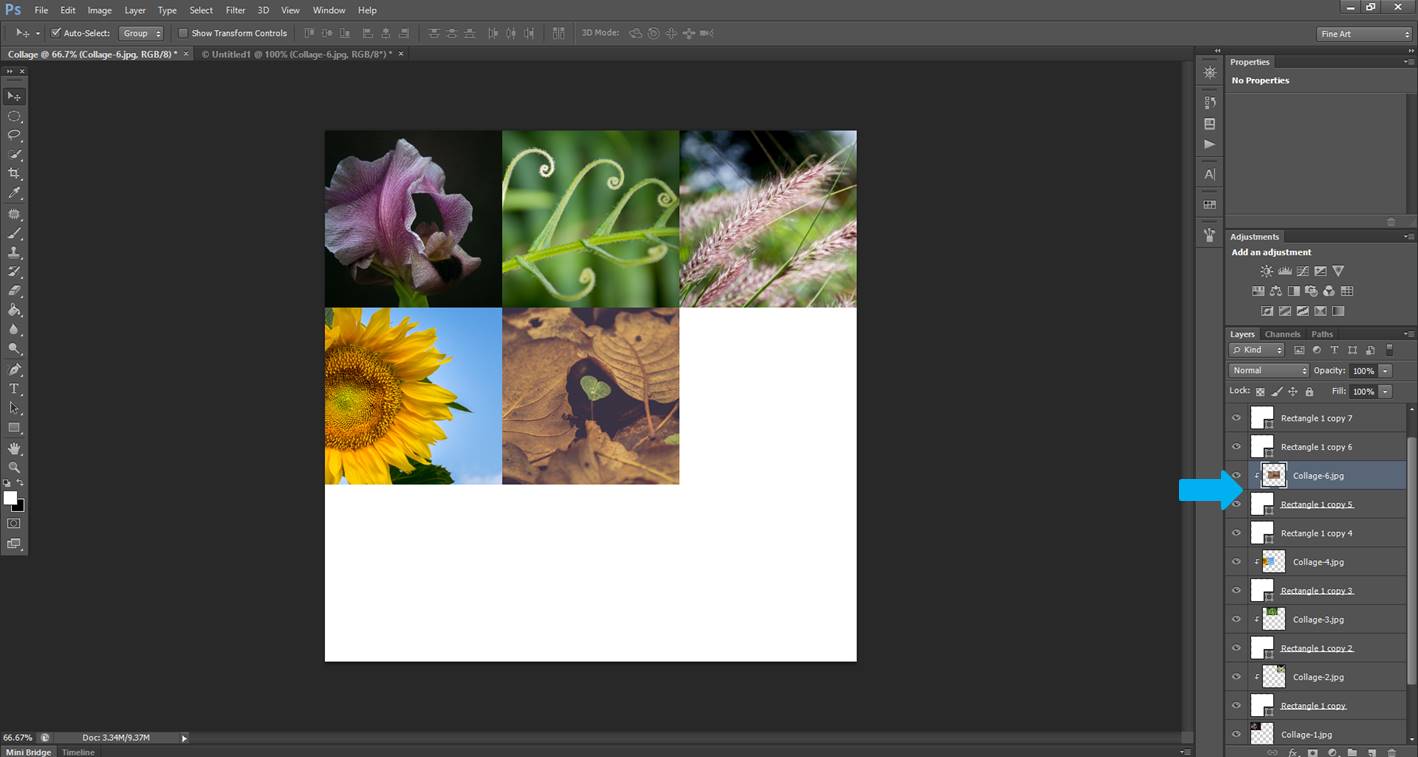
Tip: if you lose track of the square you are looking for, just unselect it for one moment and you will see a black square in the place where the square is supposed to be. Then mark it again and keep placing your images as usual
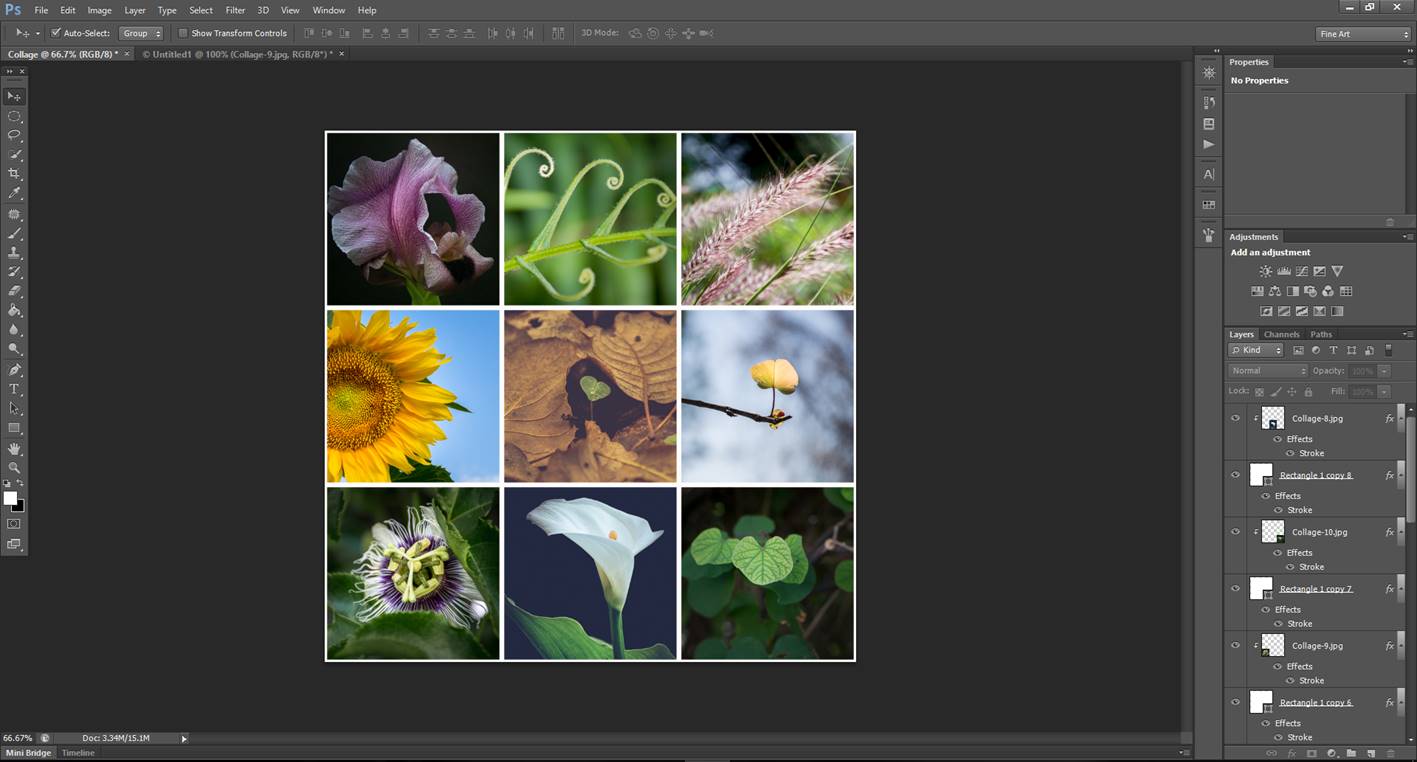
Eventually your collage will be finished! Congratulations! Steps 9 and 10 are optional, depending on your antithetical preferences.
#9. Add a grid
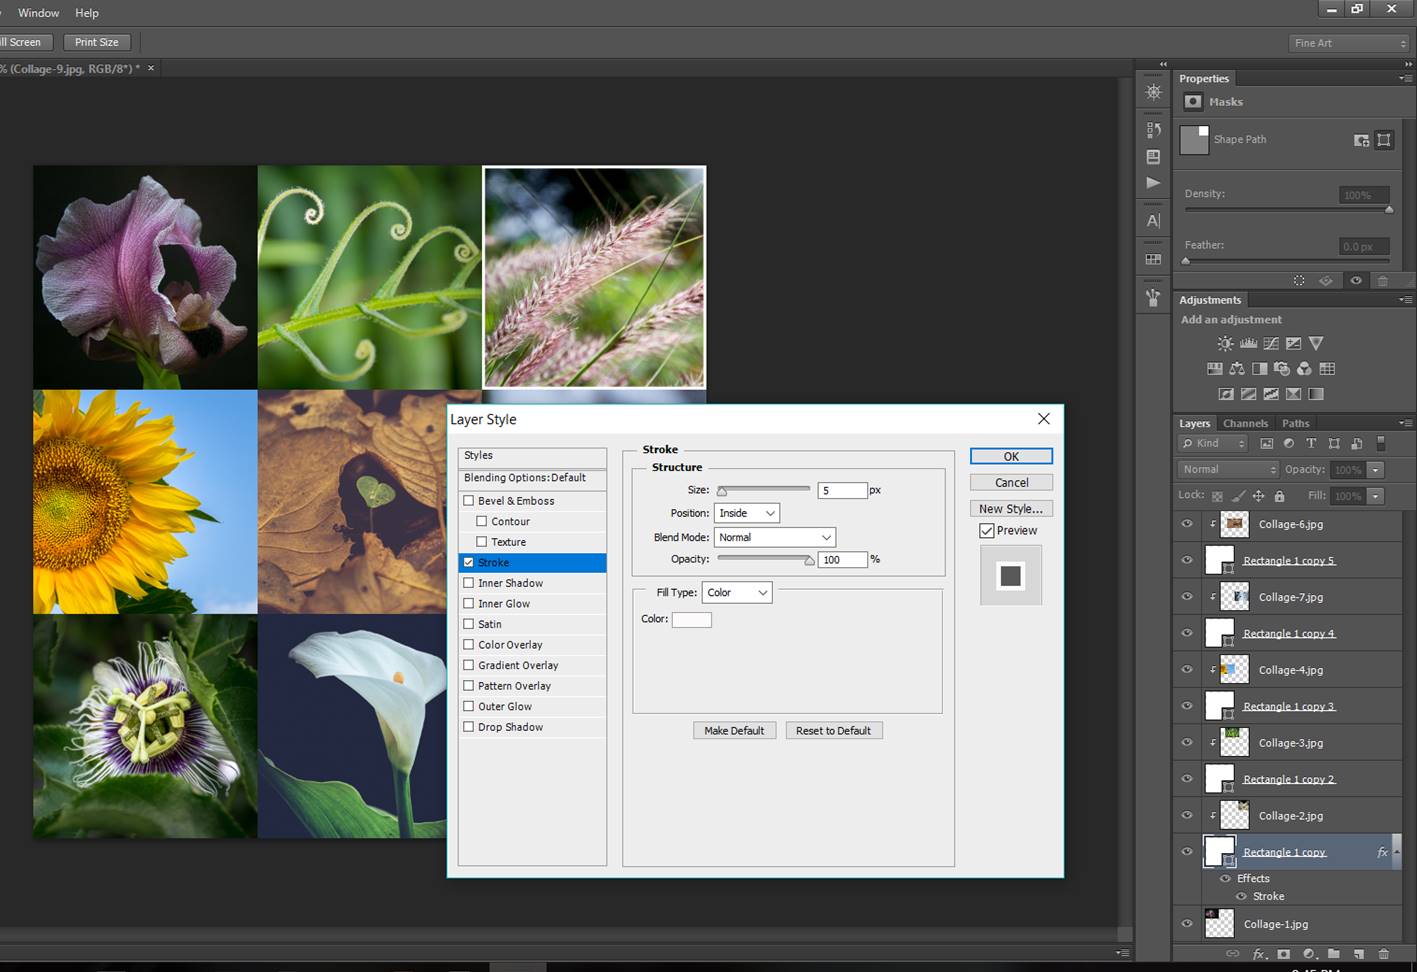
This is going to be way easier than you think! Start by right clicking on your first rectangle layer (or any other you like) and select “Blending options “. Select “Stroke” and choose “Inside” in the Position field.
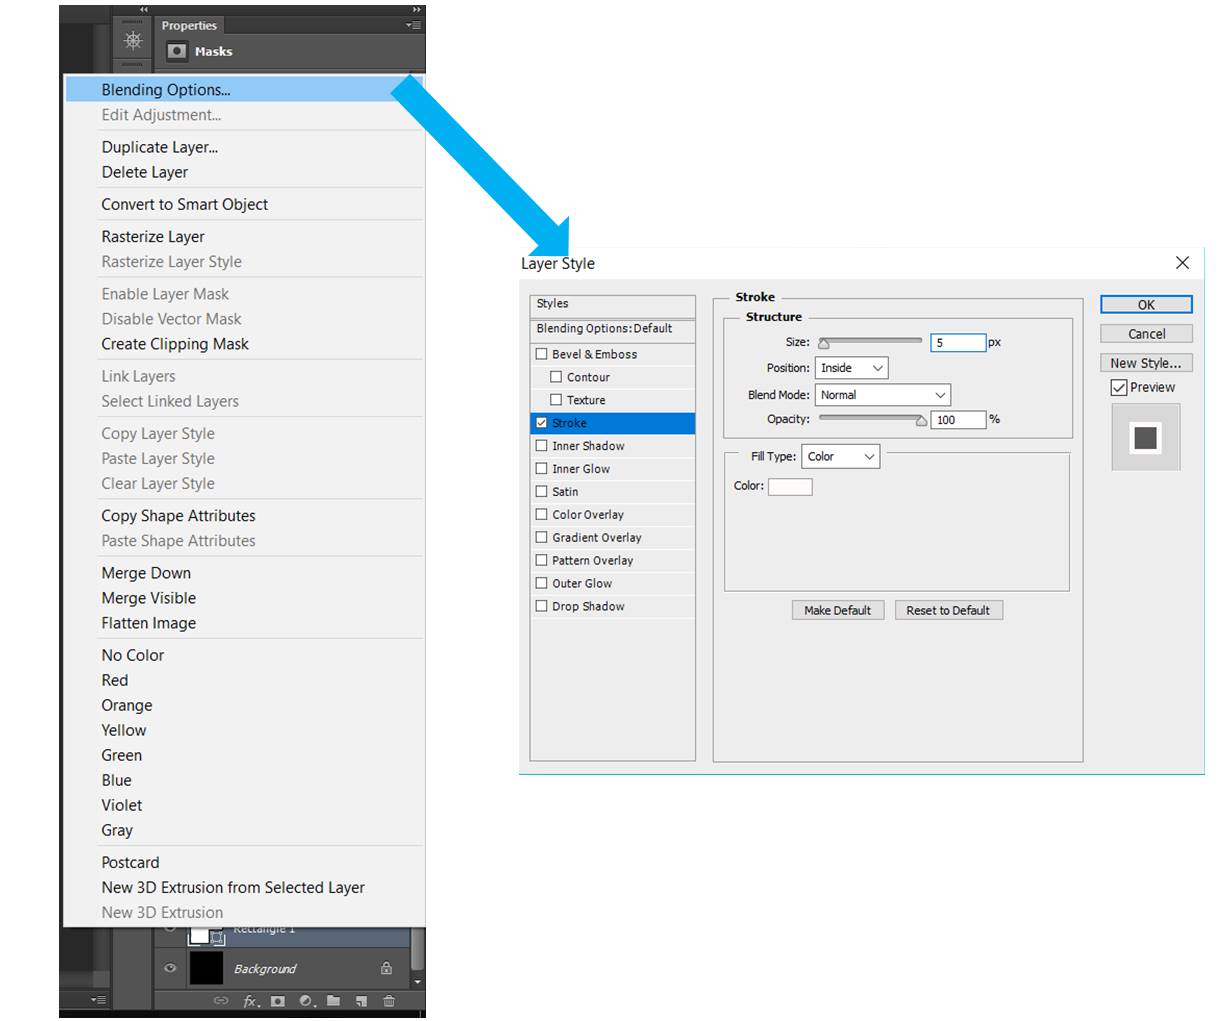
A frame will appear inside your selected square. The other parameters are up to you. You can play with the size and the color.
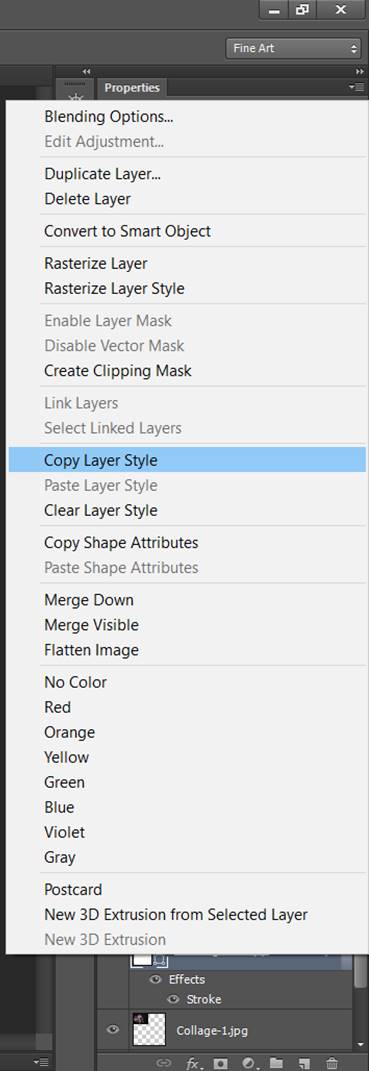
Now you can just right-click on the square with the frame and Copy Layer Style. Then you select all the other square, right click, and Paste Layer Style.
Your grid is done!!
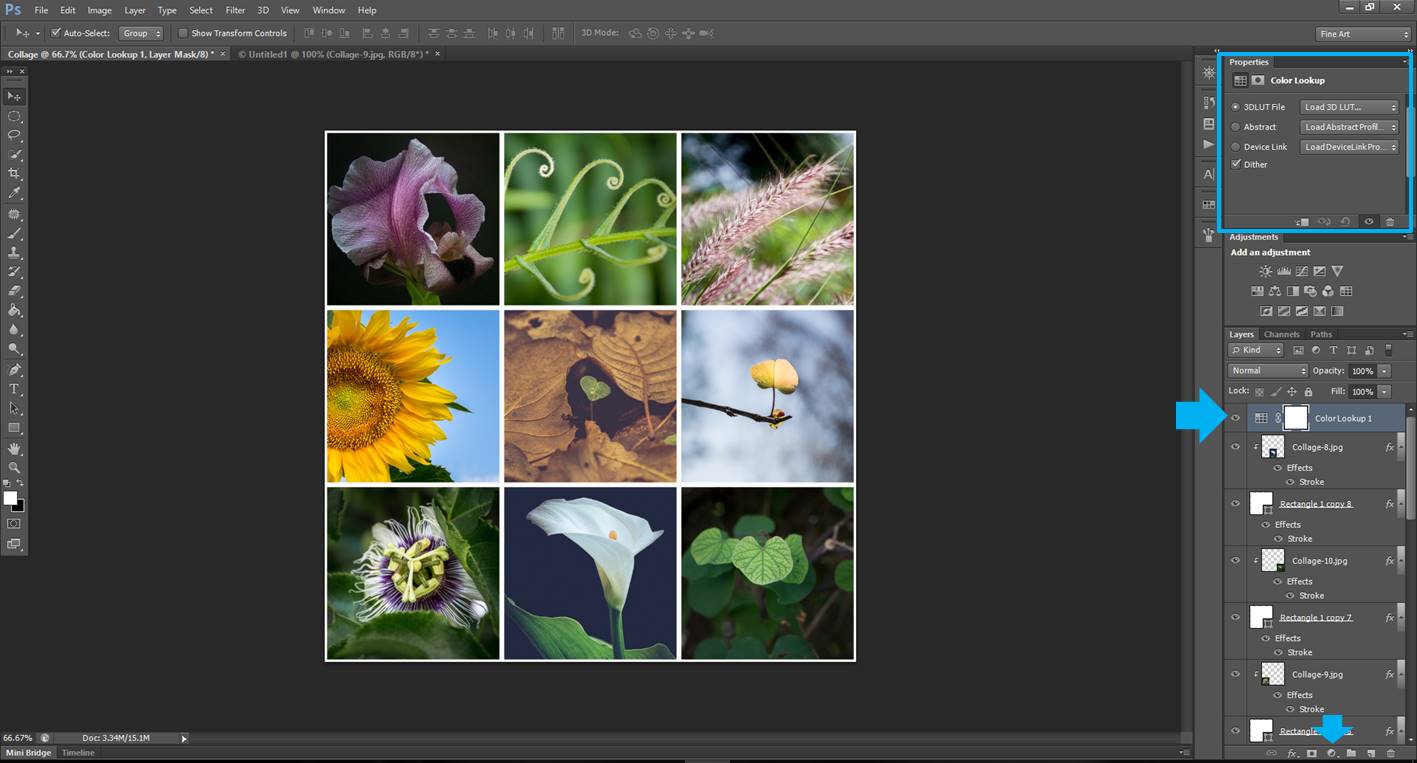
#10. Make the photos look a bit more uniform
You can make the photos look a bit more uniform by adding an Adjustment layer. First thing clicks on the “Create new adjustment layer” and choose “Color Lookup”.
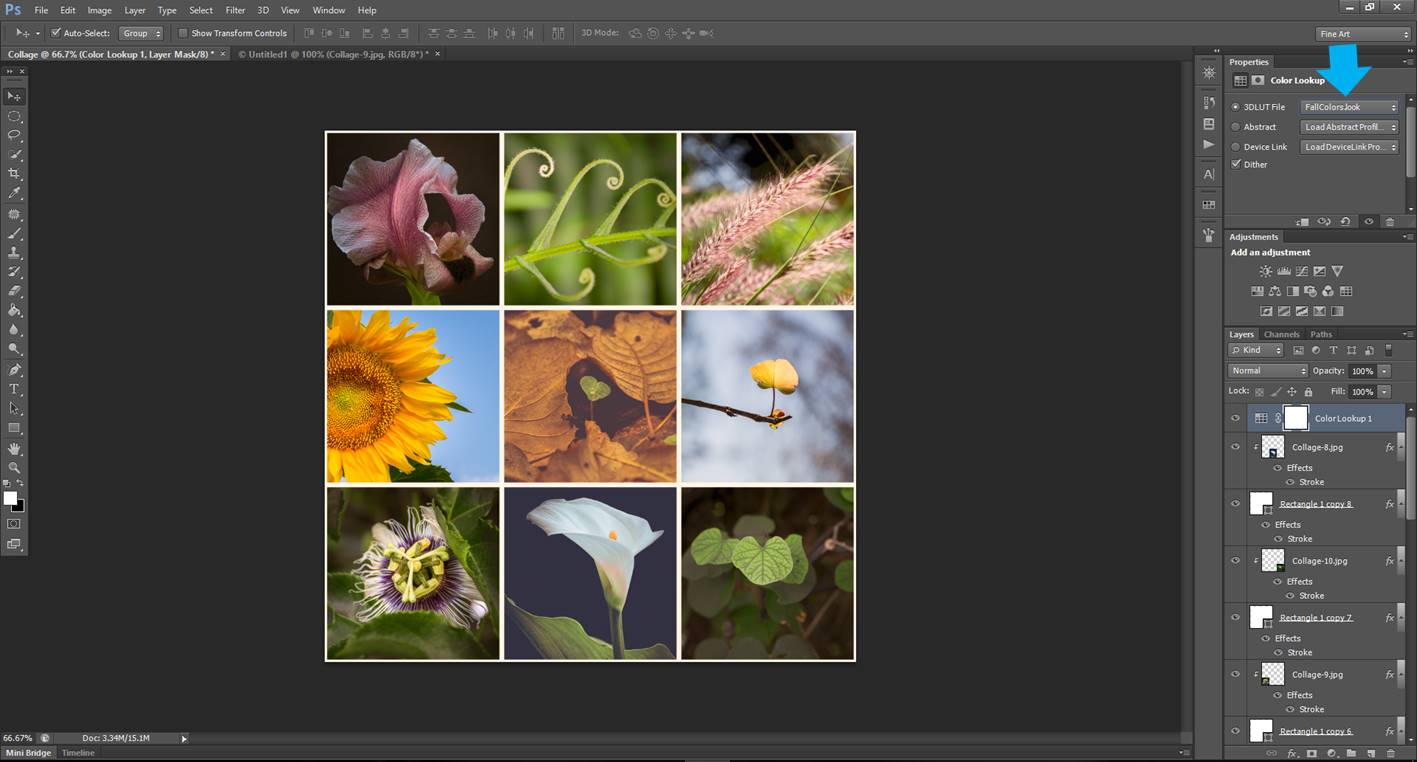
In the properties, you can select different presets. Check them out and pick the one that suits better your collage. In my case, I picked the one called “Fall colors”.
#11. Save your collage in jpg and share it!
Flatten all your images before saving your collage (see image below).

And that’s all! You can save your collage both as jpg and pdf (in case you want to modify it later). If you made it for Instagram, now it is time to go and share it!!
I hope you enjoyed making your first 3×3 collage!!
Just in case you wonder how to cut something in photoshop, here is an easy way to cut something complex in Photoshop.

 Facebook
 Google +