How many photos do you have sitting on your hard drive that has never been seen by others? Maybe it was some outing with friends 2 years ago. You probably said that after you edit them you’ll make sure that they get them. We all know how that goes. The photos we promised our friends are suddenly forgotten because we never get around to editing them perfectly. Why not take the time and make the most out of these long-lost images and at the same time make someone’s day?
This thought came to my mind one day after spending hours editing photos. As I was cataloging my most recent project, I stumbled across some old pictures of some pretty special moments. As I was reminiscing and enjoying the momentary flashback, it hit me. I was the only one who was able to enjoy them. Even though so many people had a part in creating this unique memory, this instant in time, they were all moments most likely forgotten to them.

Personal Project
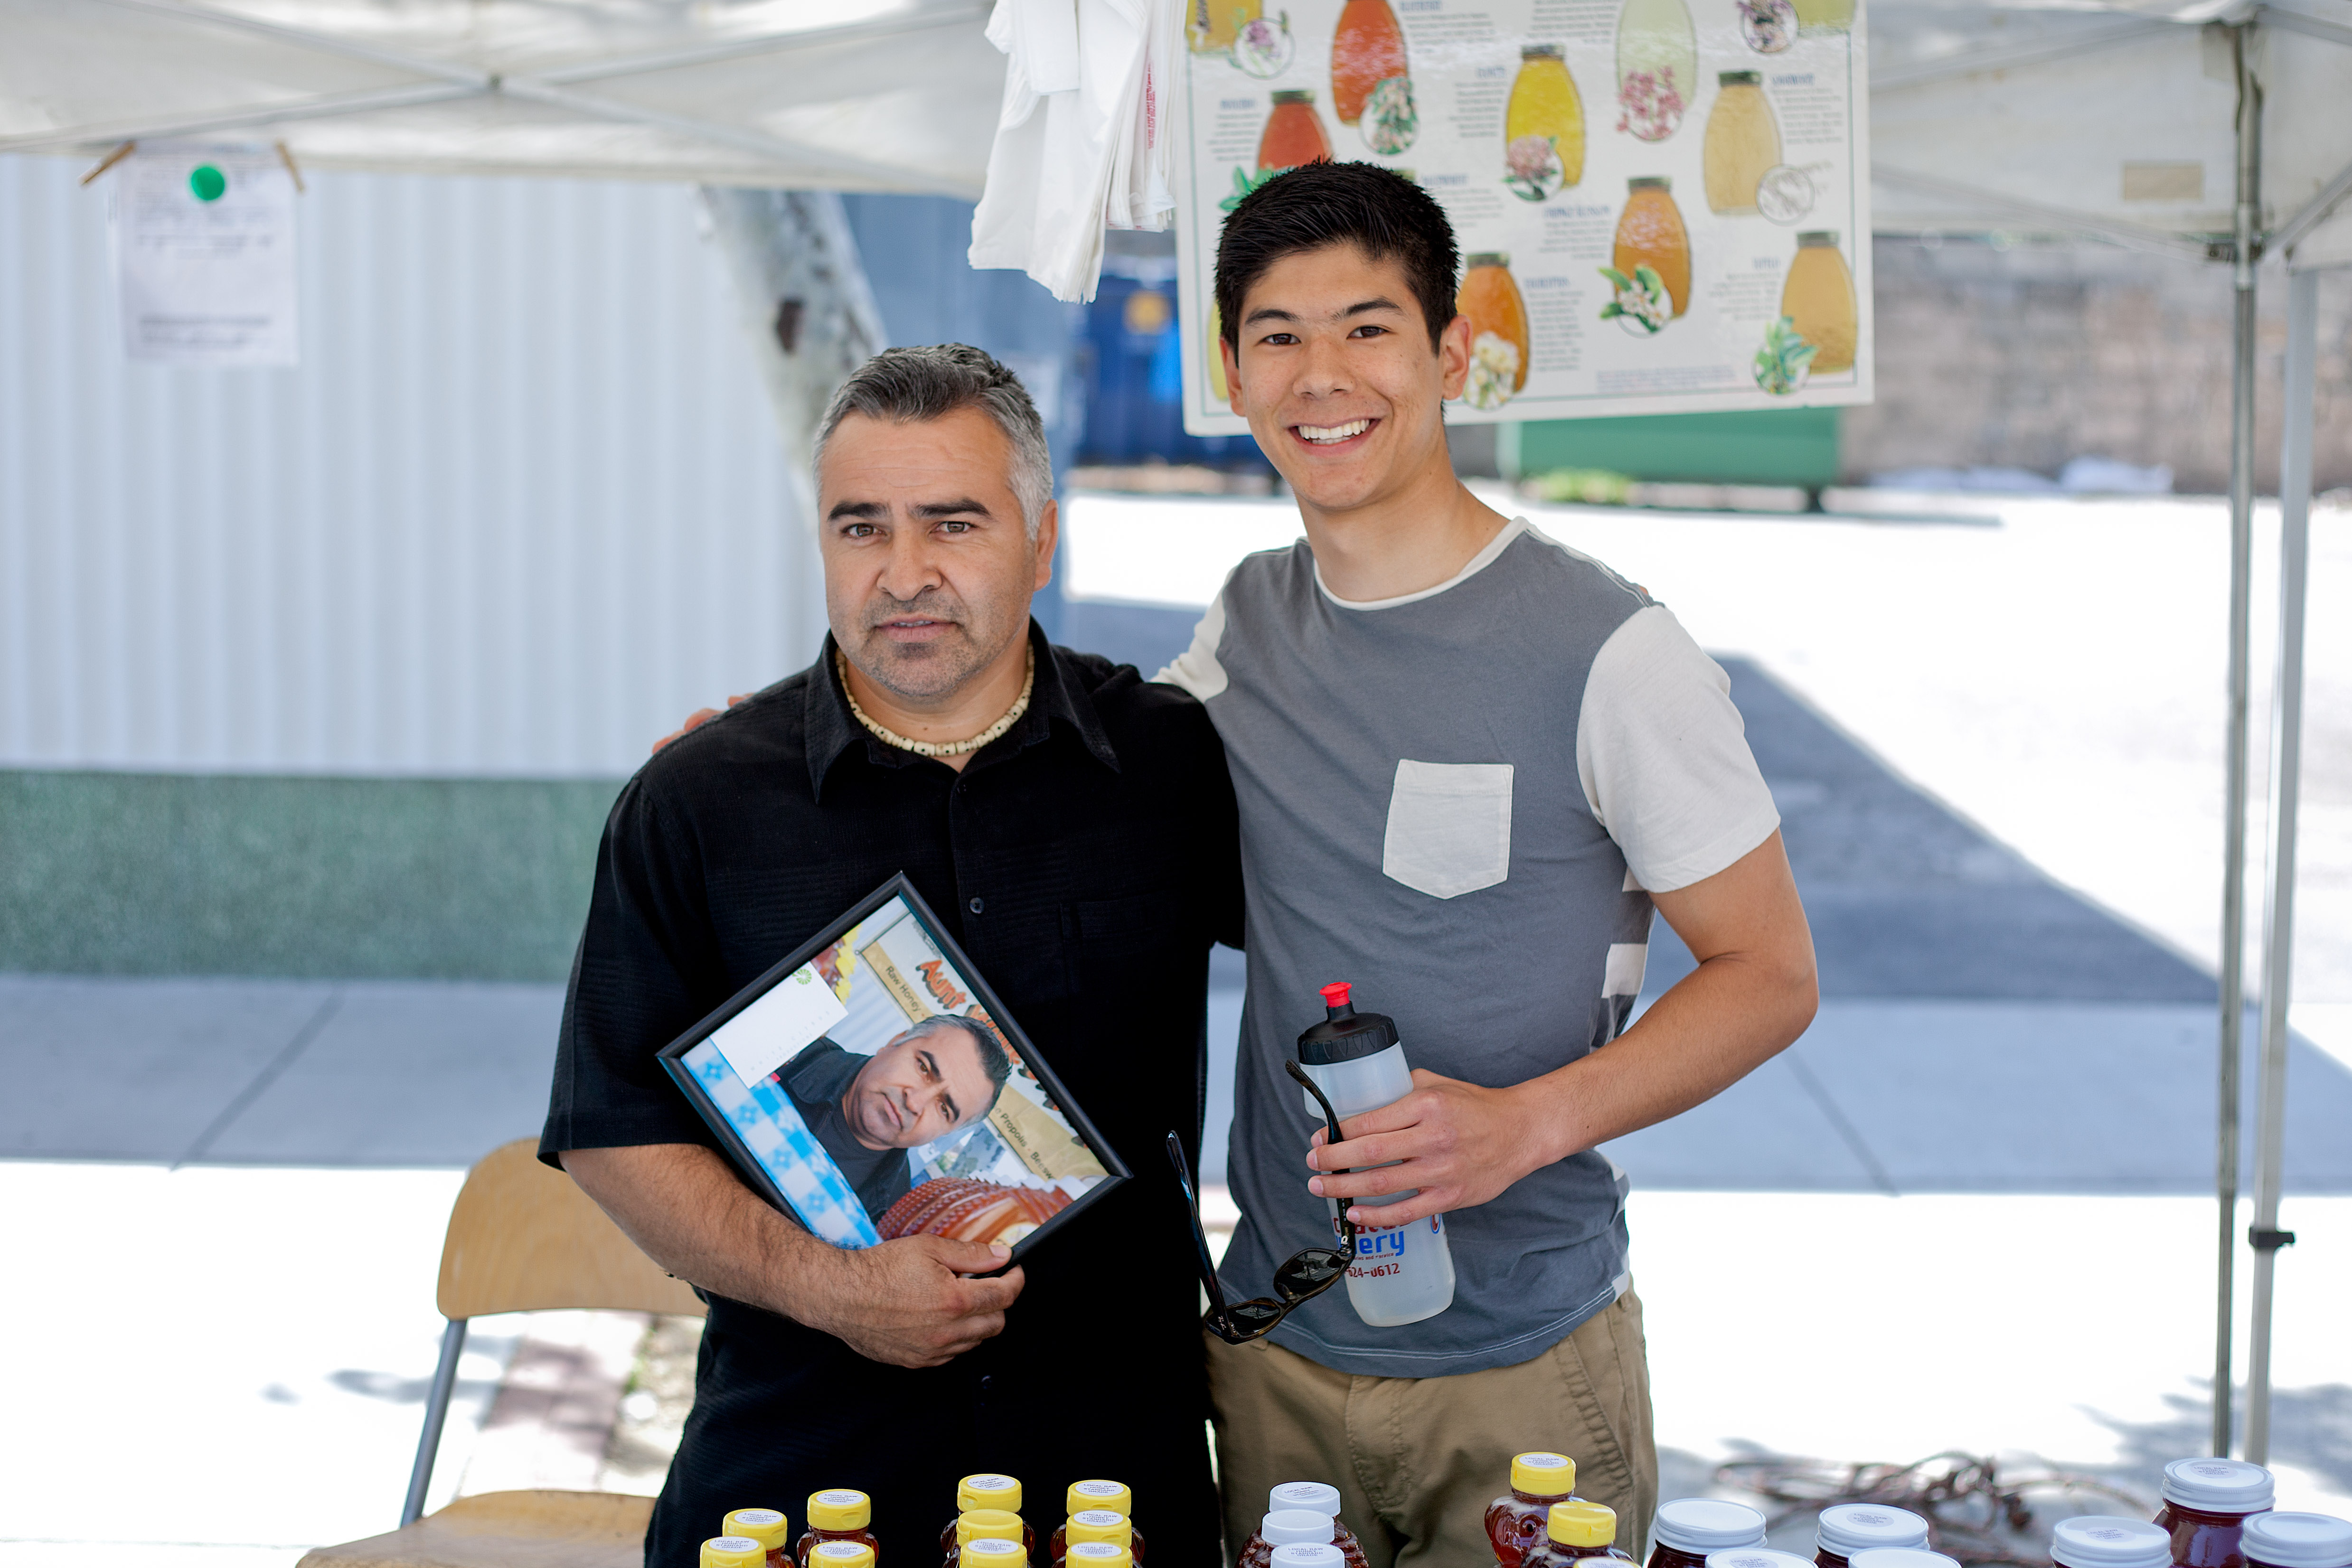
Due to this, I decided to start a project called Project Smile. I rounded up a ton of picture frames that I had laying around in my garage from a previous project and painted them. The next step was using this printer I somehow acquired that had tons of cartons of ink. I made it a goal to surprise someone with a solid memory that they most likely had forgotten. I would then give them a photo I was sure would bring them joy.
It wasn’t only family and friends that I would eventually give these photos to. I would eventually return to ones that I had met on the street or used for past assignments during university that had helped me out but received nothing in return.
There really is truth in the phrase that there is more happiness in giving than receiving. I could sense their appreciation in the fact that I thought about them enough to personally print and bring them something special. That’s the cool thing about photography, the joy can be two-sided. I bet that you have hundreds if not thousands of these mini gifts on your hard drive waiting to be shared with someone you care about. The key is getting them off that long lost hard drive and into the hands of others. What are various ways that we can do this?
 Print
Print
The obvious one is what we just discussed. You don’t have to make a whole project out of it like I did but what about trying to get a print to one person a week? It could be a small step in getting these intangible photos into the hands of someone that could enjoy them. What if you don’t have access to frames or the money to make great prints? Who cares! At the end of the day, it’s the thought that counts. Go to your local pharmacy store and print out some 4×6’s and write a little something on the back. Boom. You’ve got yourself a mini gift.
The cool thing about prints, on a personal note, is that you can hang these in your room or put them on your desk at work. You can have a constant reminder of good memories and creative inspiration around you 24×7. I’ve started to print out pictures of family, friends and personal projects and started placing them all around me. It greatly improved the atmosphere of the places I visit regularly. If you put your prints near your bed it makes for something nice to look at both when you start and end your day.
Send them Electronically
If we can’t seem to get around to making prints, sharing them via social media or email can still achieve the same effect. In a time where receiving a personalized letter in the mail is extremely special, a personalized electronic message with a thought and a picture can be the next best thing and get across a similar feeling.
Don’t let these precious memories go unseen by those that helped make them! Make the time to sort through them. Do whatever you have to in order for them to get in the right hands. Remember, the joy that comes from photography can go both ways!
Keep learning and have fun!

 Facebook
 Google +