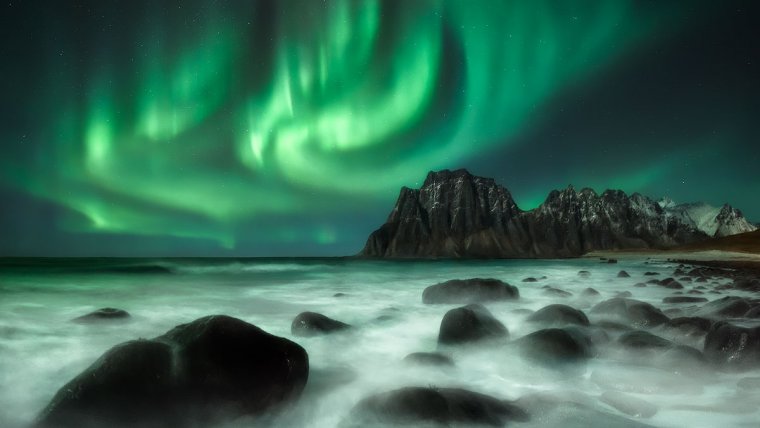
I’ll dedicate this topic to one of the most loved phenomenon in landscape photography: Aurora.
Aurora is a natural dancing light in the Earth sky, visible in the night at high latitudes. This is why it can be called borealis or australis.
When I observed aurora borealis for the first time, I was almost crying.
It’s a great emotion and, as a photographer, I would like to give you some advice on how to capture it forever.
Table of Contents
Before taking shots to a phenomenon like this, you should learn about what it consists and how it works.
It’s very curious to know that the interaction between the terrestrial magnetosphere and the solar winds produces the dancing lights.
You’ll see colored bands or vortices in the night sky (when the lights are visible and bright).
Aurora can be diffuse or discrete. The first seems like a big colored glow; the second consists of spirals, curls or bands and is the strongest.
Its unit of measurement is Kp scale and goes from 1 to 10 (in order of strength).
The composition and density of the atmosphere and the altitude determine the color of the aurora light.
An excited atom that returns to the ground state sends out a photon with a specific energy. This energy depends on the type of atom and on the level of excitement. We’ll perceive this energy of the photon as a color.
At very high altitudes, in addition to normal air, there is atomic oxygen. Molecular nitrogen and molecular oxygen compose it.
Aurora is made energetic electrons that are strong enough to split the molecules of the air into nitrogen and oxygen atoms. The photons that come out of Aurora have therefore the signature colors of nitrogen and oxygen molecules and atoms. Oxygen emits green and red photons.
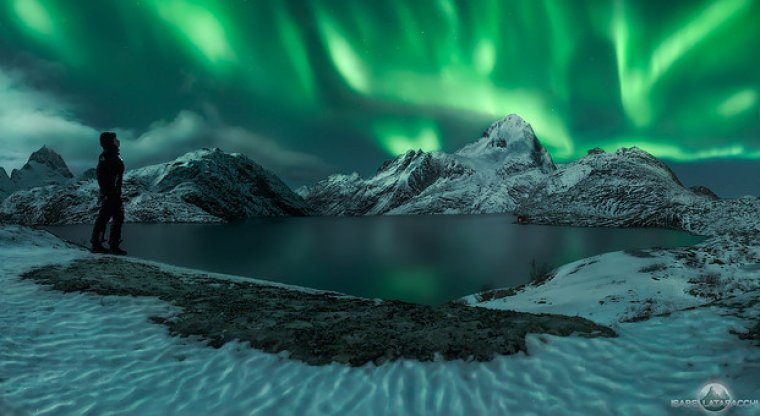
Usually, the green is the main color of the polar lights color mixture.
When Aurora is very strong, you can observe a purple-red band on the highest part of the photon emission.
At the highest strength of the polar lights, nitrogen molecules get a mixture of blue and red emission and create a purple edge at the bottom of the aurora.
So, the polar lights can be not only green. Indeed, the strongest auroras appear in lower latitudes as enormous red glows: the rare “blood auroras”.
Images from the International Space Station show the rings of aurora near the poles: when the polar lights are very strong, the rings expand and the red emission on the top of the green lights comes down to the lower latitudes.
Popular culture believes red lights as a portent of disgrace.
“Blood auroras” are said to have foretold the death of Julius Caesar (44 BCE) and they presaged the American Civil War (1860), the second World War.
A rare red aurora appeared also in November 2003, in the sky of the Dolomites, when I was a child.
Nothing bad happened and you can take a vision of that phenomenon at this link: http://www.cortinastelle.it/aurora20112003.htm .
Aurora occurs usually in the “auroral zone”, above 60° north or south of the equator. Australis are the lights appear in the Southern hemisphere, Borealis in the Northern.
As written in the previous paragraph, it’s very rare in the lower latitudes.
We can mainly observe aurora, for instance, in the north of Norway, Iceland or Alaska in the north of the planet, or in New Zealand, Tasmania in the south. We have always to be in the “auroral ring” around the poles.
But when? Well, usually not in the Summer, when the sky is too bright in that latitudes (the daytime is almost 24h long during that season); the best time frame is from September to April and the highest solar activity is usually during the Equinox time.
During my travel in Lofoten Islands, I’ve found very useful some apps about aurora forecast; you can find them in the App Store (IOS or Android). You’ll get a vague idea about the activity in the evening you’ll plan your shooting.
Is not difficult to immortalize a polar aurora (if you are in the best place in the best moment).
The best aperture and ISO sensibility are the same of a classic night sky shot but the shutter speed has not to be too long.
I usually keep it under three seconds, or I wouldn’t capture the shape of the lights movement.
For example, I took this shot in Uttakleiv beach, in Lofoten Islands.
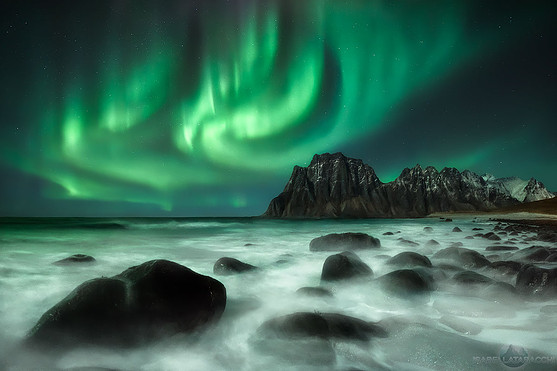
The tastes of the people are various. I can see every day thousand kinds of aurora images post-processed in different ways. I’m going to explain my own method.
Here you can see a RAW file opened in Adobe Camera Raw. This is a discrete aurora I saw in Uttakleiv, in Lofoten Islands. The lights are very bright and the shape is almost great as I observed it that evening, but I’d like to improve the luminosity of the aurora and the contrasts.
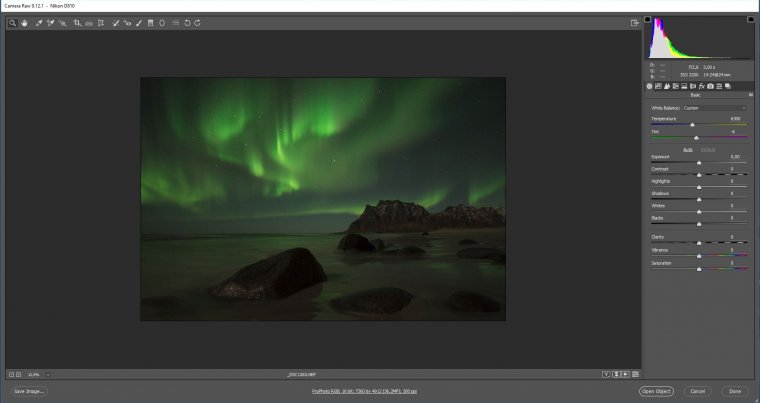
The first thing I do when I begin to edit an aurora shot, is to go in Camera Calibration section.
I change the Camera profile Adobe Standard with Camera Flat. The lights become less bright and the shadows more open; this allows me to manage the lights, the shadows, and the contrasts better.
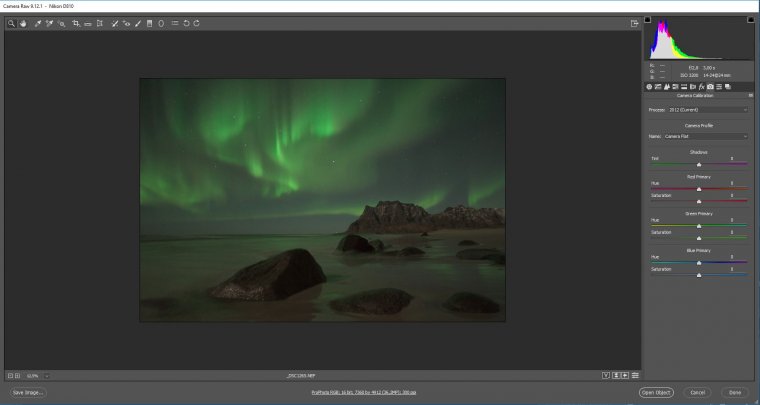
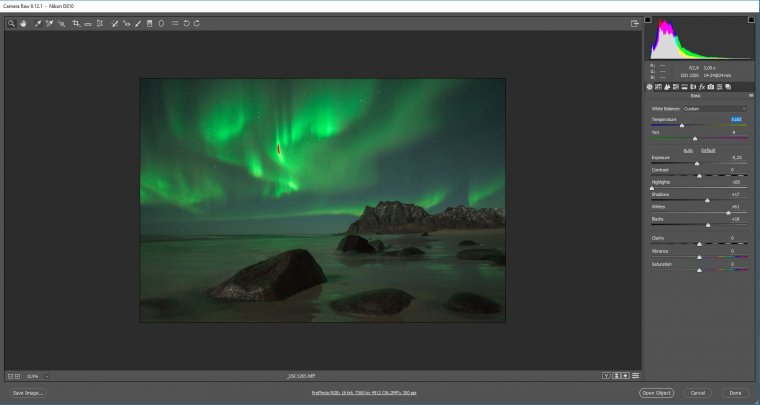
The following image shows the adjustments I usually set on an image like this.
I usually prefer to give a colder white balance that goes well with the green color.
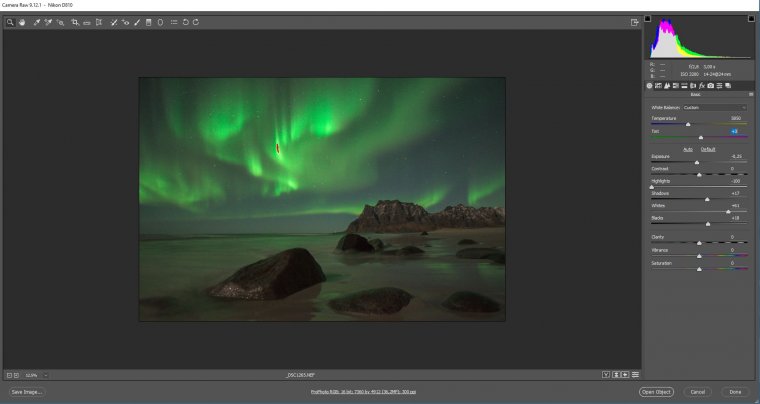
But you can also prefer a white balance that shows well the colors of Aurora, like the brown-purple in the top of the green.
I usually decrease the highlights to increase much more the whites. I’ll have a much more contrasted, well shaped and brighter aurora.
I also open the shadows and the blacks a little bit and decrease the exposure to balance everything.
As you’ve just read Aurora it’s not difficult to capture and needs a very soft post-processing. So, plan your travel and reach the highest latitudes; you’ll live amazing emotions.
Comments (0)
There are no comments yet.