
Learn how to install your Lightroom Brushes with our video tutorial:
Be sure to follow the procedure for your particular operating system
Windows Users
1. Locate the folder in which your browser has downloaded the brushes (for Windows 8 users and newer, it is commonly located in C:\Users\<Username>\Downloads)
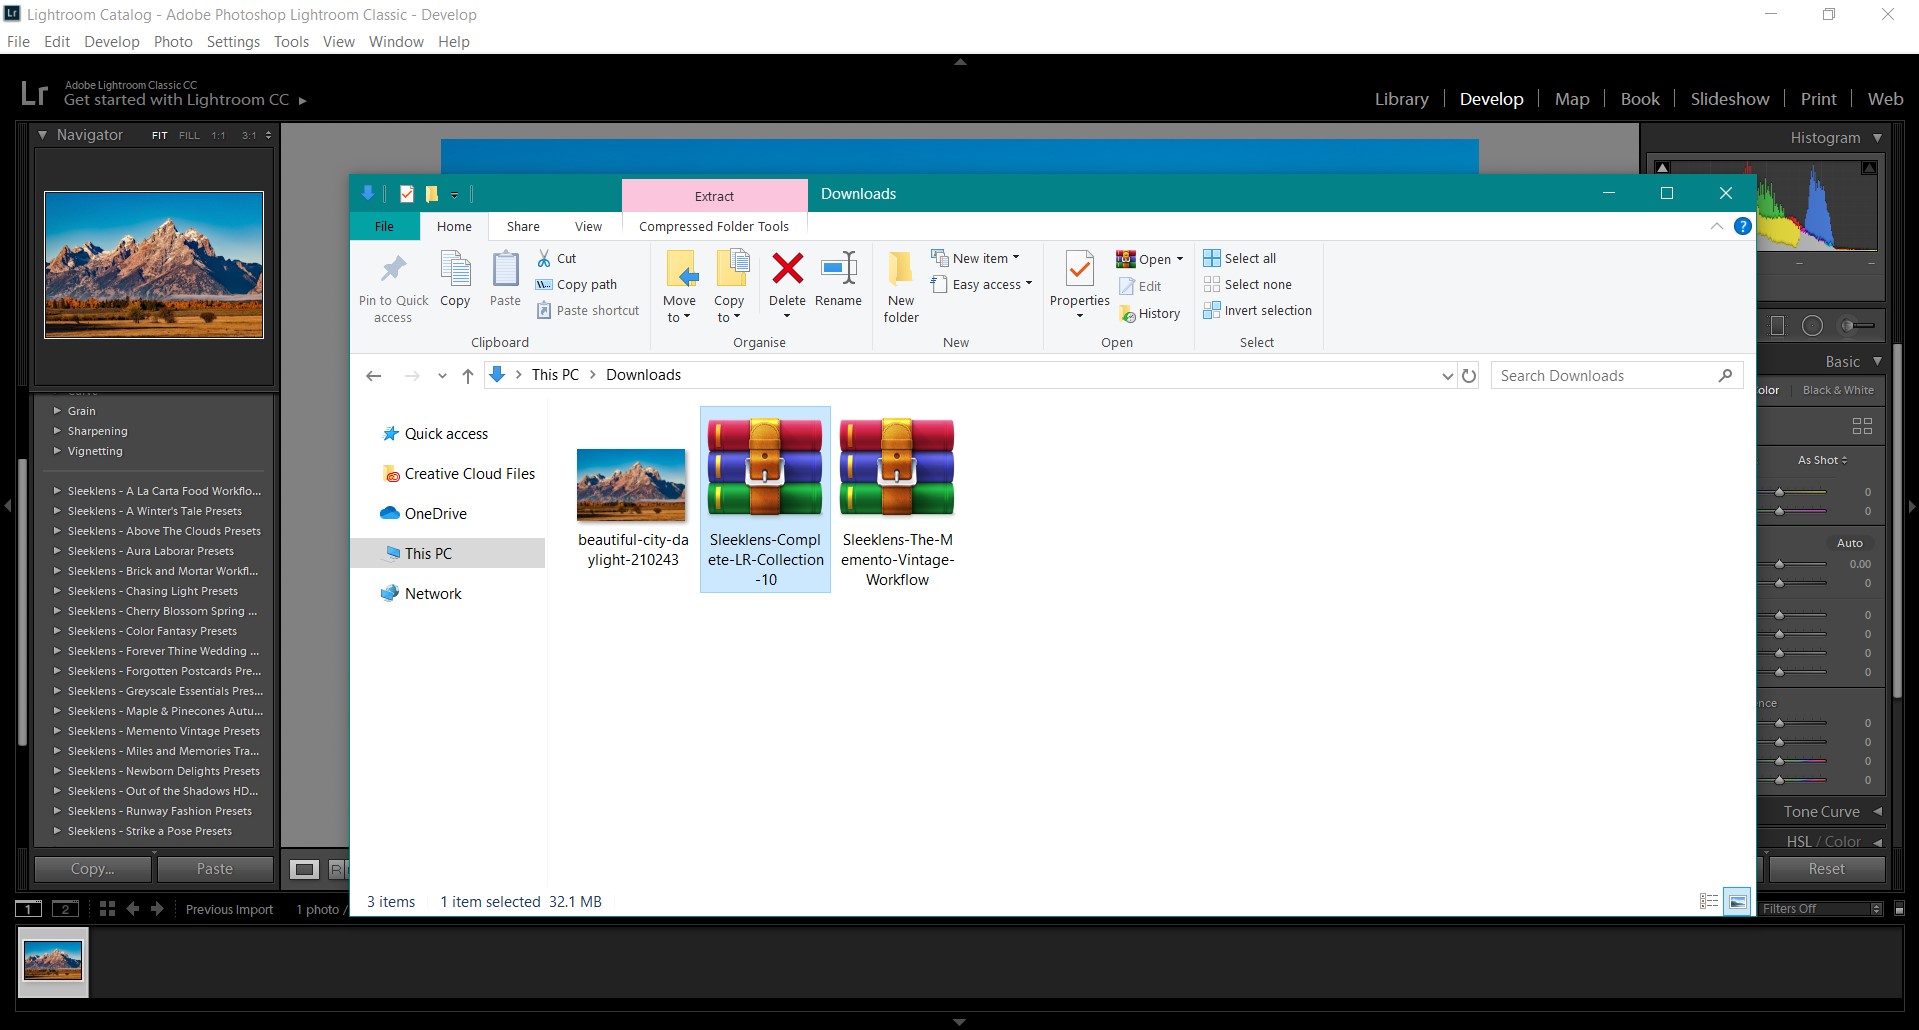
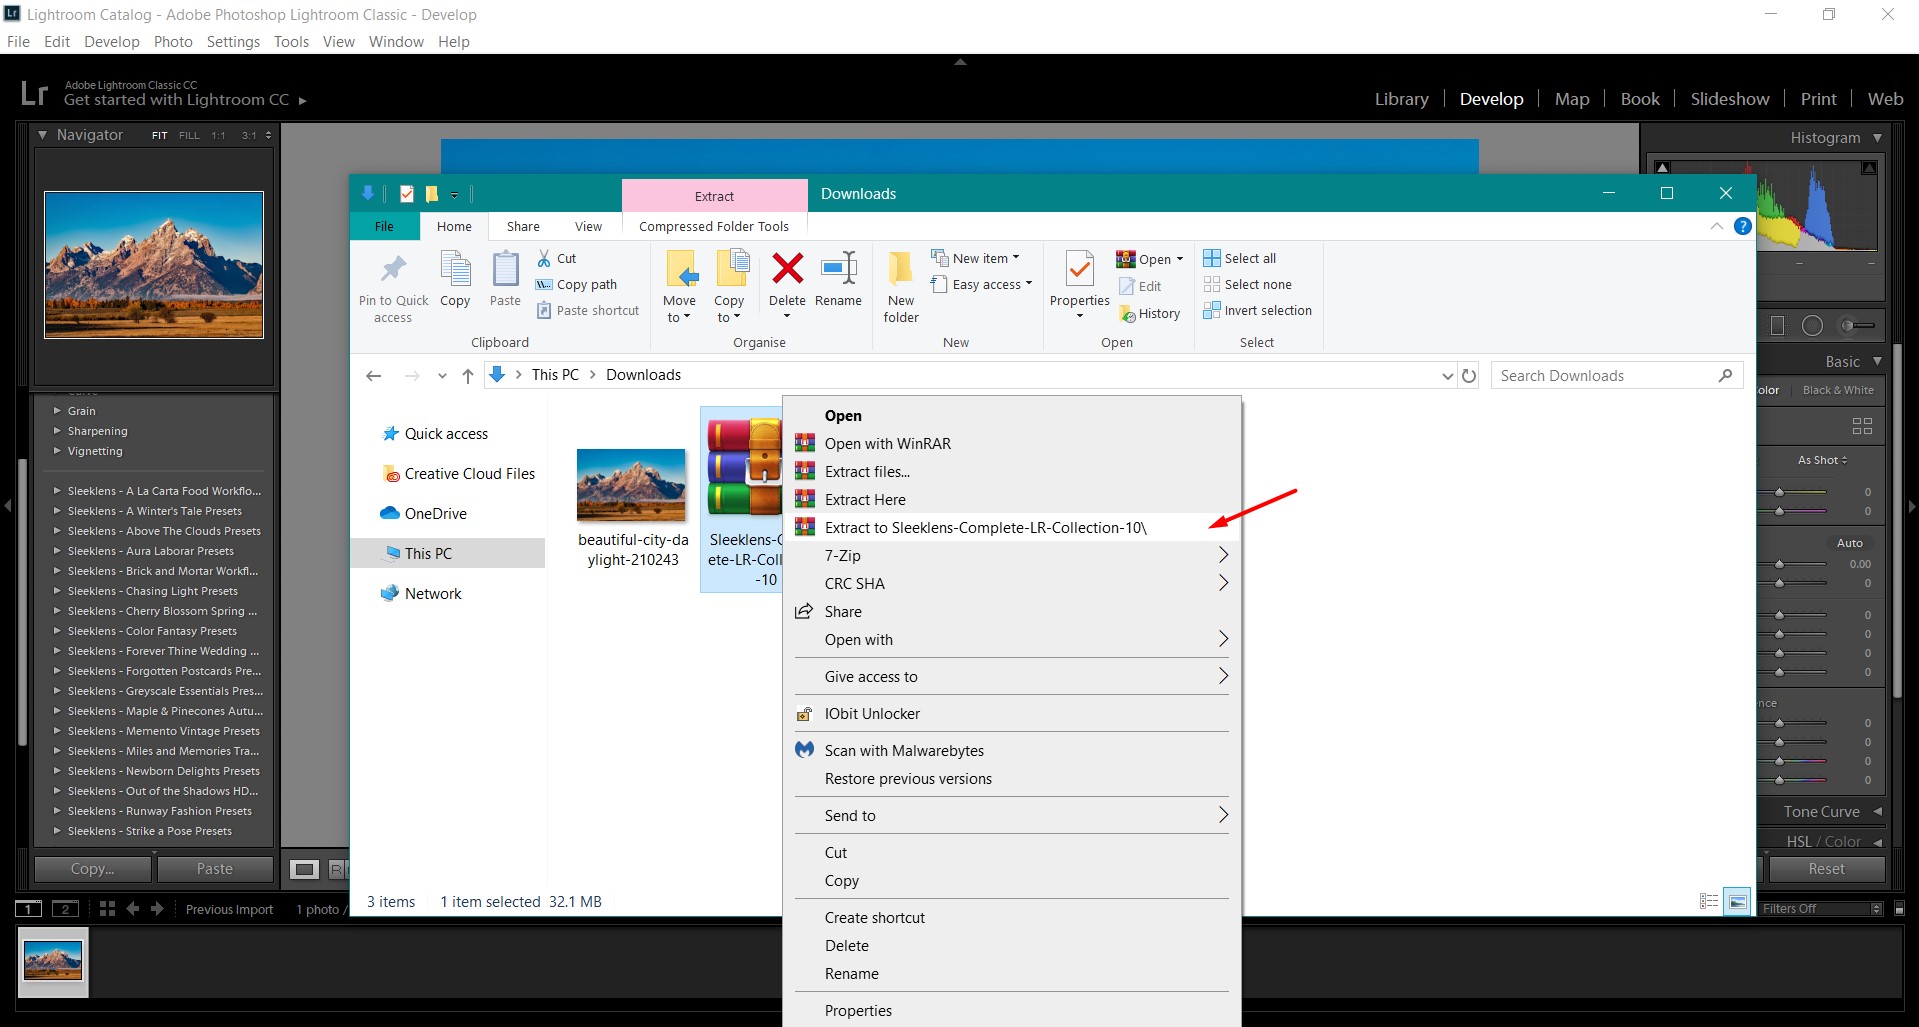
2. Extract the downloaded file that contains your Lightroom Brushes. (we recommend you to use File Extractors such as Winrar, even though Windows 10 users can extract zip files without losing too much data)
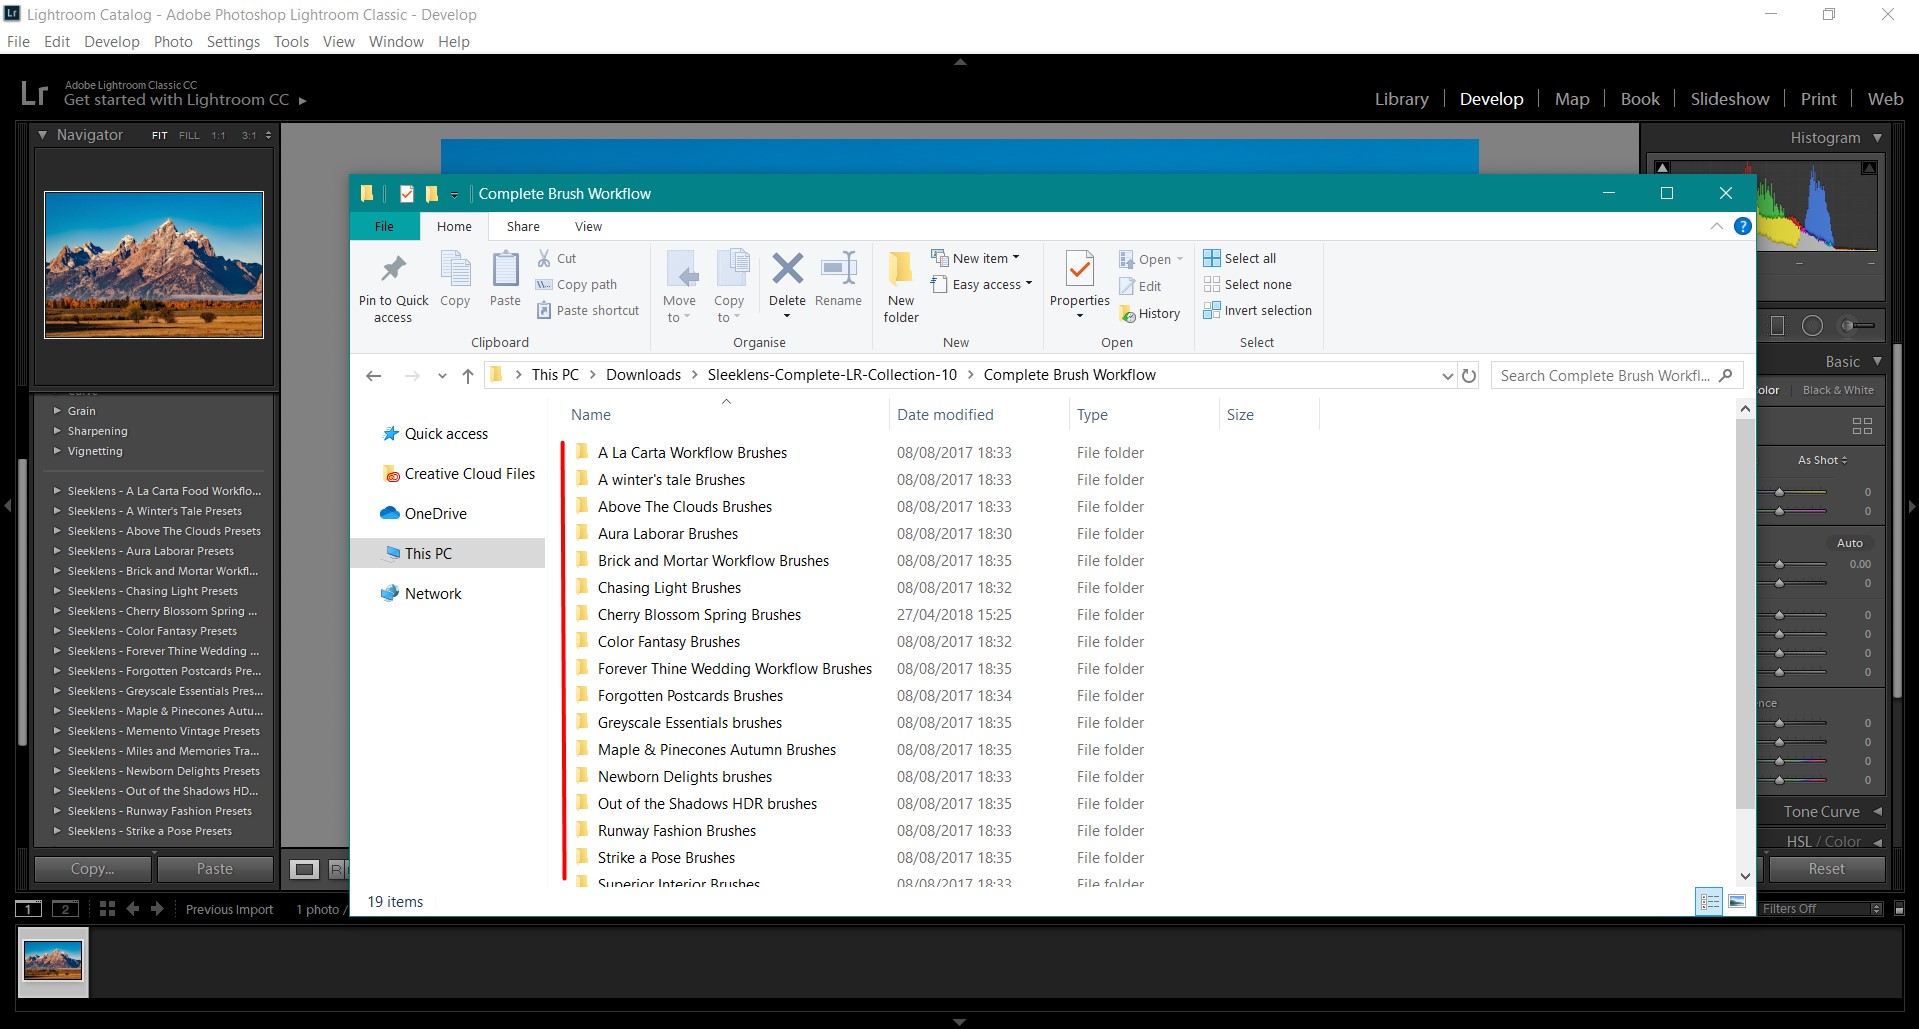
3. Open up the extracted folder and copy the folder(s) that says ‘Brushes’ with CTRL+C
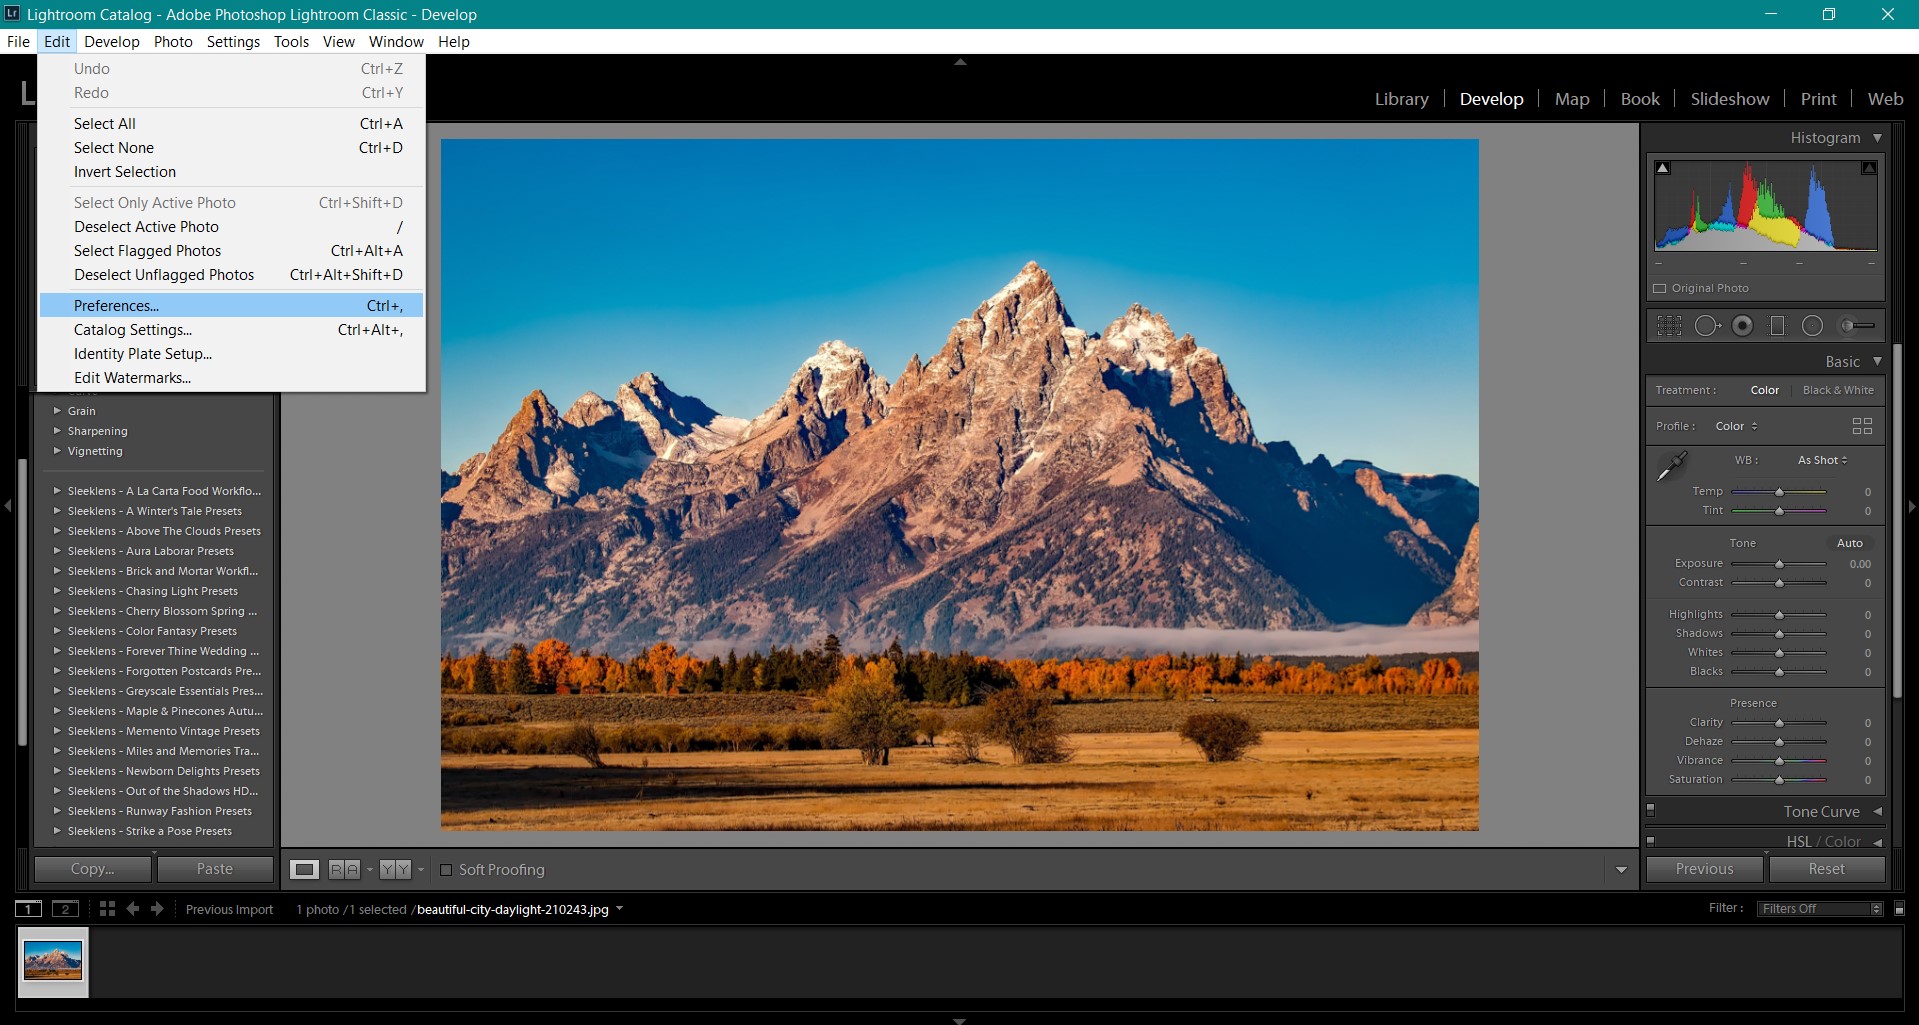
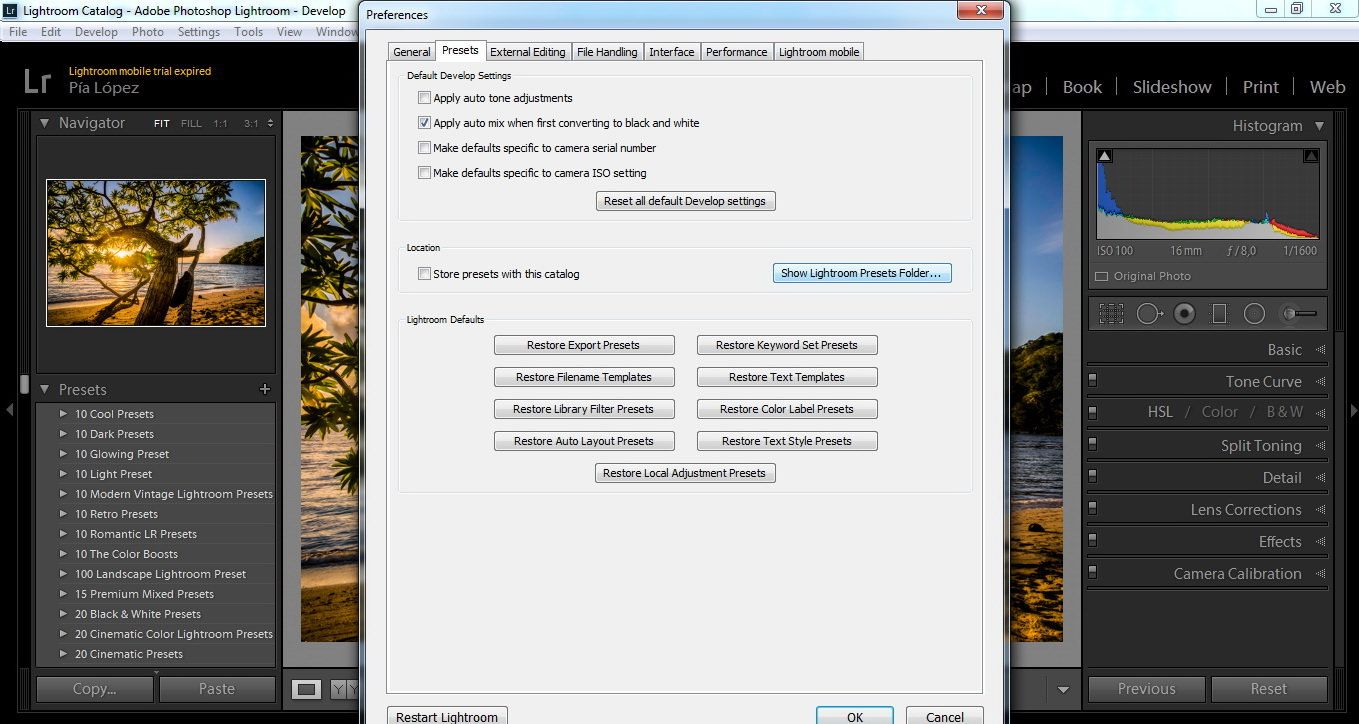
4. Go to Lightroom. Check the Edit menu – Preferences.
5. The steps will vary for LR versions.
For LR 4-6 Users:
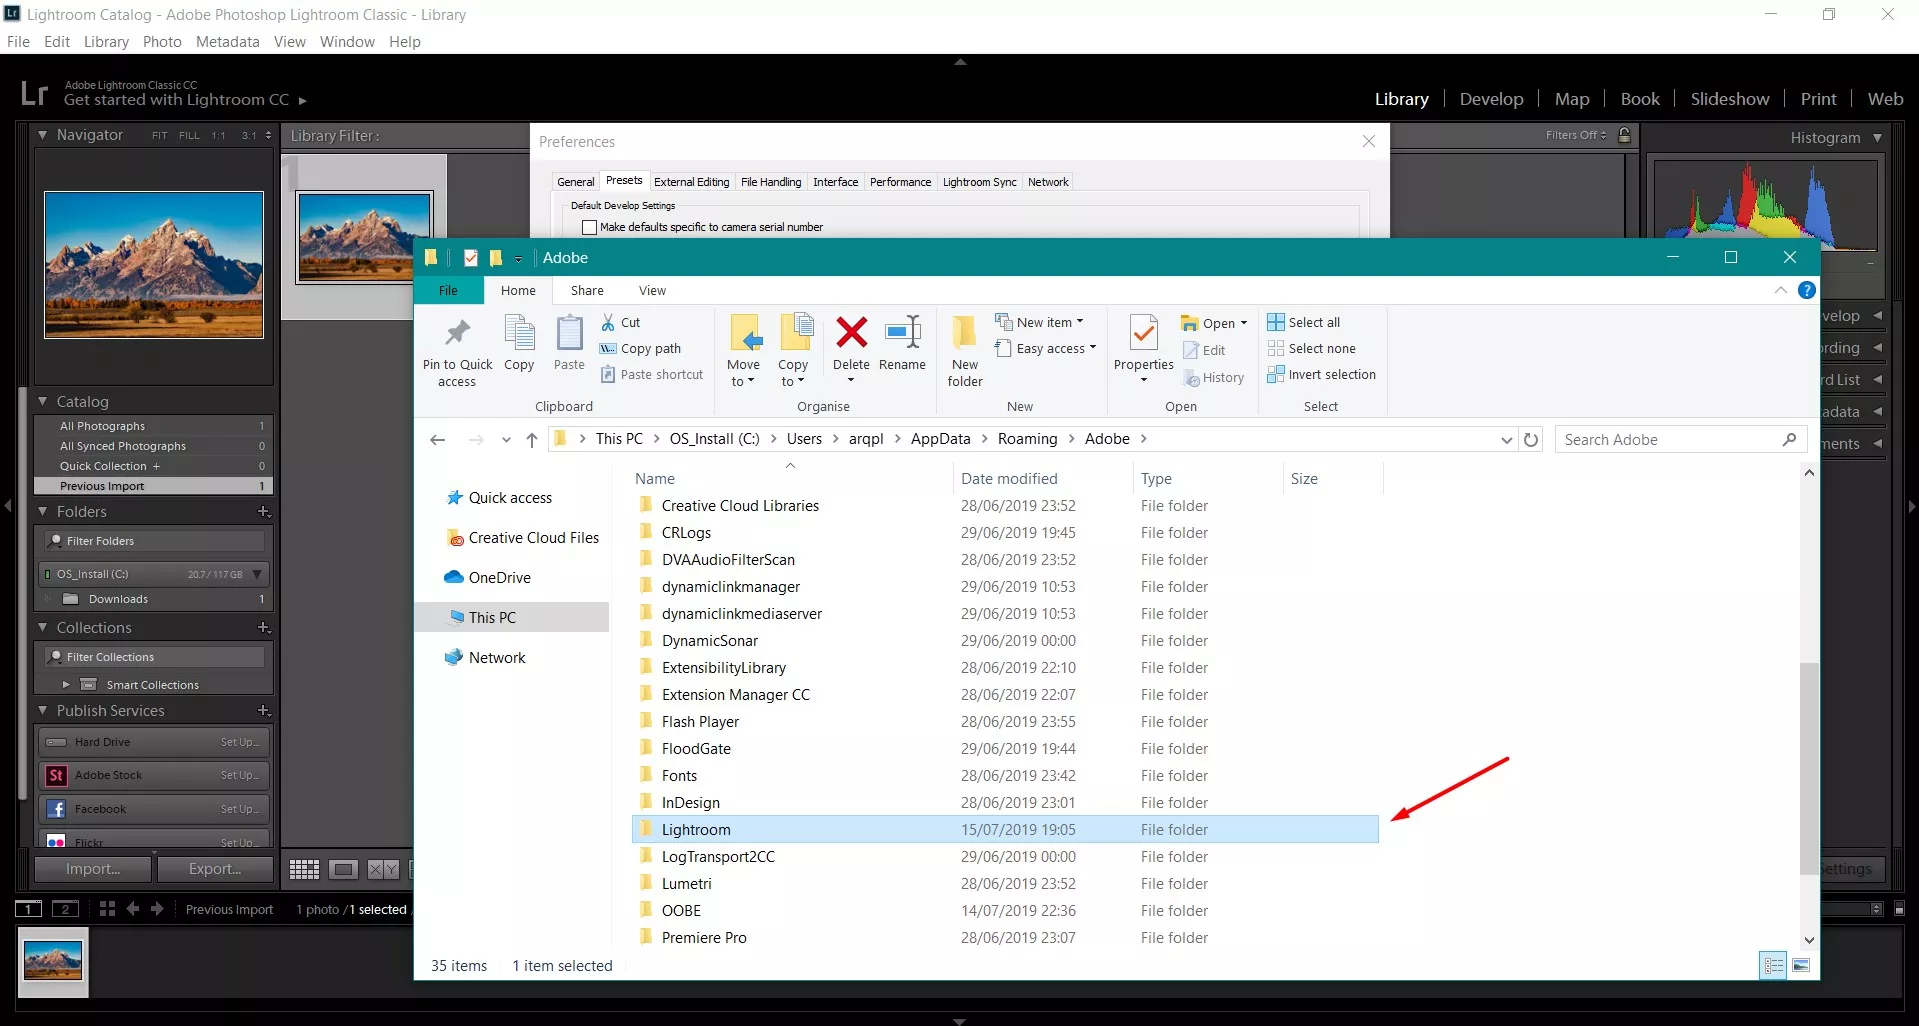
Switch to the ‘Presets’ tab and click on ‘Show Lightroom Presets Folder…’
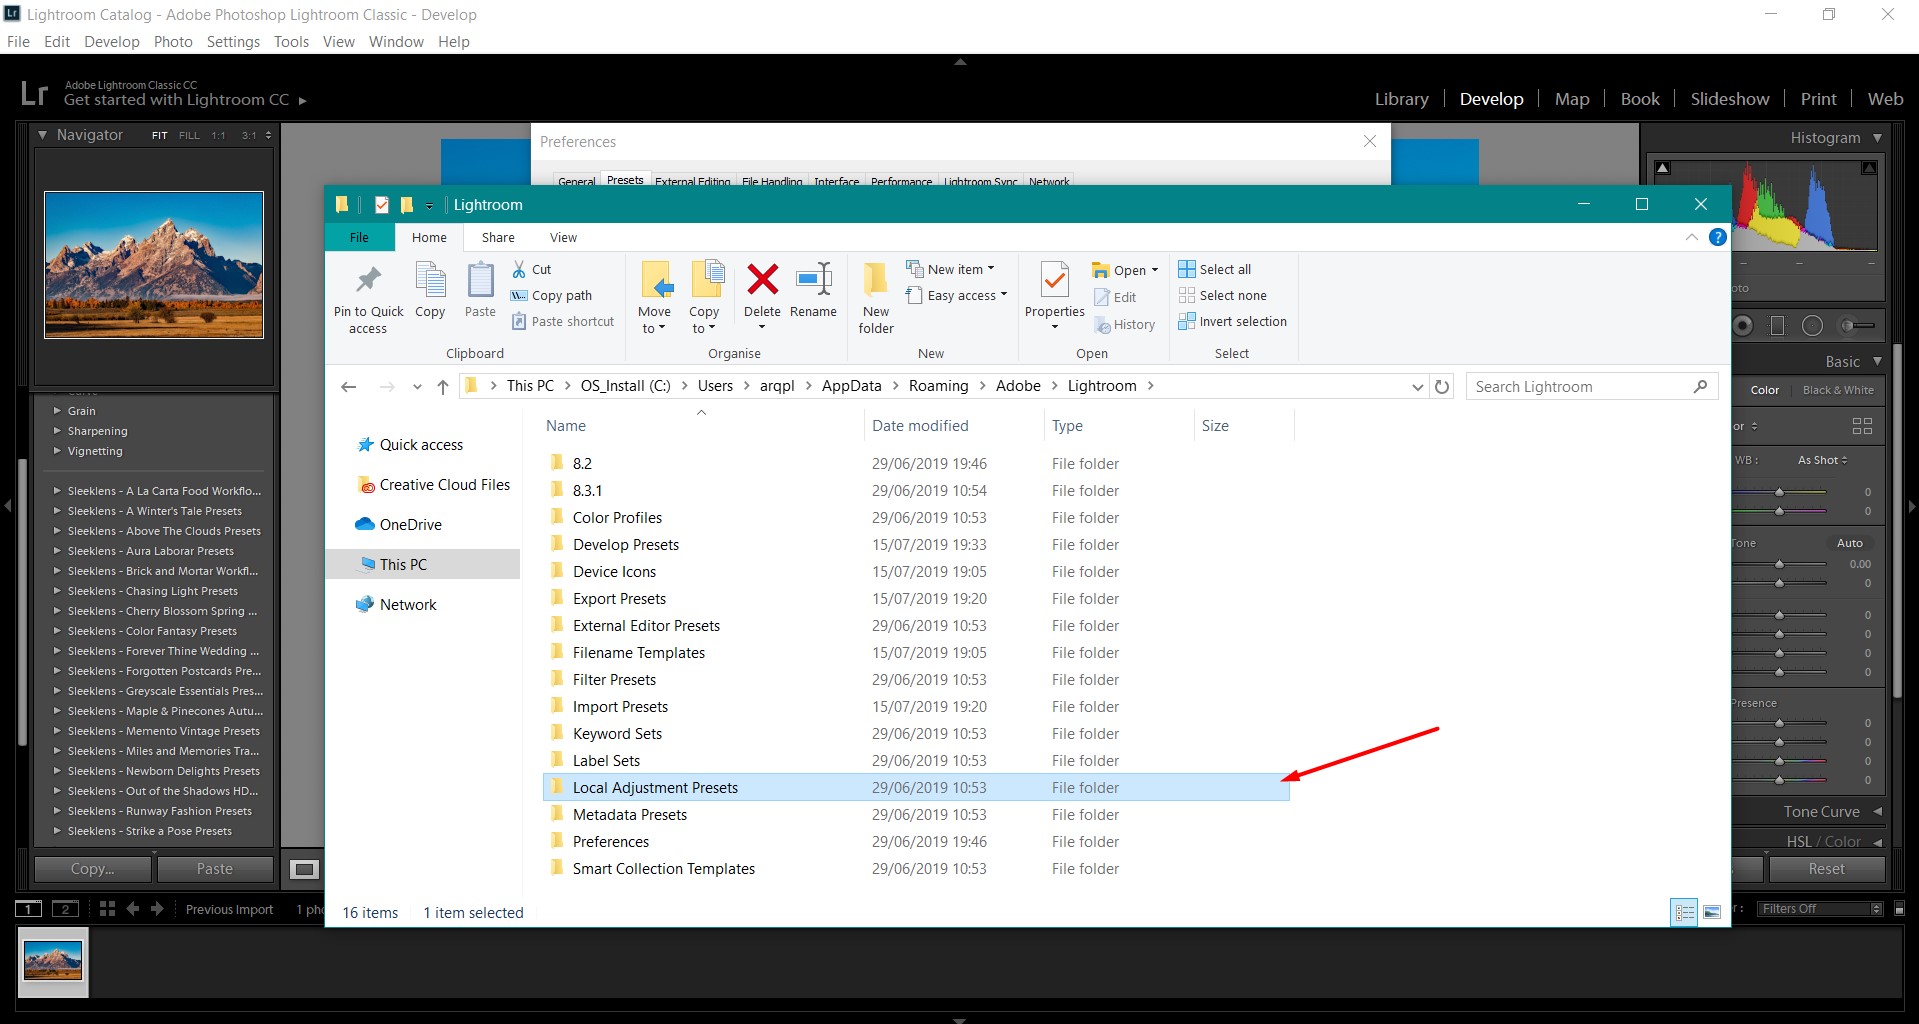
Then, double click on Lightroom. Then double click on Local Adjustment Presets.
For LR CC Classic
Go to Edit – Preferences. Switch to the Presets tab and click on “Show Lightroom Develop Presets”
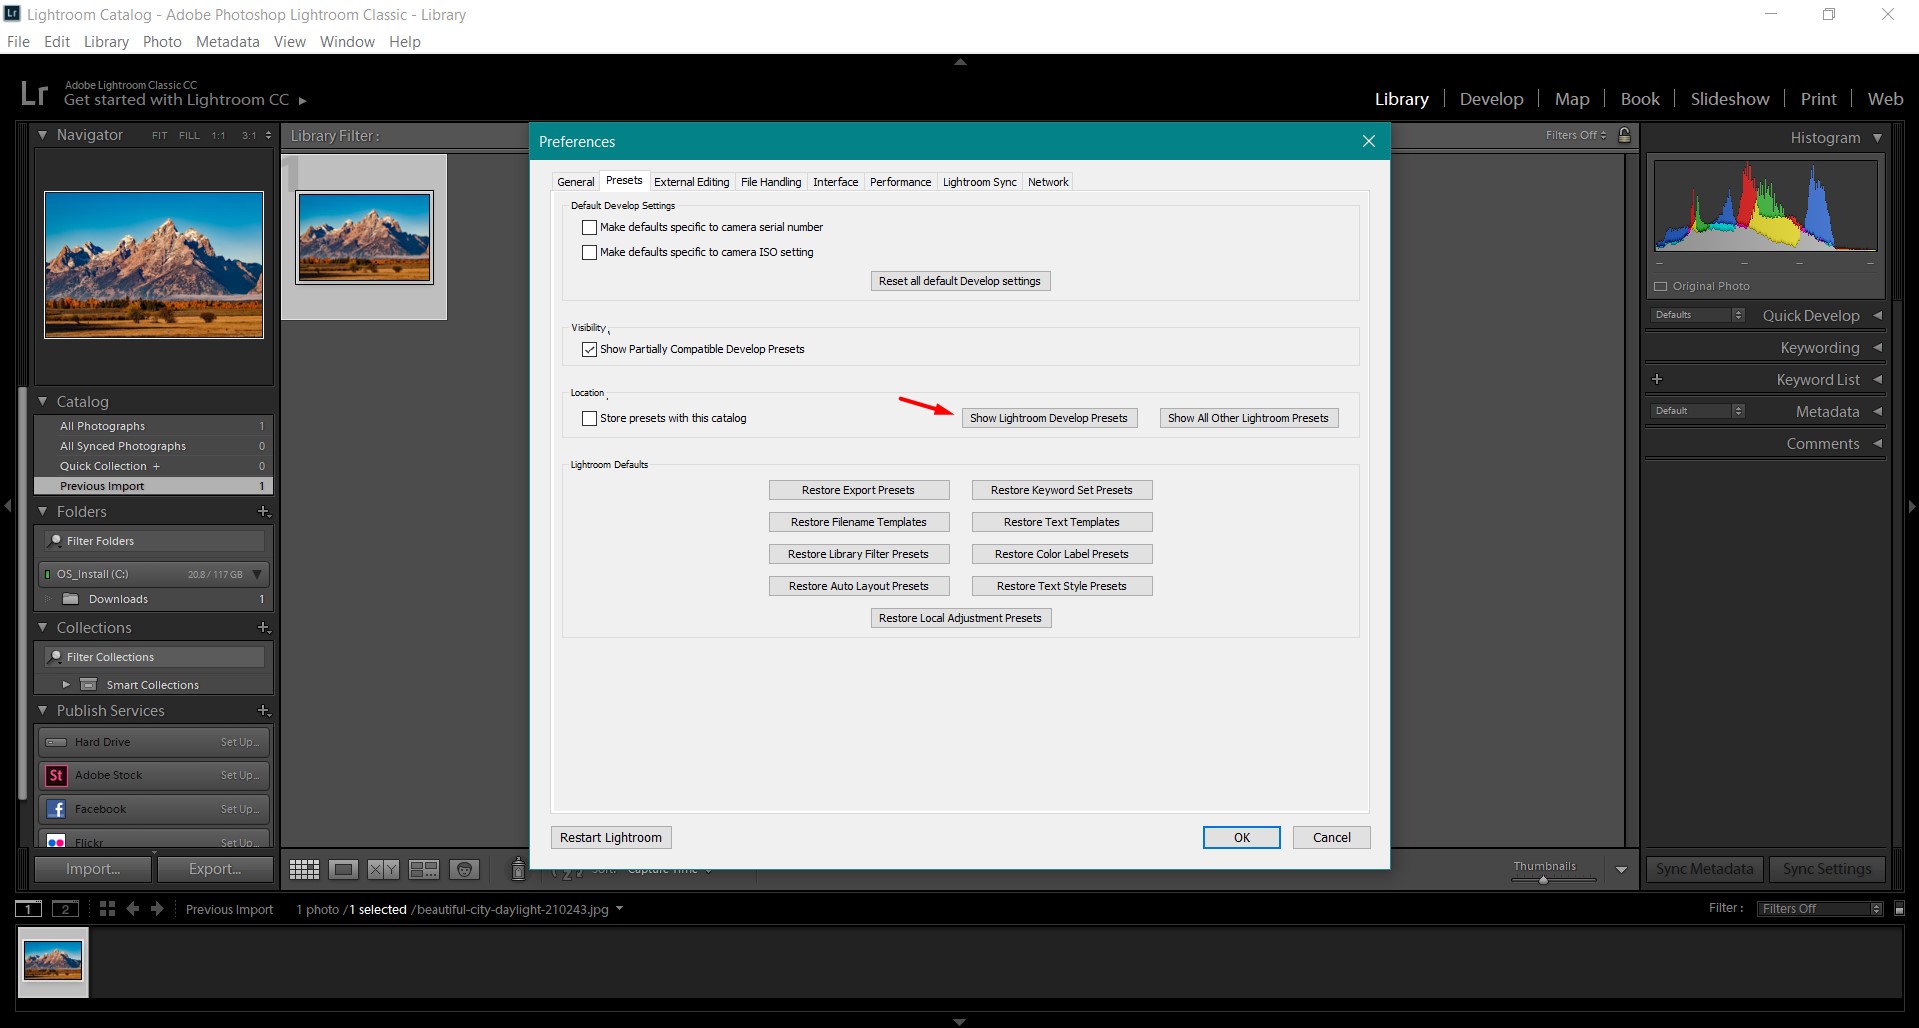
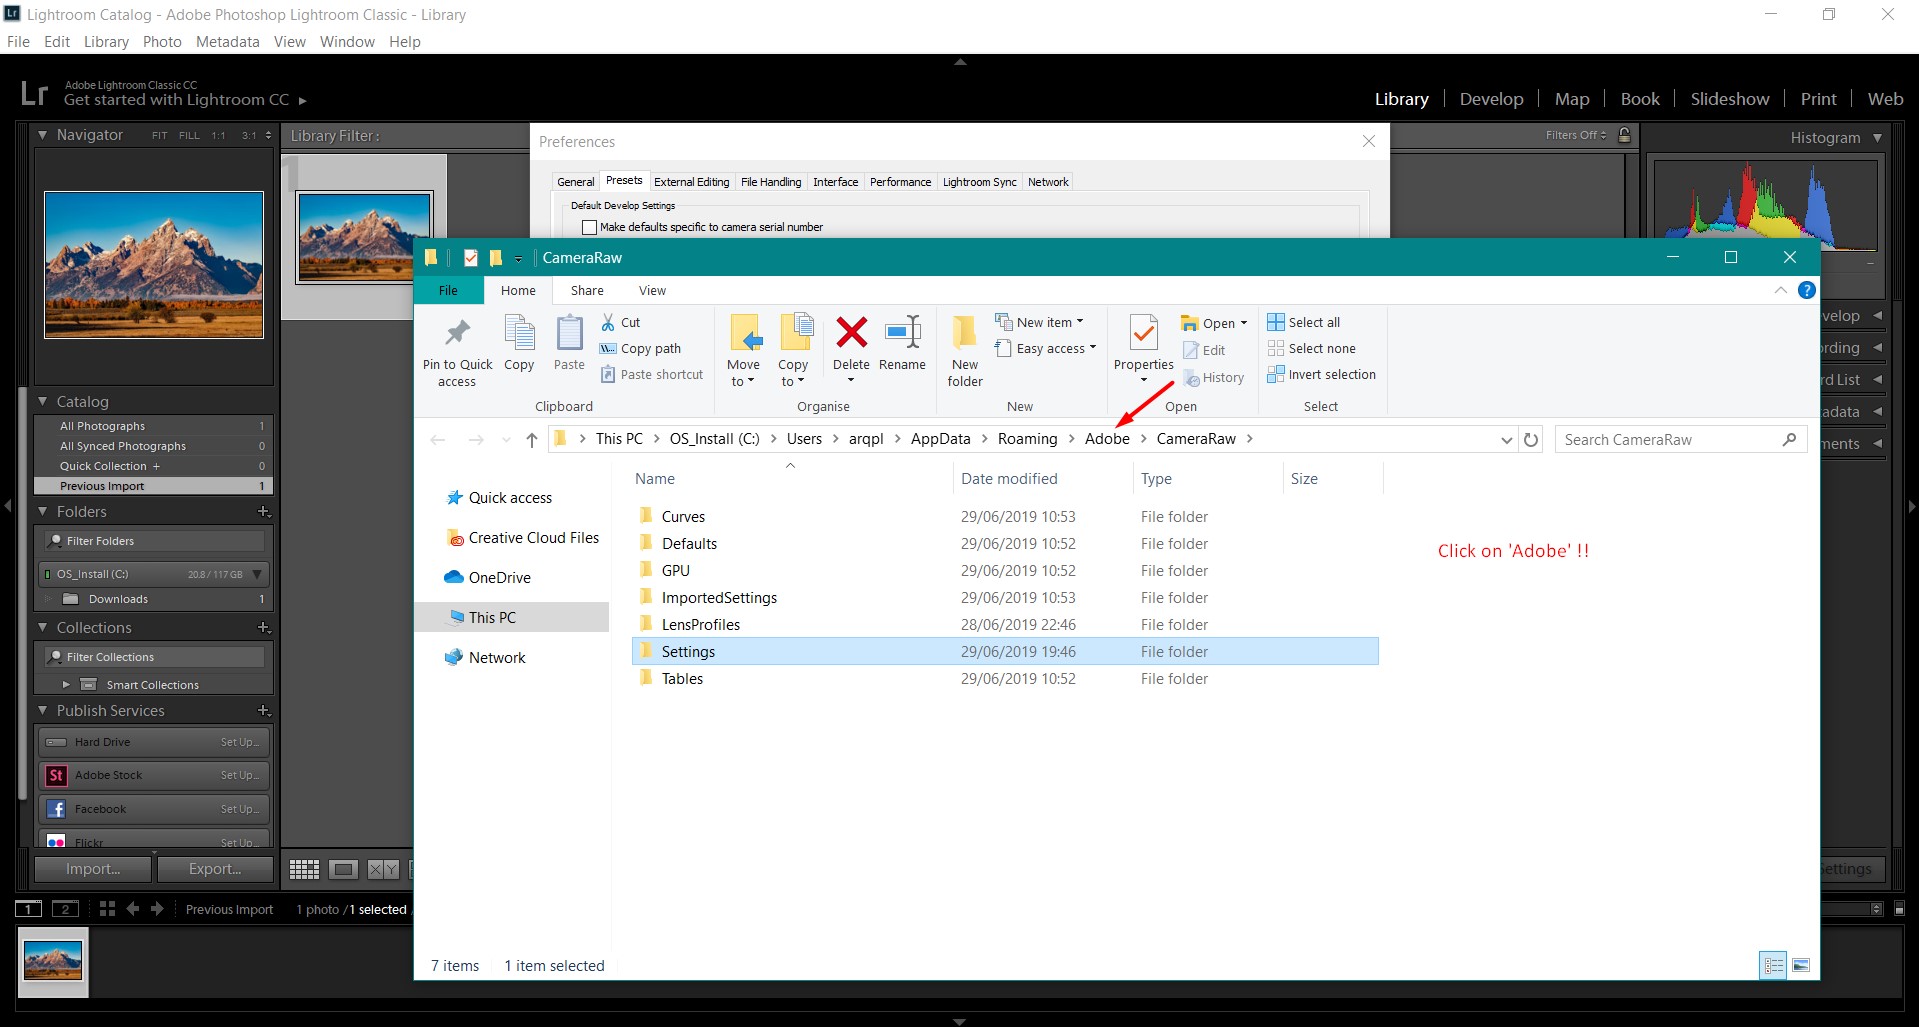
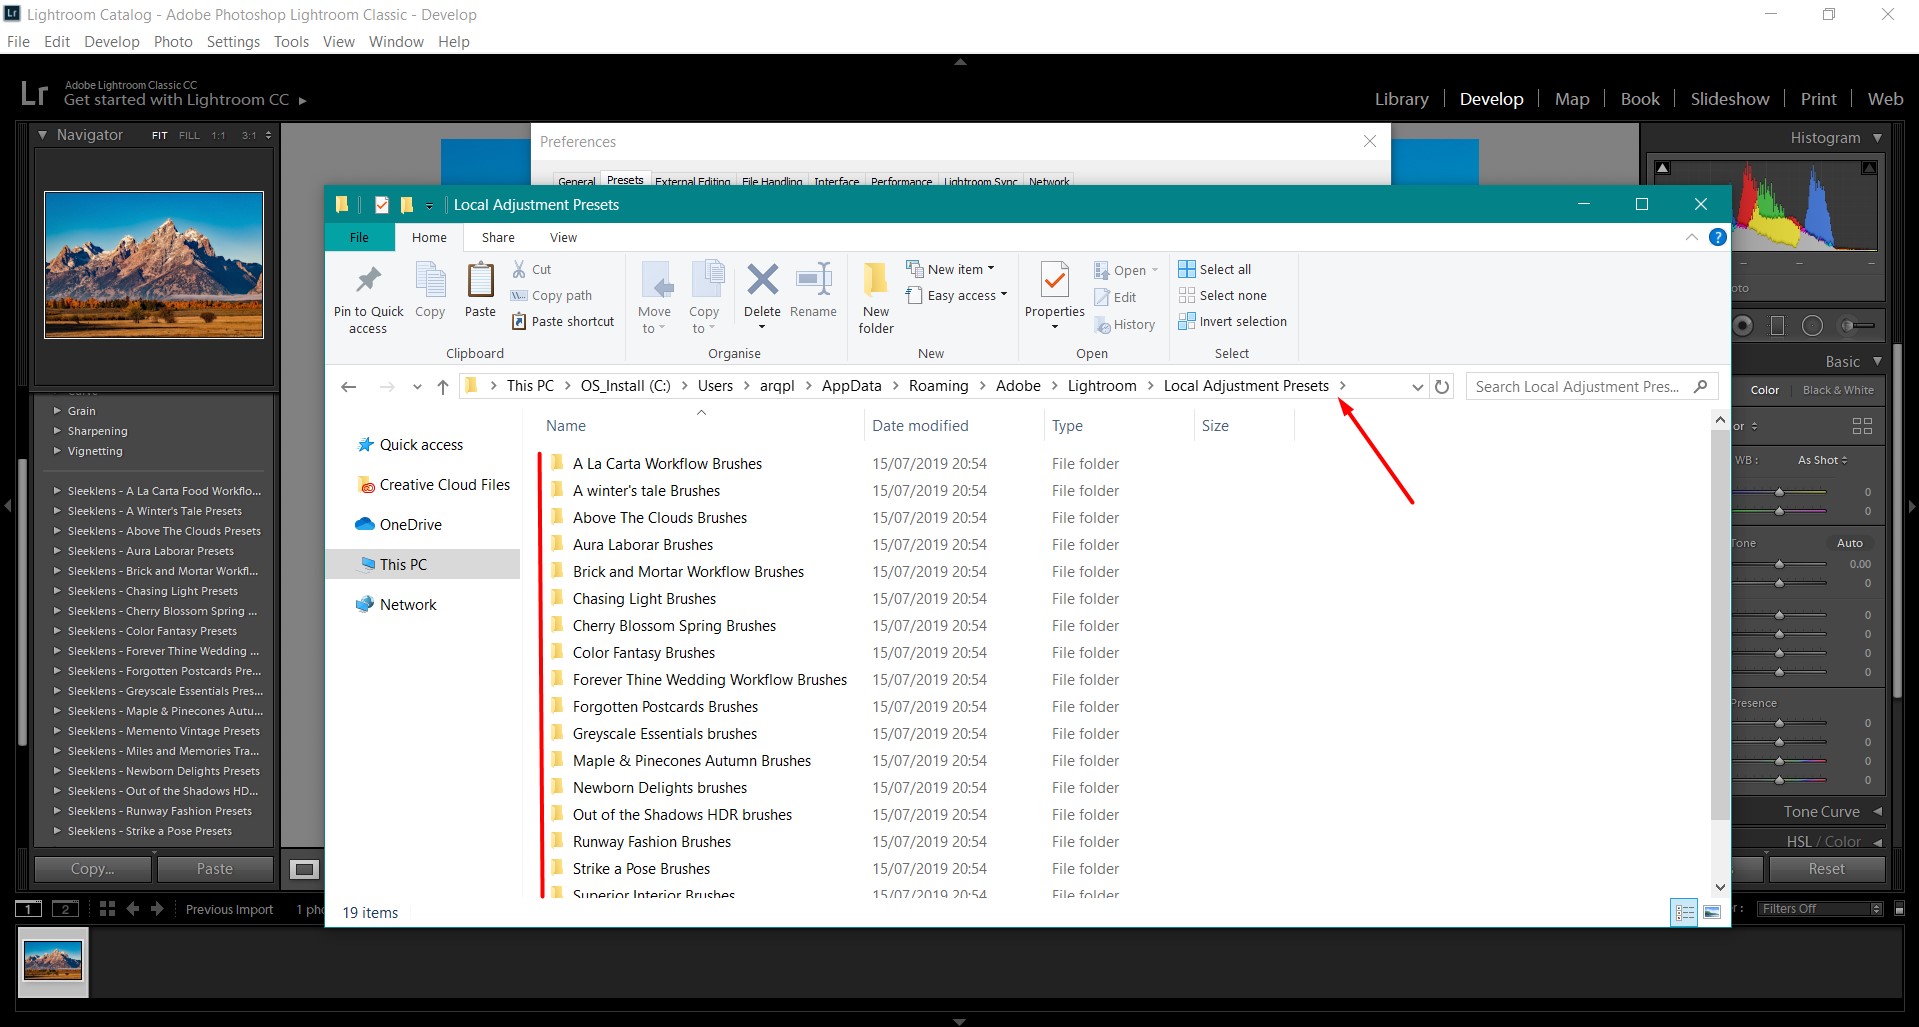
This will open the \CameraRaw\ folder. So, now you need to go back to Lightroom’s root folder to locate the Local Adjustment Presets folder.
Double-click the ‘Lightroom’ folder
Double-click ‘Local Adjustment Presets’ folder
You can also open the folder named “Local Adjustment Presets” in the following location:
C:\Users\<Username>\AppData\Roaming\Adobe\Lightroom
6. Paste your brushes inside that folder with CTRL+V
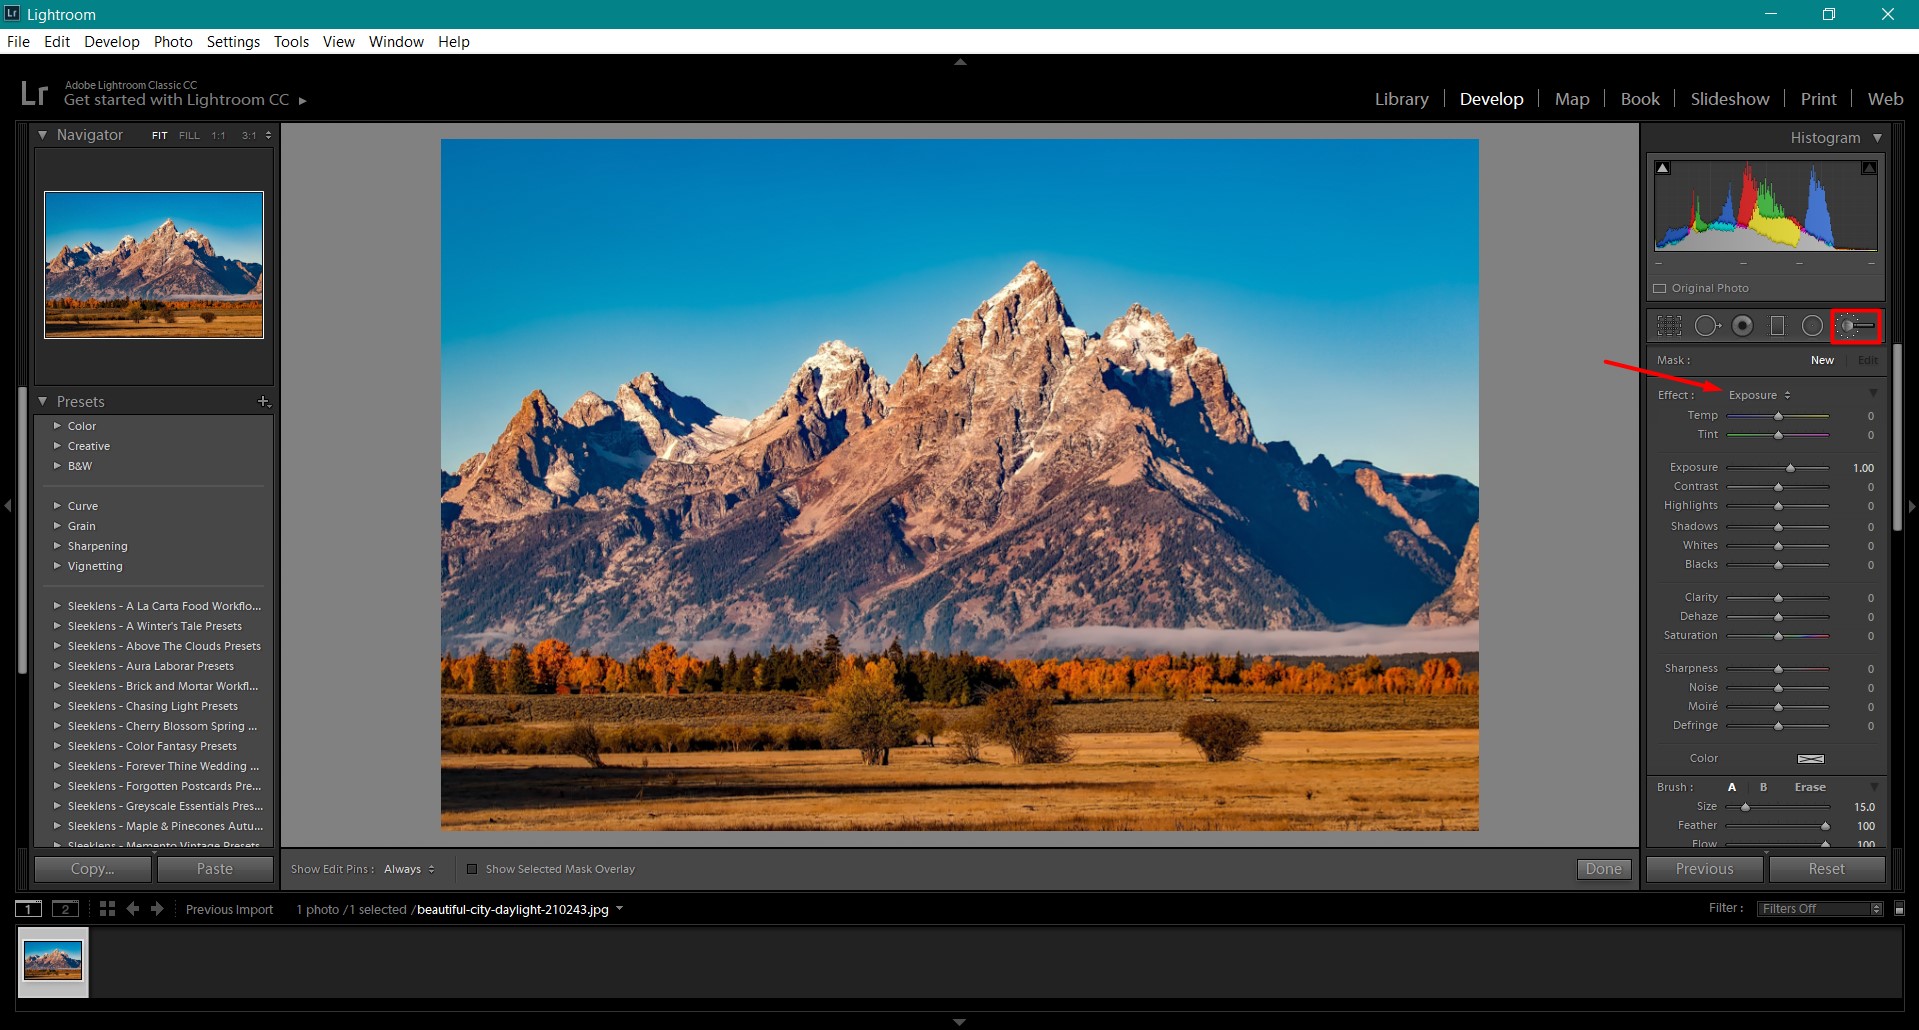
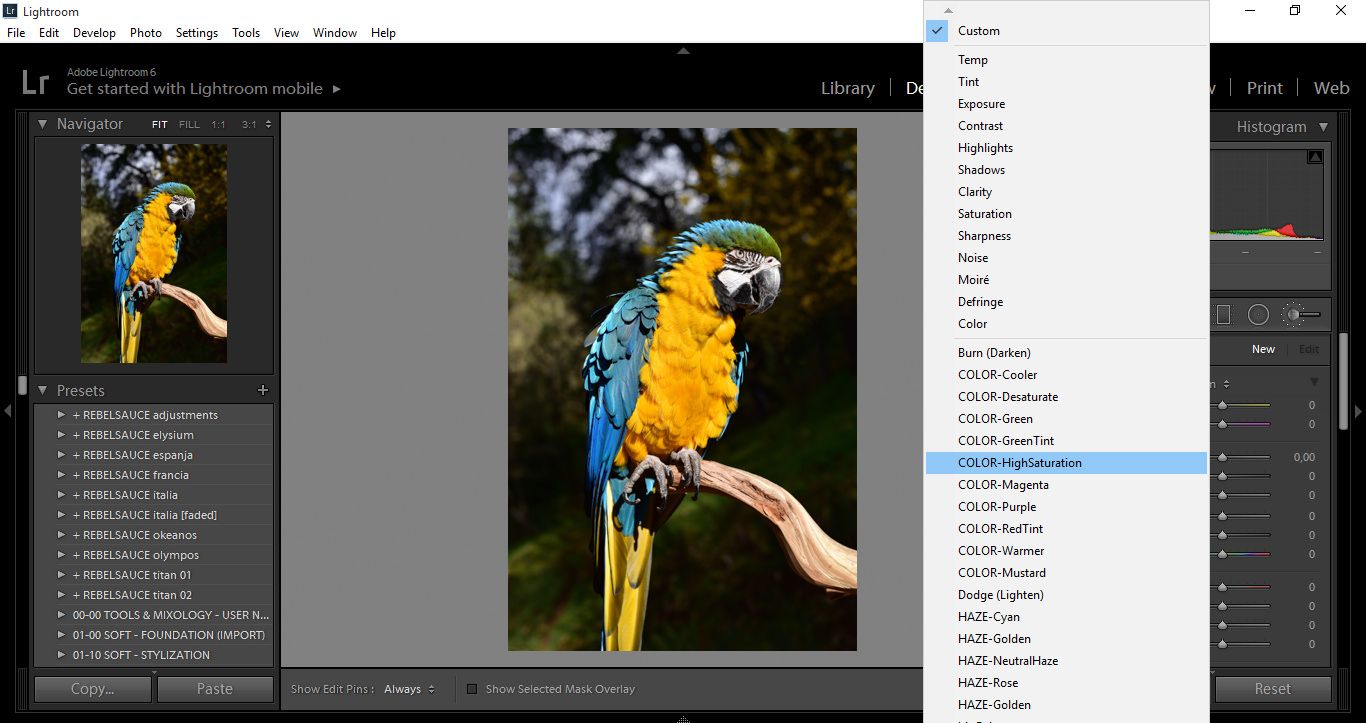
7. Restart Lightroom and go to the Adjustment Brush tool section. After activating it, click where it says Effect: Exposure. This will open up the option for loading new brushes; select the brush you want to use for your job.
Mac OSX Users
For LR CC Classic 7.3 onwards please refer to the Windows instructions from step 5 onwards.
Common mistakes when installing Lightroom Brushes
Sometimes when new Brushes don’t work or if you can’t find their location inside Lightroom’s UI, it is usually because a step may have been missed during the installation process. Let’s go through some of the most common issues found when installing Brushes.
Not extracting the brushes: Commonly, new users may simply download the brushes and place them inside Lightroom’s folder structure, instead of actually extracting the appropriate files; especially when the file is packed as a .rar, but the user doesn’t have a file extractor that supports .rar files, becoming masked as common RAW images for the inexperienced user.
Encrypted files: Sometimes you can’t use your brushes because they may be encrypted, therefore you’re not able to access them. In order to fix this issue all you need to do is right-click on your brushes file, then select Properties. Go to Advanced and uncheck the last box about encrypting content for data protection. Now you will be able to use your brushes.
Brushes being too old that they don’t apply to new Lightroom tools: Remember that in Lightroom 4 and newer, Adobe made huge updates in regards to tools. Fill Light is not a slider anymore, and older Brushes valid for LR 2-3 won’t work in Lightroom 5-6.
Be sure to backup your Brush Library!
As you may know, viruses never ask for an invitation, and often they bother us at the most inconvenient times. Even though it is recommended to work with a different partition of your hard drive for data, Lightroom’s Brush Library is contained in the root folder of the Lightroom installation. This means that, in the event that your PC is infected by a virus and the operating system cannot boot, you are likely to lose your complete Brush library.
Keep a backup of your preset library on an external memory drive; either a hard drive or even a good pendrive, as the files won’t occupy that much space in regards to MB.
Enjoy your product and keep editing! And if you like handmade professional lightroom presets and photoshop actions, you can visit Sleeklens.com. For further technical questions/answers and tutorials please refer to our Facebook site:
Sleeklens.com
Please verify your software version before proceeding.
 I’ve verified my software version


 Facebook
 Google +