How to Post Process a Beach Scene with Lightroomwww.sleeklens.com
A beach scene generally consists of the colours yellow and blue in a large or, in some cases the entire part of the photograph. What we will be looking into in this post is one particular way of processing a photograph of a beach scene in Lightroom.
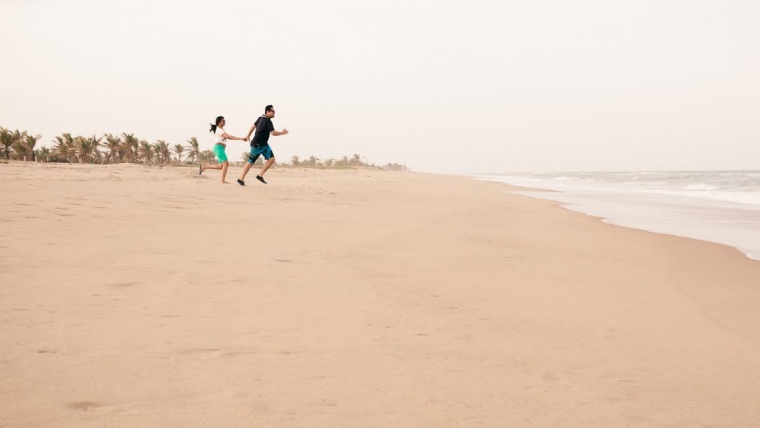
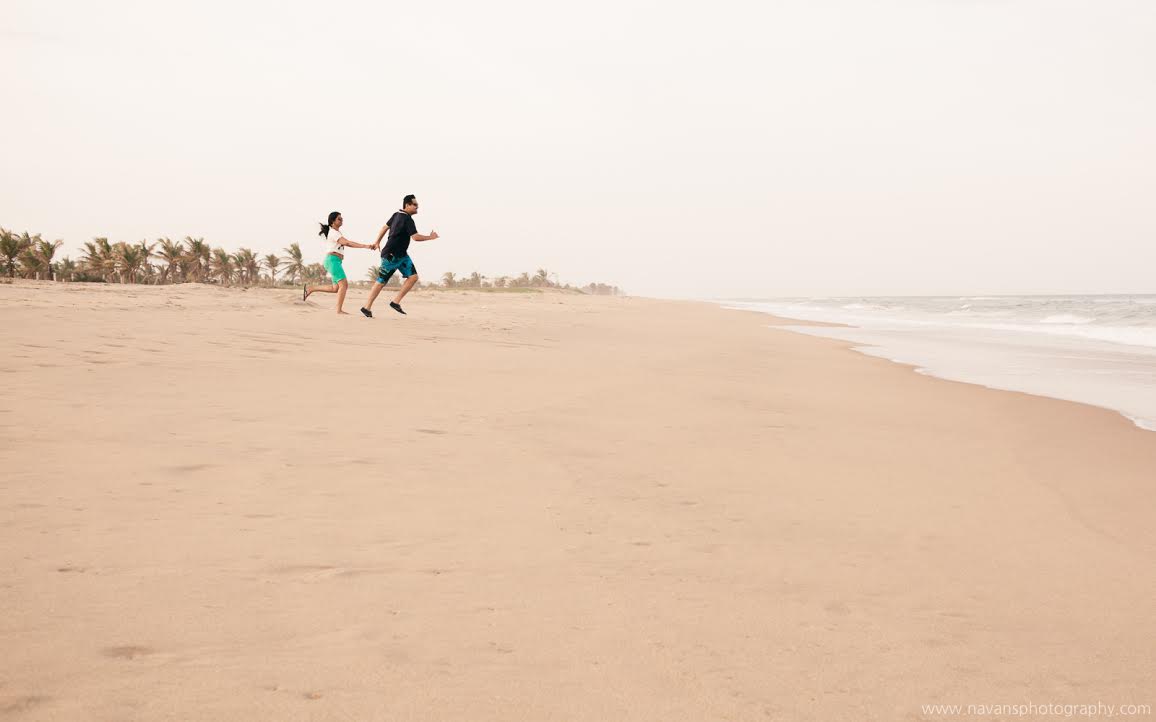
The image below was shot at a beach in Chennai on a pre-wedding shoot.
This is an SOOC (Straight Out Of Camera) taken with the following settings:
The Shutter speed was at a speed of 1/250 secs, the Aperture was at f/6.7 and the ISO was of 100. The lens used to capture the image was a Canon 35mm f/1.4 L USM. The make of the camera being Canon 5D MK III.
At taking a closer look at the SOOC, you will find it to be a little underexposed. You will also notice a small shift of frame that might come off as off balance while viewing as well. Before anything, the framing can be fixed first using the crop tool in Lightroom. By pressing the letter “R” from any module you can access the Develop module with the crop tool activated over the selected image. To know more about crop tool click the link here.
Having tilted the image very slightly and cropped off a little bit as well to enhance the subject’s presence in the photograph, you will observe that the photograph is flat on all other portions except the part of the subject, that is, the subject that is being dealt with seems more highlighted than before. Also, the costume colours suit the whole idea of the beach scene.
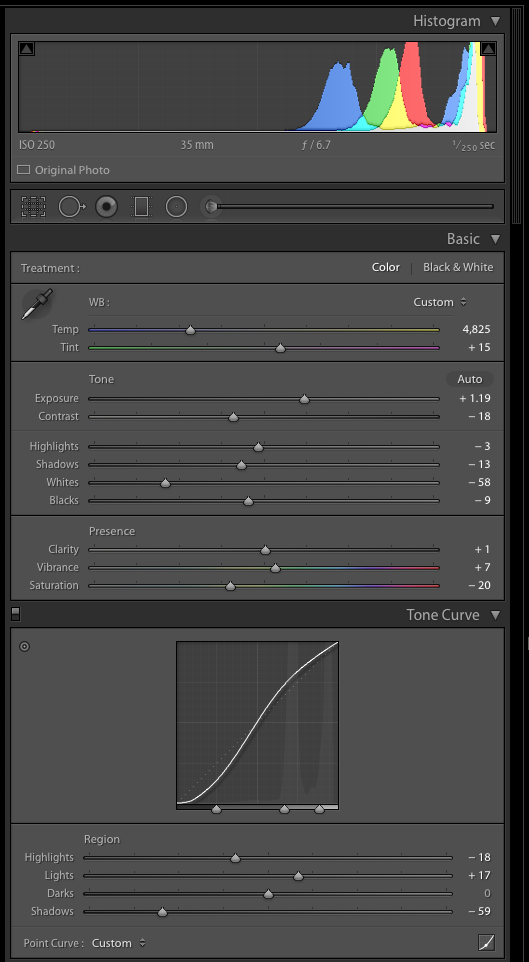
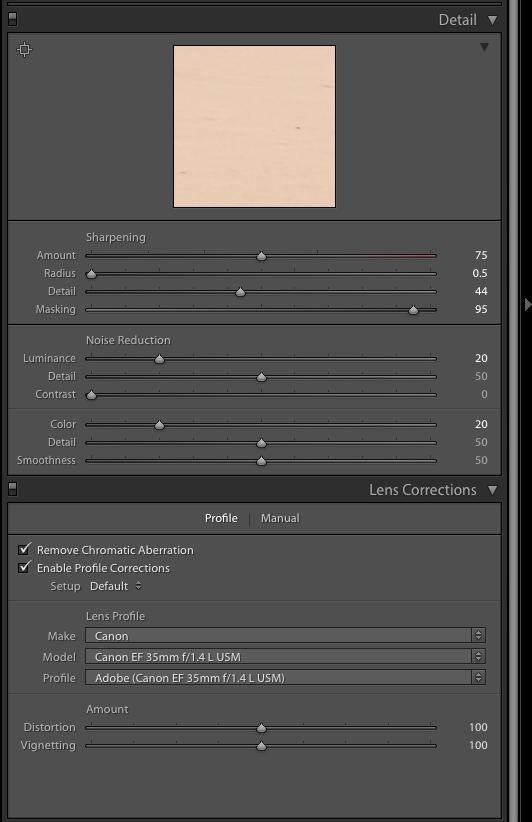
The next thing to fix about the image is its exposure. This can be done with a help of the Histogram that is a graphical image that is seen on the top right corner of the screen in the Develop Module of Lightroom.
After this, the White Balance will require a little bit of an adjustment. This can be achieved using a WB slider in the Develop Module of Lightroom. Try not to particularly bring in any Blue tone or Yellow tone that frequently occur over here. The images below are from the Develop Module of Lightroom and will give you more insight about the adjustments that have been accommodated in the editing of the image. The important thing to note here is that the saturation slider has been brought down to a -20 to avoid any colour dominations that may otherwise occur. The White has also been brought down to reduce any bright over the exposed area which may disturb the wholeness of the photograph.
The Tone curve has to be adjusted accordingly as the contrast of the image needs to brought down. For this adjustment, the custom option has been used by us.
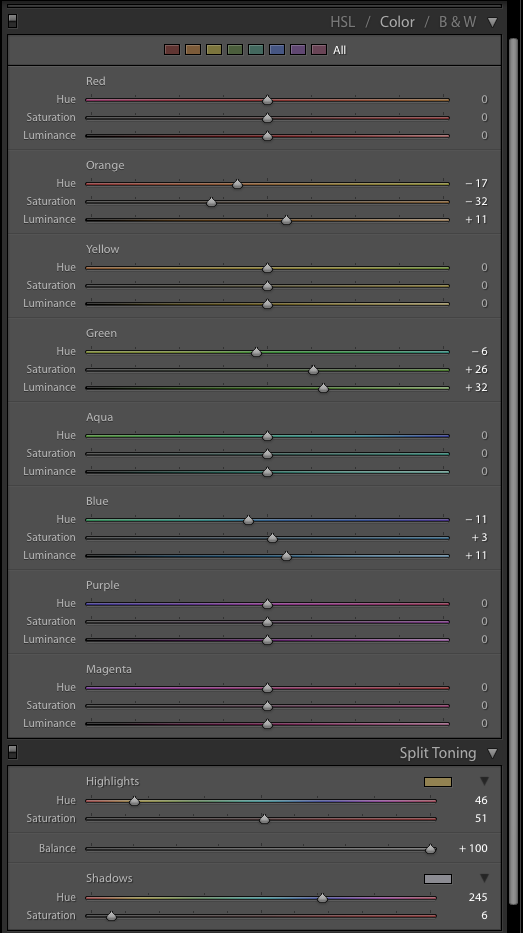
Next, important color adjustment that has to be corrected Color panel of the image where you can change the Hue, Saturation & Luminance of individual colours in the photograph. Lightroom has this feature for exactly 8 colours and they have the TAT(Target Adjustment Tool) in the HSL tab for all these 8 colours separately, so it is easier for the Lightroom user. To add a little finer colour tones across the image wherever necessary, we have used the Split toning tab. You can learn more about Split toning here.
Finally, applying the Noise reduction appropriately and adjusting the Sharpness of the image as you prefer will get you a finer version of the photograph.
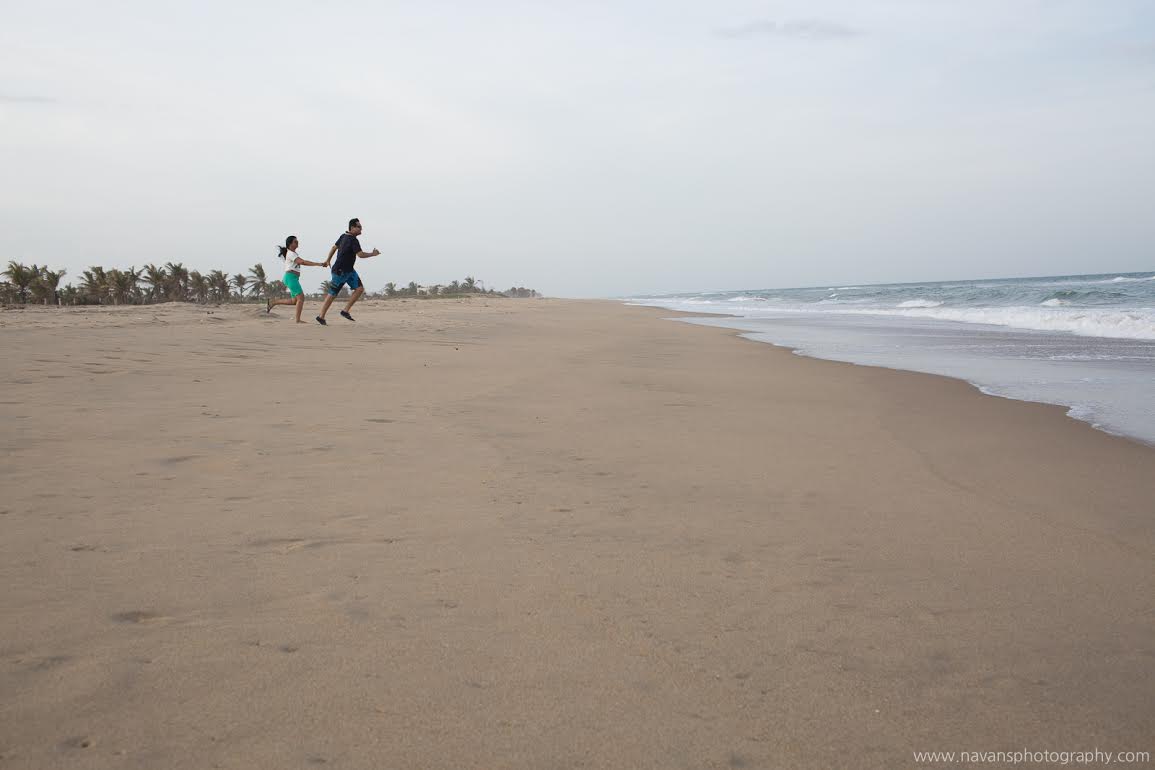
Once you apply the Lens profile, you have your desired image that you want to use. Here is the final image we ended up with after applying all the corrections that are mentioned above. It will provide you with better insight of the adjustments we have made to the image:You can try a hundred different combinations and methods in Lightroom using the various tools and options available to render you with a result that does not damage or even affect the original file as Lightroom is non-destructive editing program that does not affect the original. A separate file with your personal changes for that session can be saved as a separate document by using the virtual copy option.
Navaneethan Viswanathan (best known as Navanee Viswa) is a professional photographer based in Chennai. After completion of his Engineering and Management degrees he worked as a Civil Engineer for almost 10 years and slowly realized that his true passion was in building good photographs rather than building a structured construction. This made him quit his job and become a full time photographer to pursue his passion. Now he specializes in Candid Wedding photography primarily, he also does Product photography, and Industrial photography.
Navaneeth is a trekker and a traveller, who enjoys photographing things he comes across during his travels. He contributes articles regularly to photography websites like Digital Photography School , and he also maintains a photography blog which is followed by many. This blog has lots to talk about photography and the techniques involved. His works have been exhibited at the photography exhibition organized as part of Art Chennai 2012. Many of his works have been chosen as best entries in on-line galleries like One Eyeland . Navaneeth is also well known in the industry for his photography related workshops.


 Facebook
 Google +
Comments (0)
There are no comments yet.