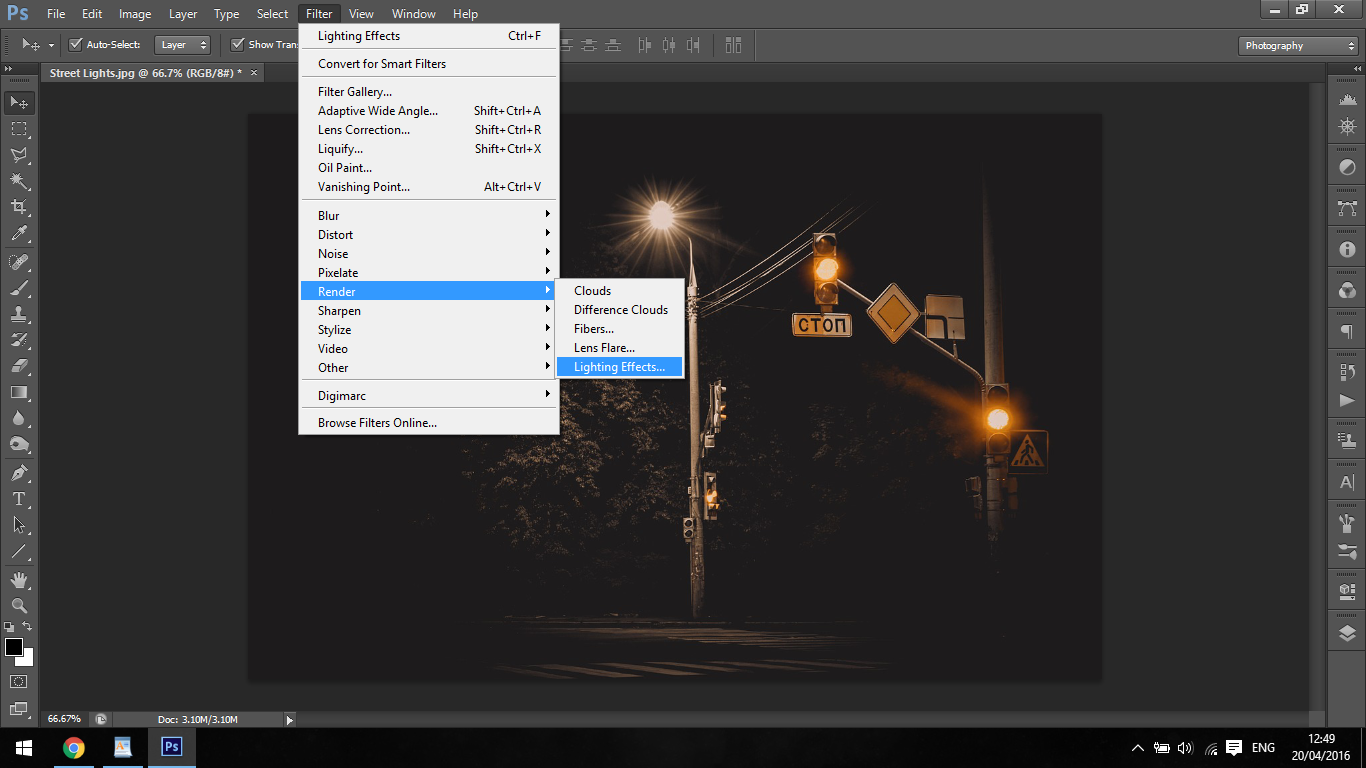
How to Use Lighting Effects in Photoshopwww.sleeklens.com
Hi all.
Today I’ll be showing you all the ins and outs of the Lighting Effects Tool in Photoshop.
At first I never used to mess with this feature as, I’ll be honest I kinda considered it cheating, which couldn’t be further from the truth, it was so silly of me to think that. I used to do all of my Lighting effects using blurs and layers, which took a long time to do. Instead, I could have just blasted out a few lighting effects and I would have cut the work time down by a great deal.
So that’s the first part of my tutorial, don’t get stuck in the mud and think something has to be this way or that way. If there is an option there that you can use, then by all means take full advantage of that. I mean, they made that feature on Photoshop for a reason and I see everyone using it, from beginners to professional, so 100% get on it and make the most out of it, because I was converted myself. It didn’t take too much to open my mind once I see Lighting effects being used by true professionals, it makes a huge difference when you see the big boys master a tool such as Lighting effects.
So now I’ll be walking you through all the various options, giving good examples for you to follow.
The three different types of lighting effects that we have are the Point light, Spot light and Infinite light.
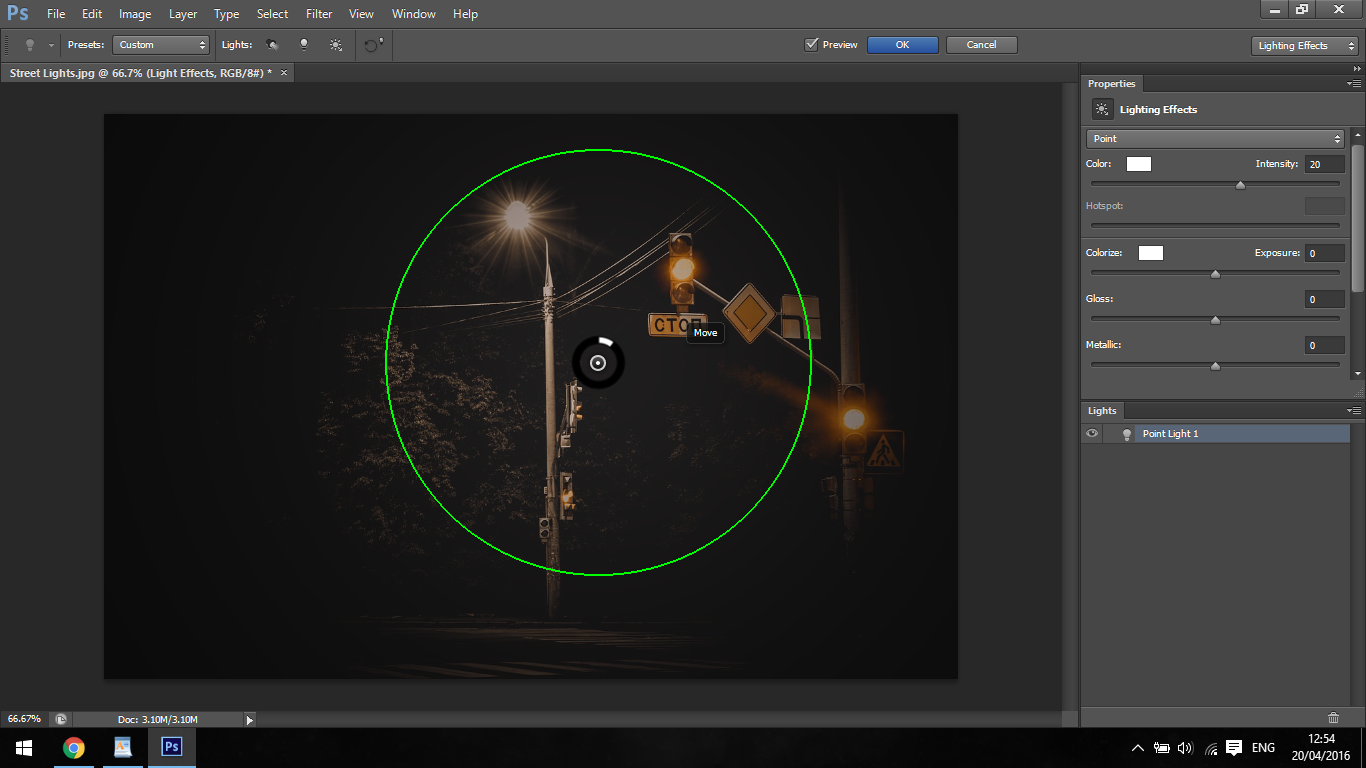
Starting with our Point Light. This works as if you were holding a torch and shining it on something.
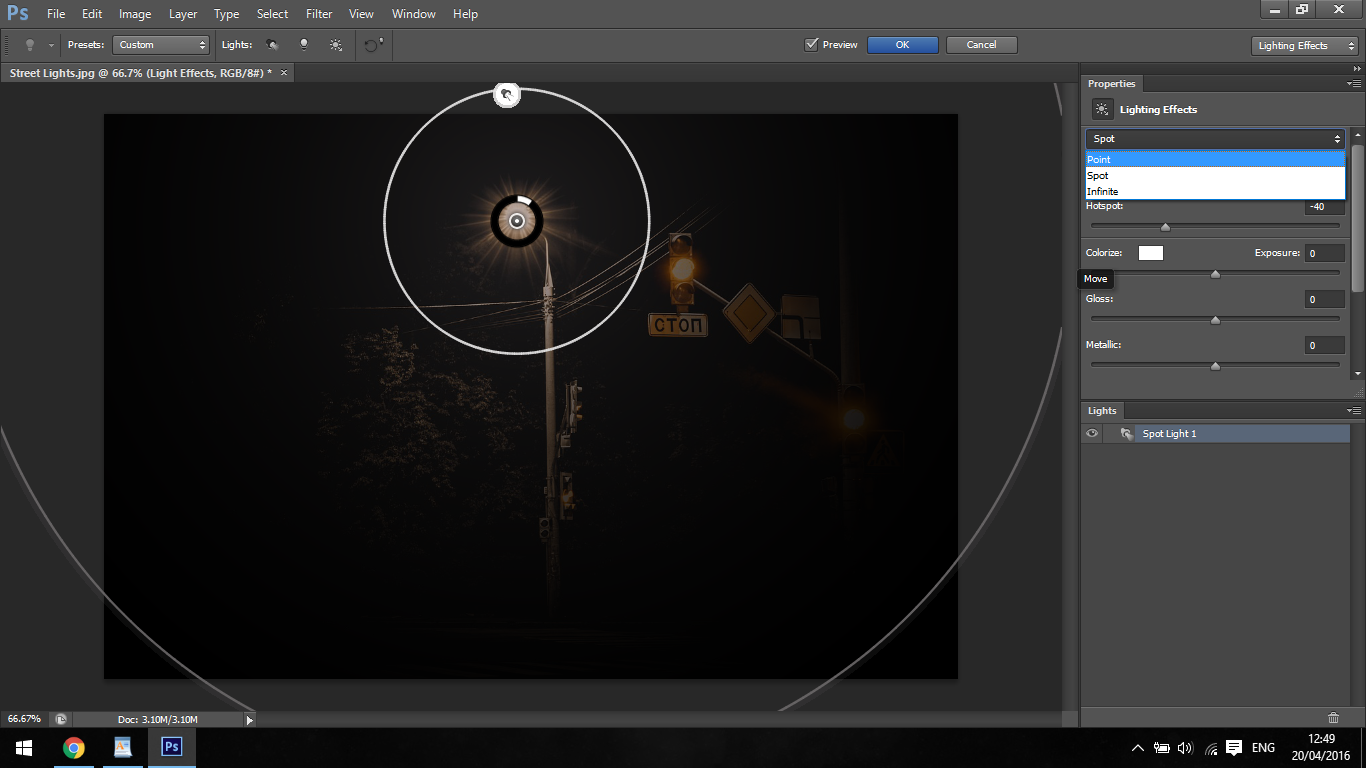
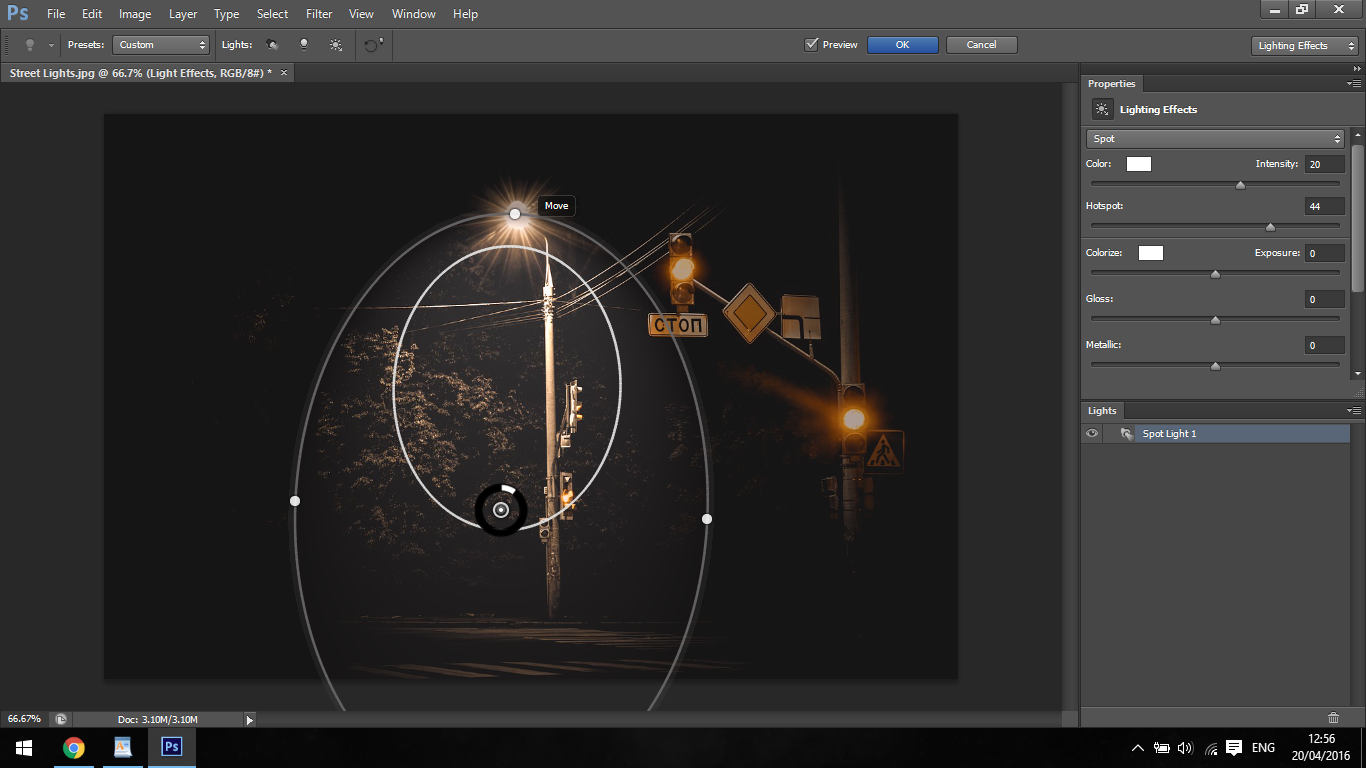
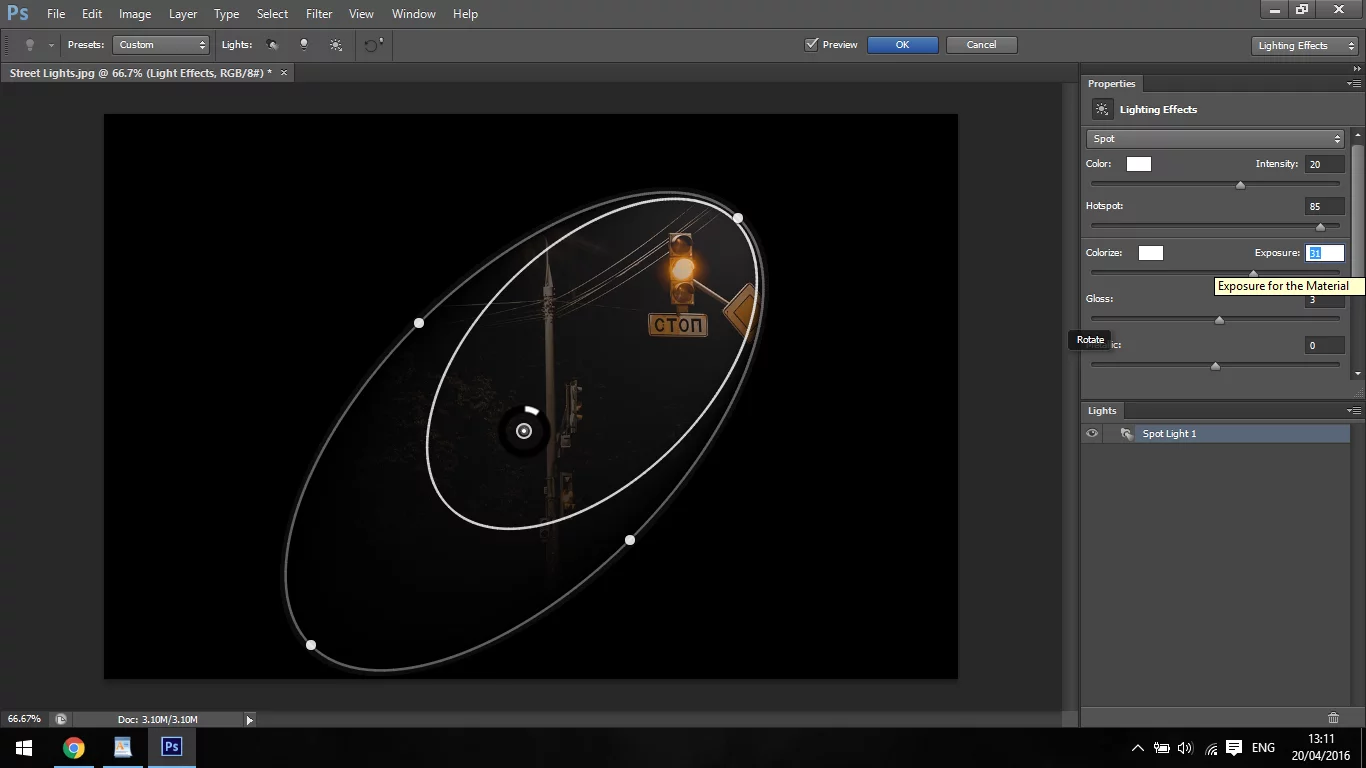
The next effect is the spot light. This light is coming from above, shining down on our subject. You can stretch out the circle around it, to increase the lighting effect, by clicking and pulling the points on the outside.
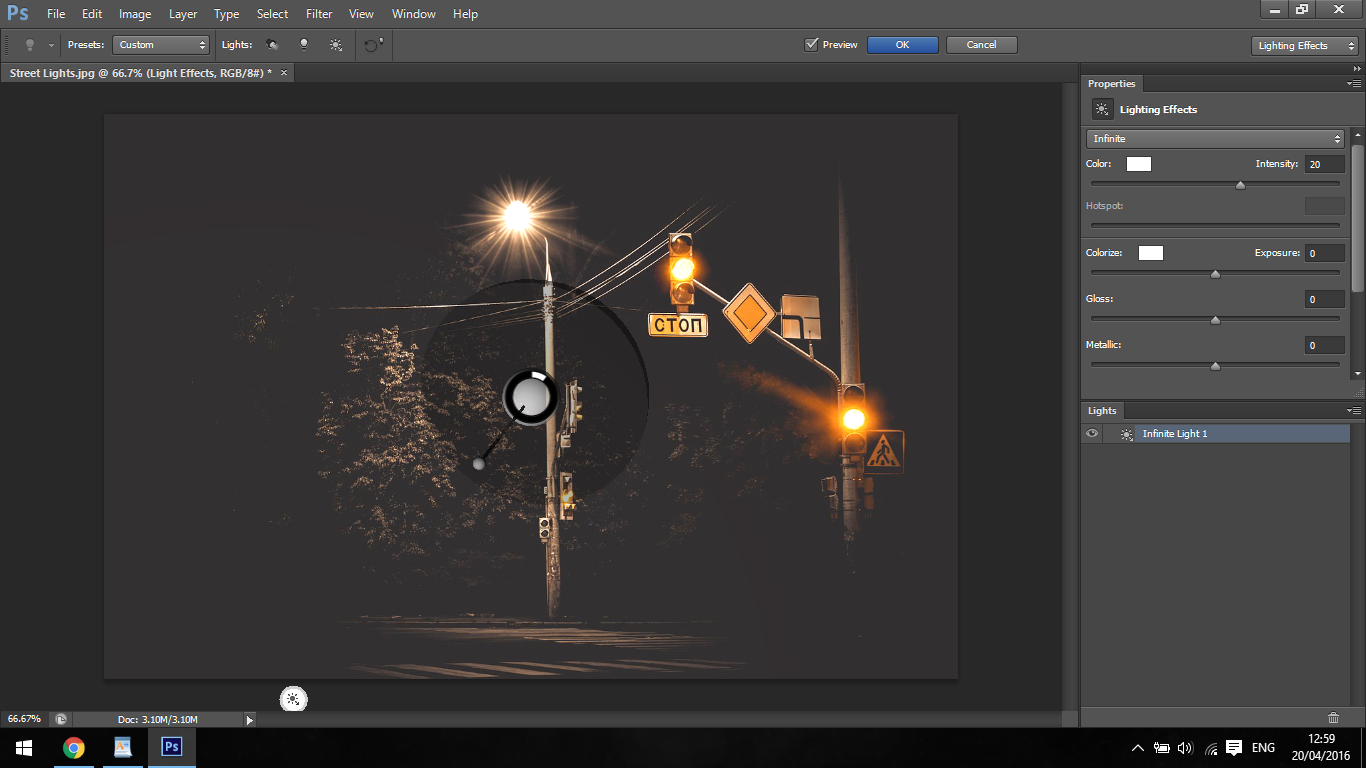
Last is the Infinite Light. So, imagine that it’s a huge torch, only with this tool you can move the angle of the beam around like in the examples below.
If you play with the settings, you can see that you are able to increase the intensity of the light beams back and forth, and so on.
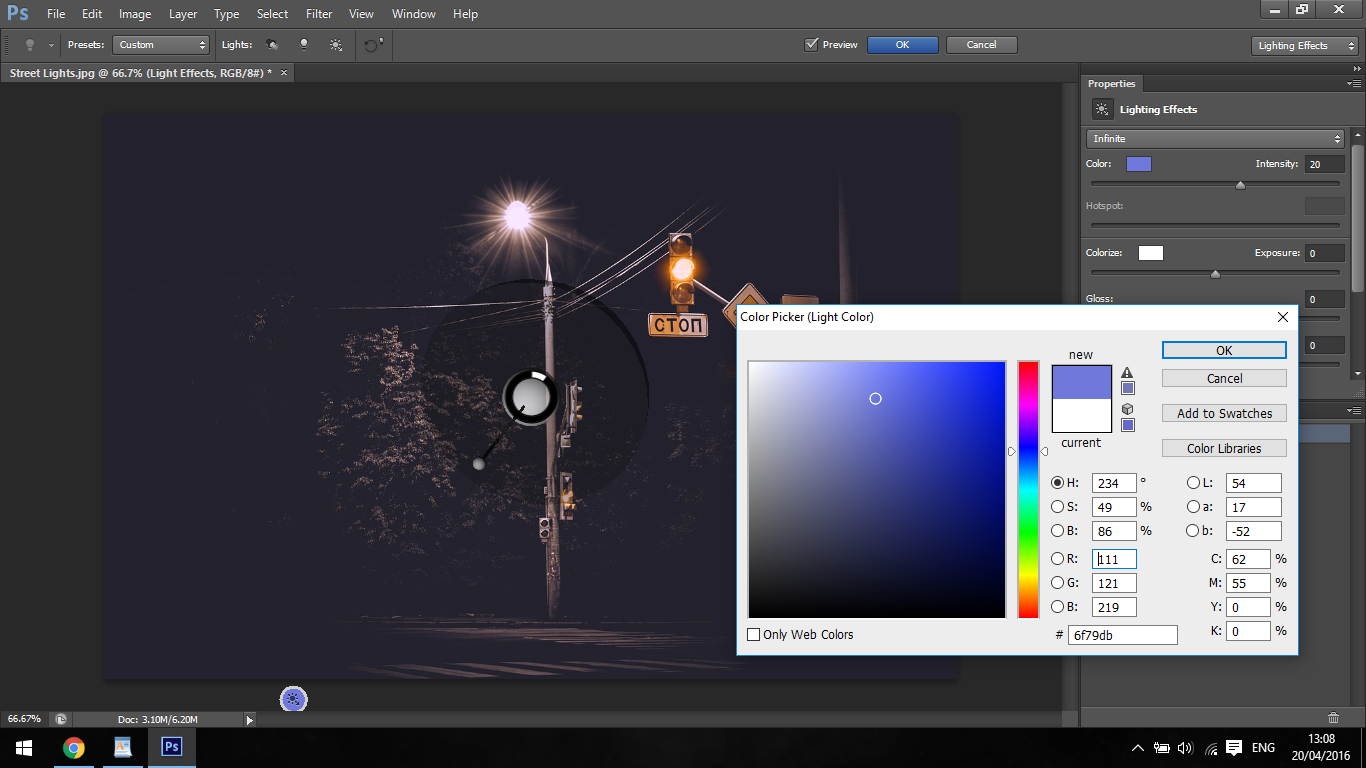
You may also change the colour of your Lighting Effect, so depending on your image you may want to use a different colour to best suit the light in your images, as it will not always be white light.
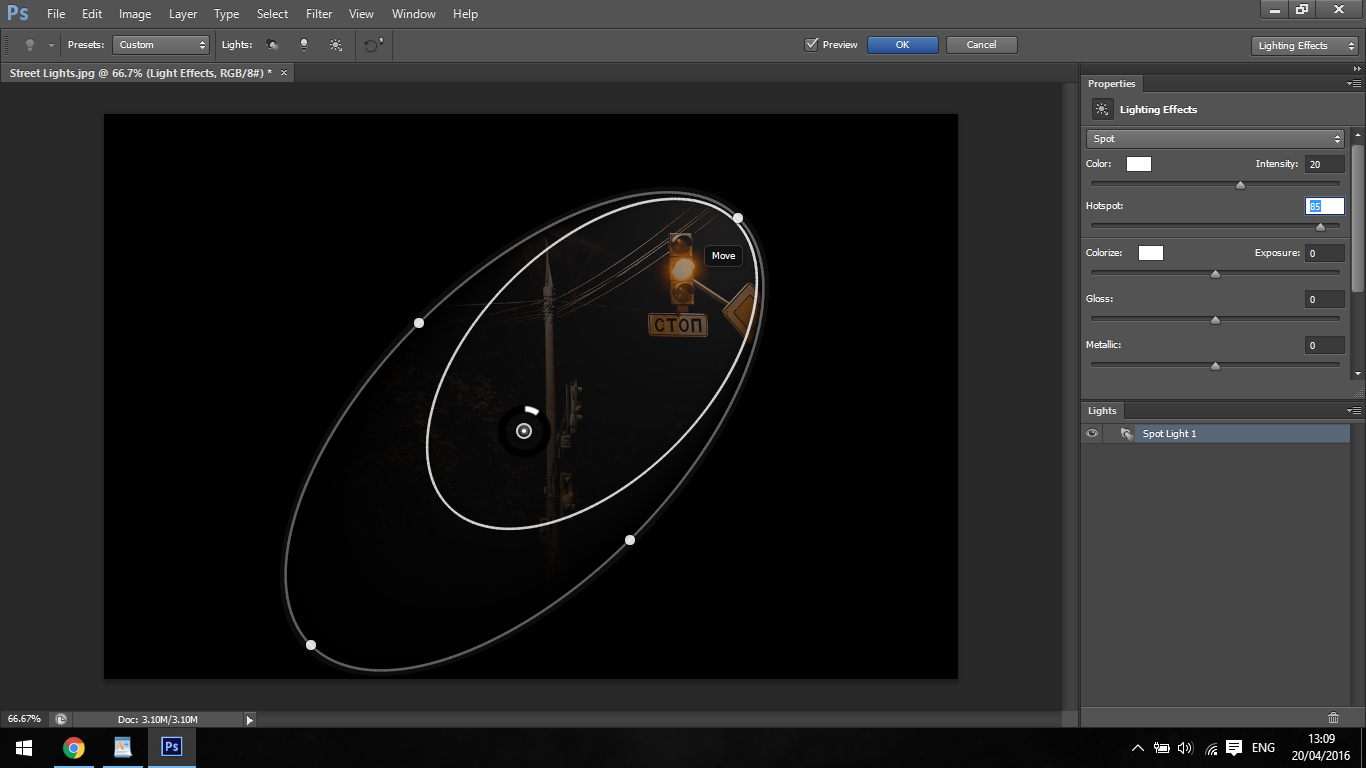
There is also what’s called a hot spot area. That slider will intensify the main beam of the light, so in other words the “bulb/globe” area of your lighting effect, or the source!
Exposure does to the lighting effect exactly what exposure would do in a normal camera, so if there isn’t enough our lighting effect will look grey and with too much, it will look completely blown out and far to white, resulting in a major loss of detail.
Either way isn’t good, so I tend to not even bother with this one.
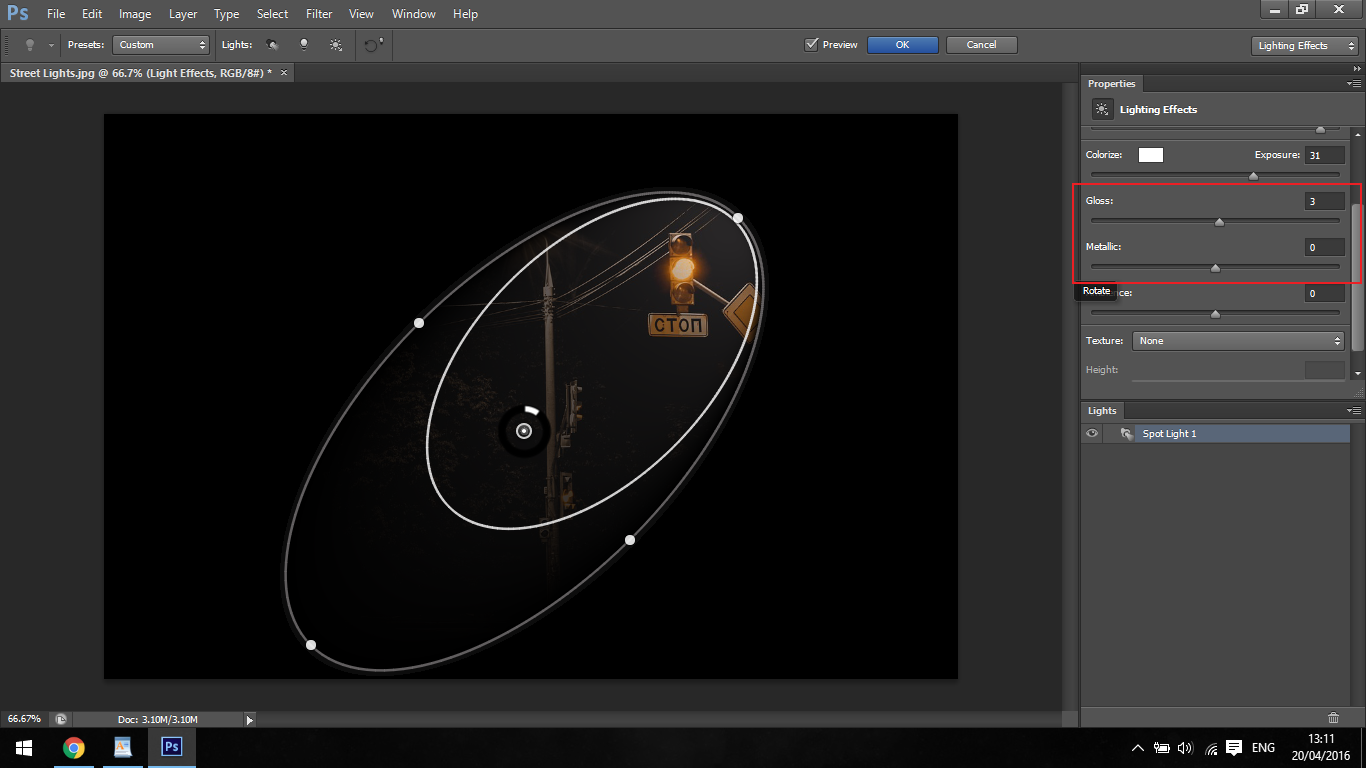
Next you’ll see gloss and metallic, I guess this is kind of self explanatory, but I’ll fill you in just in case.
With gloss and metallic, you would use these on plastic surfaces, cars and other things like that. You’ll want to match it with the material, so imagine what the light would look like on something and use the effect accordingly. If you look around now, wherever you are, you will see how light may fall on a wall, but if there was a metal door beside that the other lighting effect would use the metallic function.
You don’t have too, as I doubt many people would notice, but it’s an option and it’s there for you to use so hey, why not right?
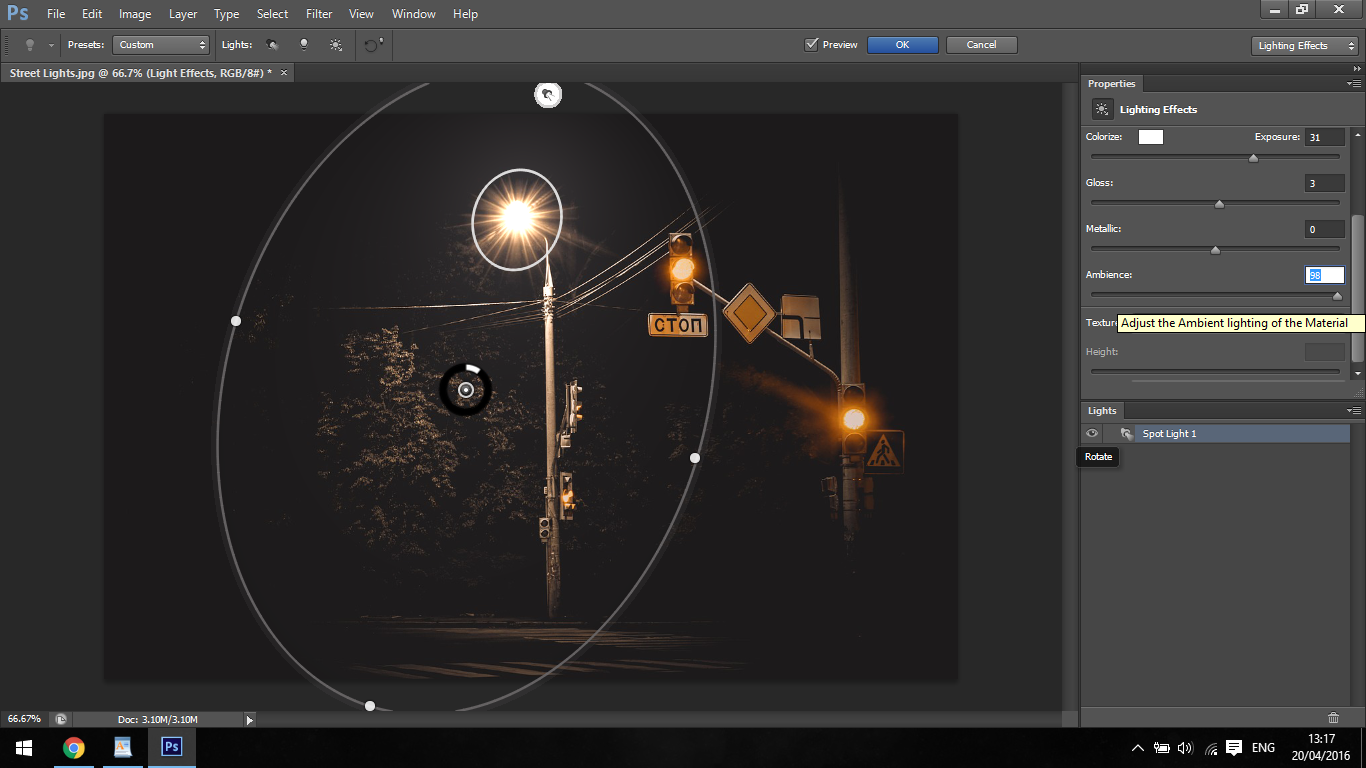
Last of the features is the ambiance. Think of your ambiance as your dimmer switch, say you had a nice picture of a living room with people sitting around and you wanted to create a smokey vintage feel. You could, after the other edits, use an ambient lighting effects on the lights to give the image a bit more atmosphere and expand the range of the light.
Ok, so by now you should be pretty familiar with the options you have at your disposal, so keep practicing and try to apply these to your skill set.
But what if you wish to create such lighting effects in a faster way? Yes it’s true this process gave you full control on how to manipulate the lighting, but when you need to process a large bulk of images, time is gold. For that very reason, we created a bundle of Overlays for Adobe Photoshop in order to attend those needs – Our Complete Collection of Lighting Overlays.
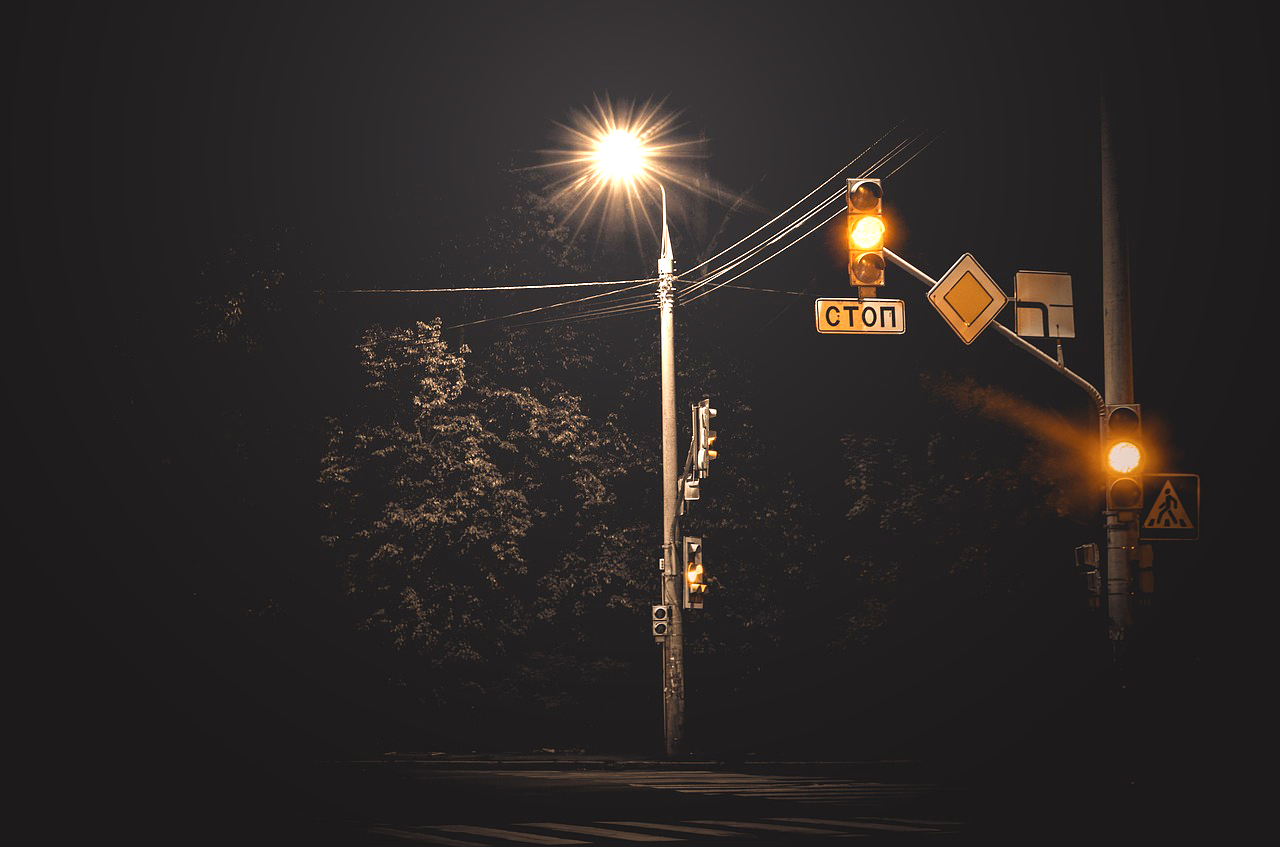
Not only for urban night photographs, but also for boosting natural lighting, these images work with Photoshop’s layer blending modes, not requiring any additional knowledge from you. Quick and effective: you only need to position them, resize and change layer blending mode and voilà! Take a look at this example below.
There are several reasons why someone might want to use Photoshop lighting effects. Photoshop lighting effects can add artsy, eye-catching elements to photos, such as gaussian blur, flare, ambient light effects, and glowing effects. Each cool lighting effect can completely transform a photo or add slight tweaks that make it more interesting.
Most importantly, Photoshop lighting effects can enhance natural lighting. Suppose you shoot outside on a partially cloudy day. Without enough sunlight, your photos might look overcast and dull. Add a Photoshop light effect, and you can instantly brighten a photo. Sometimes, it's necessary to shoot photos during the day, but what if you wanted nighttime lighting effects? Using a light effect in Photoshop can turn daytime photos into nighttime scenes with a few clicks.
You can experiment with the various lighting effects filters and tools. Each effect can bring an entirely new style to your photo. For instance, with some graphic design and photo editing skills, you can create a bokeh effect, select a specific light source to feature in your photo, or add light streaks to your image. Check out our Lightroom presets to make editing even easier.
Opacity in imagery refers to the transparency of an image, layer, or element. Opacity is important to understand when working with the layers panel, as each new layer can be as transparent as you need it to be. Lower opacities yield more transparent layers or elements, while higher opacities are less transparent. An opacity set to 100% will not allow any of the background to show through.
If you follow Lightroom tutorials for photo editing, you'll probably see opacity mentioned frequently, including in lighting effect tutorials. Some Photoshop lighting effects require multiple layers, and choosing the right opacity ensures that the background layer shows through properly.
To adjust the opacity of a layer in Adobe Photoshop, first select the layer you'd like to edit. Then, click the drop-down arrow next to the Opacity box. Drag the slider to the appropriate opacity, which you can see the change happen in real-time. You can do the same with the background layer – often the original image – by clicking on it and editing its opacity.
Whether you're working with older versions of Photoshop, like Photoshop CS5 or Photoshop CC, or its latest version, you can experiment with different Photoshop lighting effects that move light around your photo. Point, spot, and infinite light are three of the most popular features to add lighting that highlights parts of your photo:
Point light: Point light works similarly to a light bulb, which points light in multiple directions. When you use a point light effect, the lighting will change depending on where you place the point light. Adding point light effects close to one area of an image will brighten the spots closest to the light.
Spot light: A spot light effect casts lighting on one specific area of a photo to bring attention to it, like a plant sitting on a desk or a product against a black background.
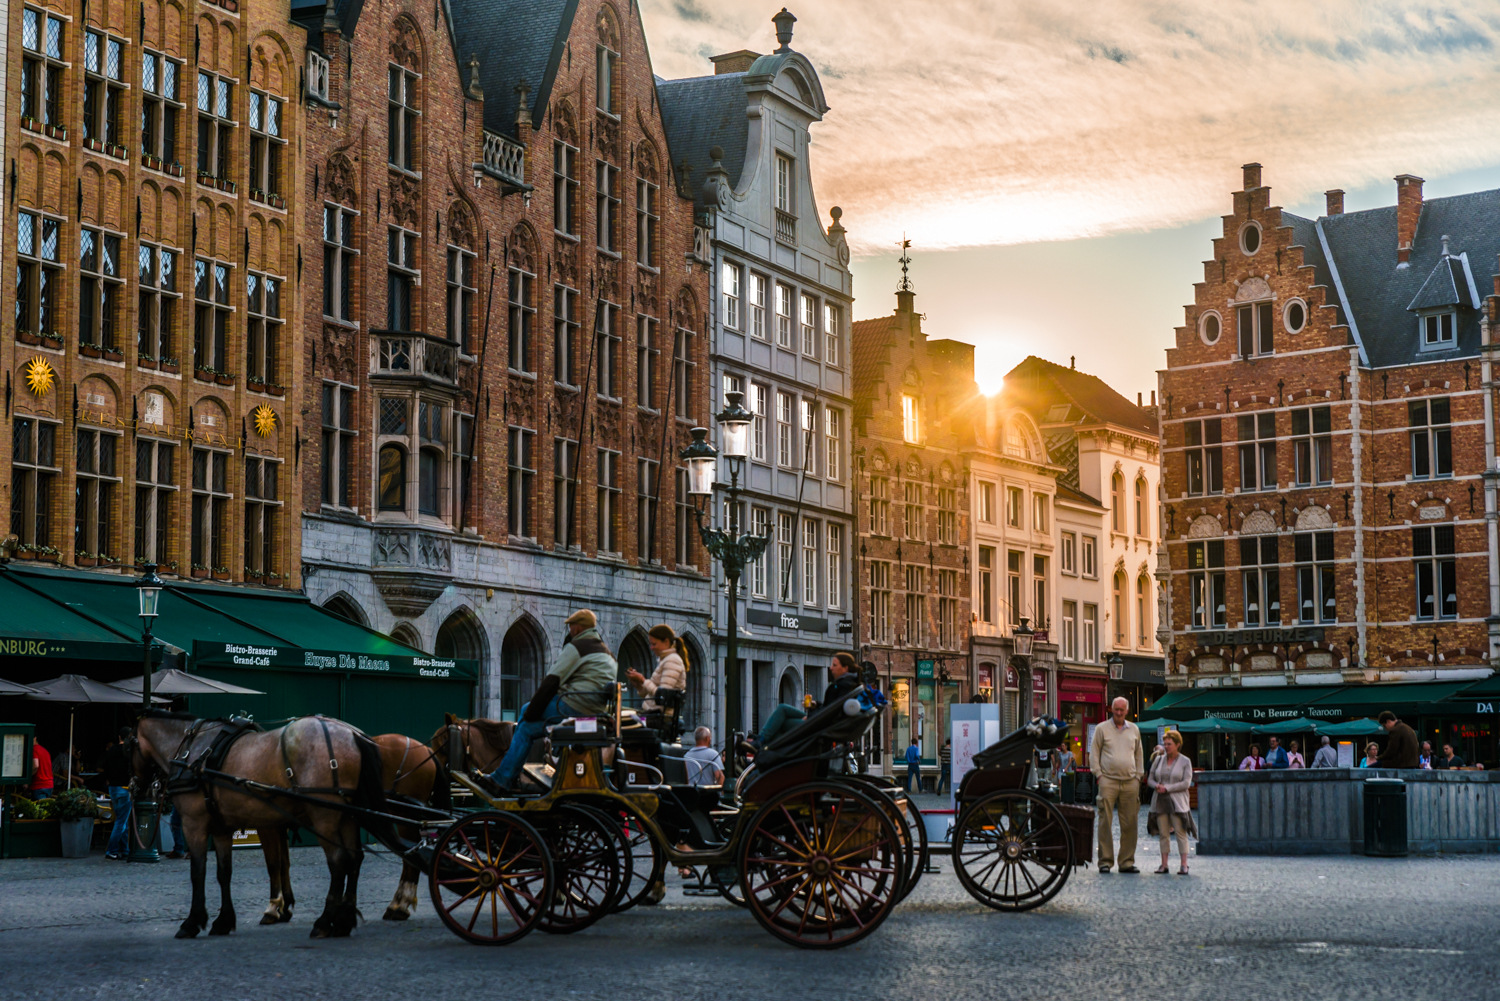
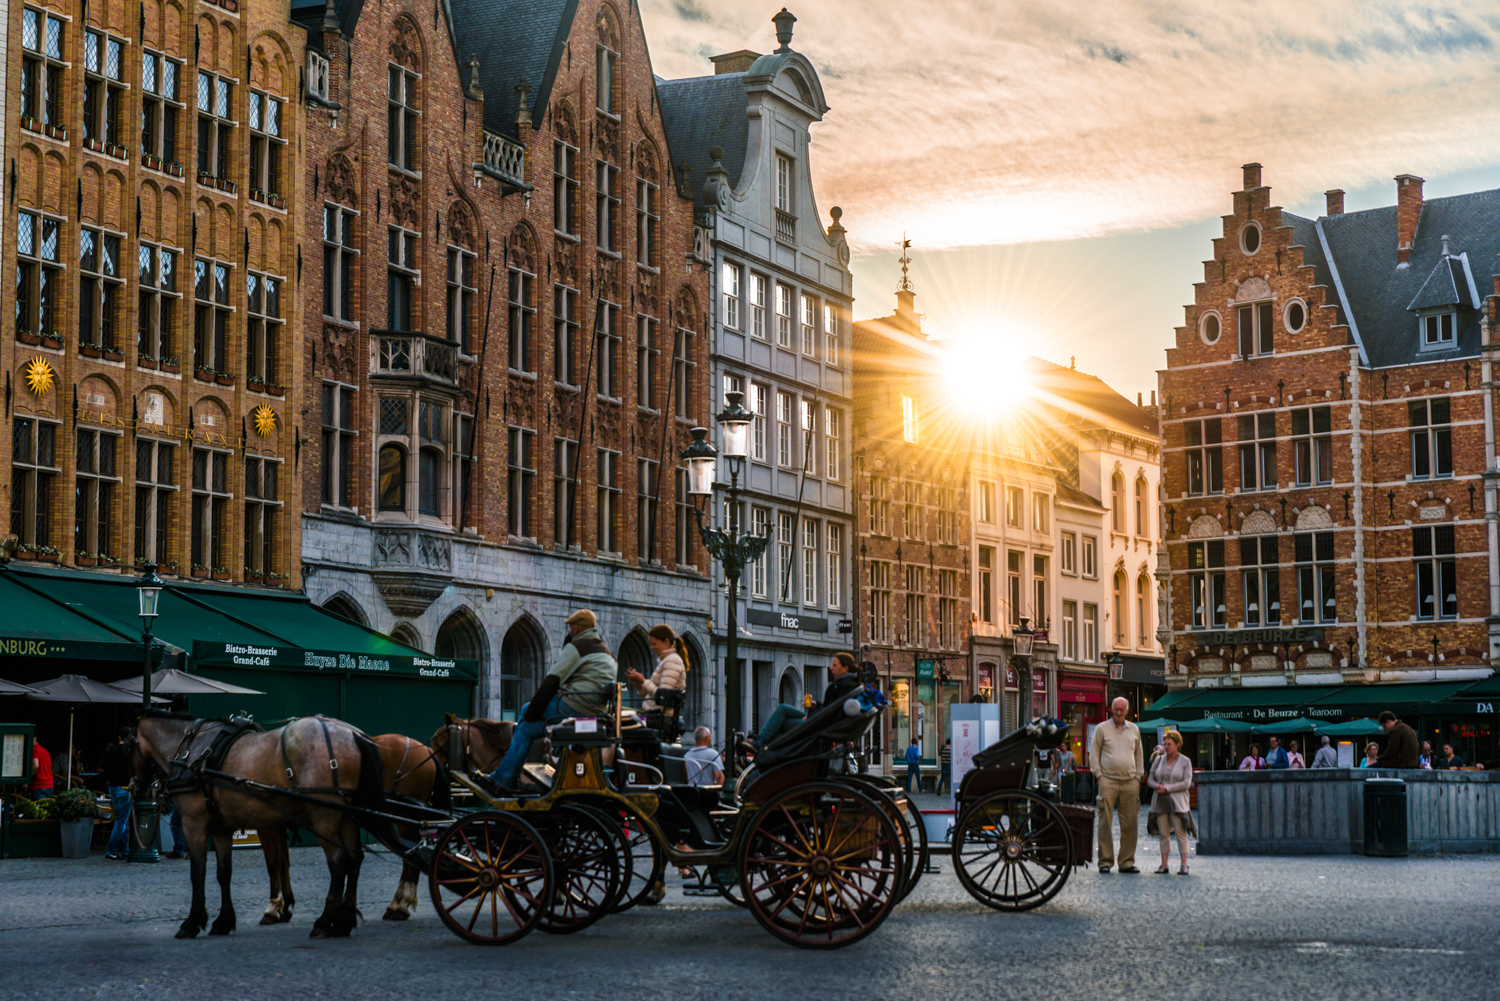
Infinite light: Infinite light adds light across a specific plane. It's common to use infinite light in outdoor photos, like photos of cityscapes or landscapes, as it casts lighting effects that mimic the natural lighting of the sun.
In photography, ambience is the mood a photo creates. For instance, a photo of a person sitting on the floor with their head down against a backdrop of muted colors might make the viewer feel sad or lonely. In contrast, a photo capturing a field of bright flowers on a sunny day can evoke happier feelings.
Photoshop lighting effects can play a role in the ambiance of a photo. In either one of these examples, simply tweaking lighting might yield a different emotion.
Photoshop lighting effects have the power to brighten dull photos, turn day into night, and highlight specific parts of a photo. An original photo might be okay without lighting effects, but playing around with lighting can take it to another level.
Sometimes, natural lighting simply isn't ideal for photography, but sessions still need to happen. Photoshop lighting effects can rescue a drab photo by adding extra lighting to it, diffusing harsh light spots, or casting shadows to add depth to your image.
Of course, learning different lighting effect techniques can be tricky on your own. Consider signing up for online photography classes to learn how to put Photoshop's many lighting tools to work. You can also pick up other skills along the way, like using layer mask tools or the brush tool, working with blending mode, and using the gradient editor.
A light leak happens when a camera's sensor or film becomes exposed to outside light. Although a light leak doesn't always give you the final result you expected with your photo, it could create a unique, artsy perspective. Usually, a light leak causes discoloration and areas of a photo with high exposure to lighting, but it can yield a one-of-a-kind shot. In older photography, they often led to areas of red glare.
You can follow Photoshop tutorials to learn how to create light leak effects in your photos without actually exposing your camera to light leaks. Light leak effects in Photoshop create light streaks, lens flares, and interesting light patterns. Sometimes, adding a light leak effect can be as simple as adding a premade overlay to your photo.
Graduated from college in 2002 with a degree in Art & Design, I started exploring my way in Graphic Design and Professional Post Production. Full-time freelancer since 2011.


 Facebook
 Google +
Comments (0)
There are no comments yet.