How to do the Tilt-Shift Effect in Adobe Lightroomwww.sleeklens.com
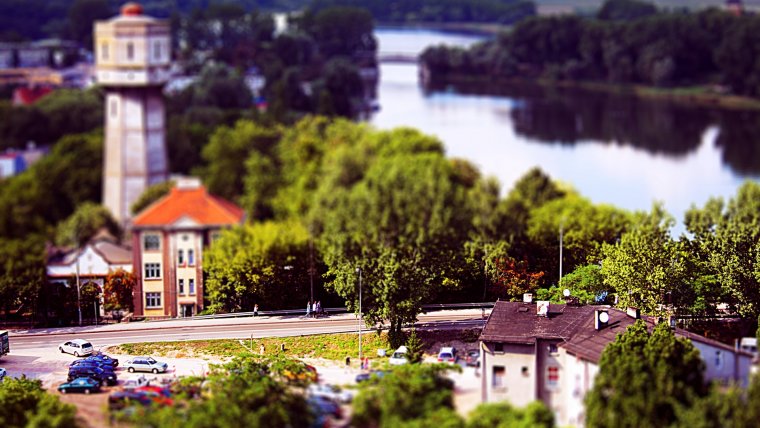
In this video, I will show you how to do the tilt shift effect in Adobe Lightroom. Tilt shift effect is an effect that you can do post processing to kind of mimic the effects of a tilt-shift lens. what it basically does it that it gives you a large depth of field so you can get kind of a blurred top and bottom look while the center of the photo remains intact sharp. That is basically what we are going to do here. But let us install the Lightroom presets before anything else.
A lot of people think when you have an image like the one we have in our video and you want to get the people to the shown point that the best thing is to go for the adjustment brush and you start painting the effects. While this is a good thing to do, one of the most effective tools to work with Lightroom preset is always the Graduated Filter. I will click the gradient filter and drag the filter all the way down to the bottom of the image.
You should drag the filter all the way to the part of the image you want to choose and blur out. I will also bump two sliders down and then do the clarity as well. Sometimes the clarity doesn’t work but still, I will go ahead keep it and see what we will do. You can see that it is only blurring a small section and therefore will take the filter and drag it down as much as I can
I will do another effect by going to ‘New’ and drag another effect from the bottom and then repeat the process of reducing clarity and sharpness and then click done. You can already see the effects and it already looks like a miniature model effect, making the picture look like a tiny village or model that was made. One way to decrease the model is to click on the nodes and play with the clarity as shown in the video but the sharpness really gives the effects.
We can click on the before and after button and see the half of the original photo and the after photo, and you can see the cool effects the process adds to the image. This is the kind of effect you would want to put on Instagram.
I am a Real Estate and Landscape photography as well as a Graphic Designer based in North Carolina, USA. My passion for photography started with taking photos with a point-and-shoot and now I own a successful photography business. My goal is to help others learn the art of photography, develop their creative side and just have fun.


 Facebook
 Google +
Comments (0)
There are no comments yet.