How to Create a Stained Glass Effect in Adobe Photoshopwww.sleeklens.com
Hi all! Today we’re going to be taking a look at how to create an awesome realistic Stain Glass effect in Photoshop.
As it’s coming up to summer in my end of the world I figured I’d do a few of these for fun for my profile so join me in doing another.
First thing if you don’t already have your images taken then don’t worry for training purposes I’m sure you will be able to find plenty to work with on Google.
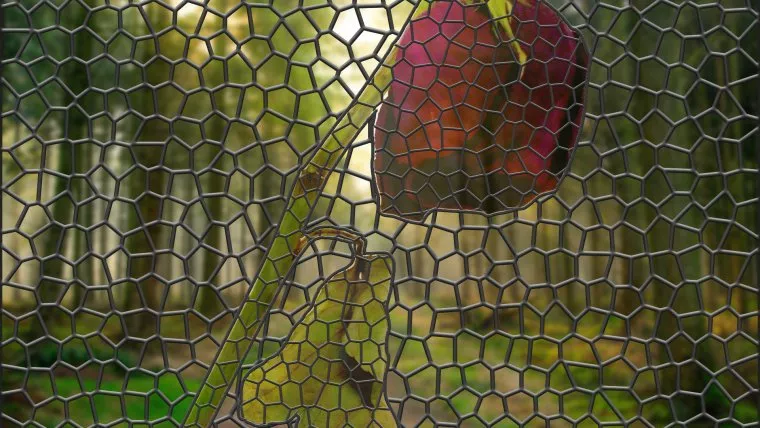
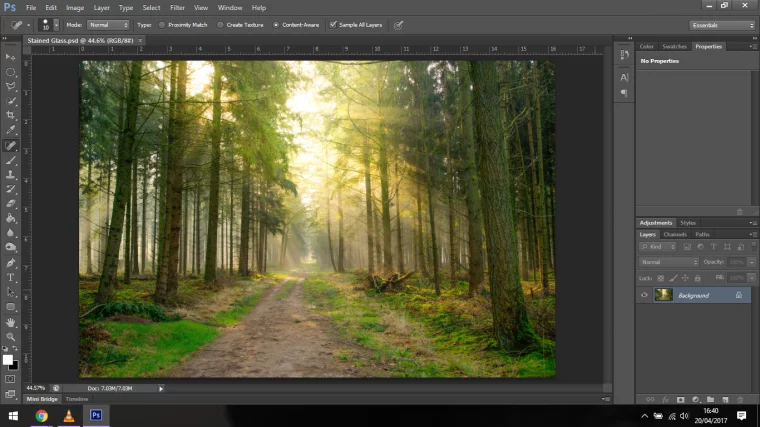
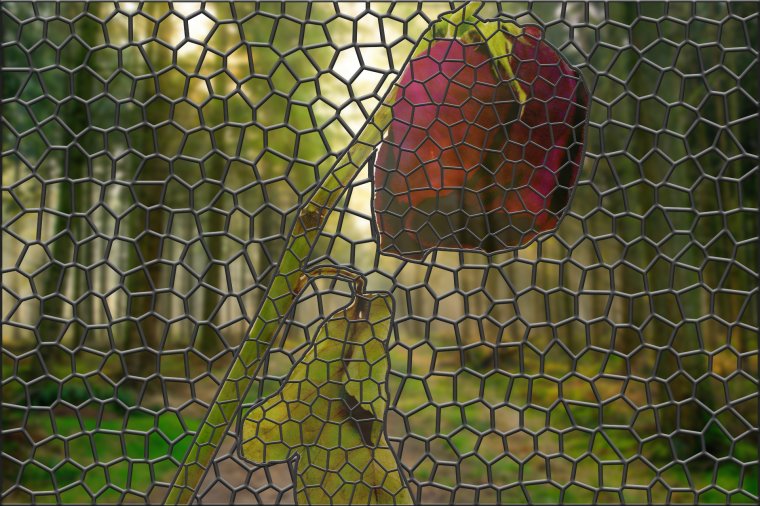
The first image that I choose was this nice forest Image with some nice Colours, I want to create a little mystery with this image so the viewer can imagine that they are in some an old abandoned church or something along those lines looking out into the wilderness.
The next image you will have to look for will either be a PNG image that is already cropped so make sure to include that in the google search bar Example: ‘Nice Cat PNG’
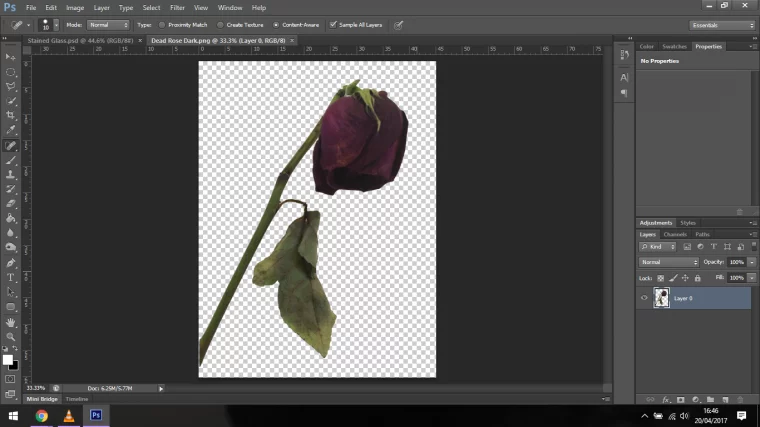
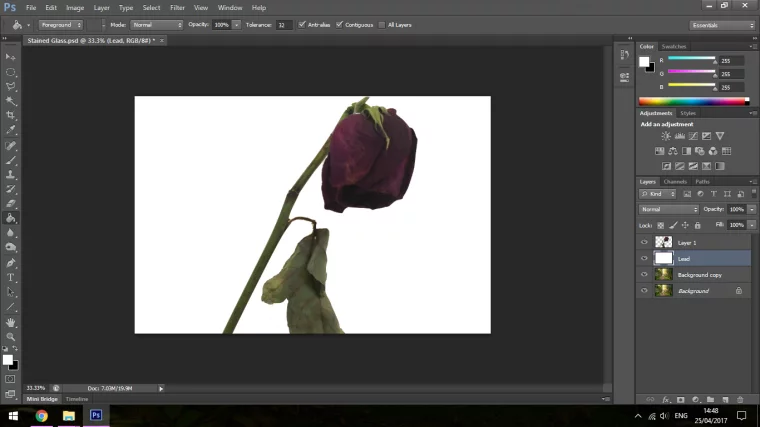
Ok so I know I said I was feeling summery but when on my search and as I thought about my image I have decided to go with this.
That’s right a Dead Rose…
Well, what can I say you are reading the thoughts of a creative right now, we change our minds 🙂
Righto, so if you chose to get yourself a PNG file you should be all locked and loaded and ready to go, if not you can choose something of your own making and crop it out whatever way you are comfortable with, Pen Tool or Polygonal whichever suits you.
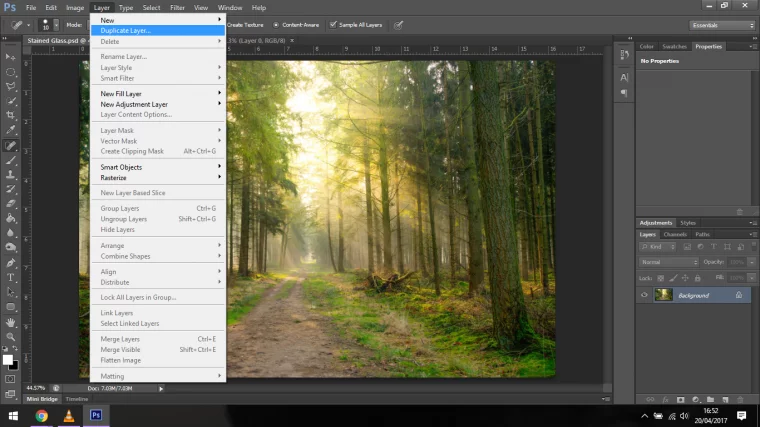
Next, I want to Duplicate my Background layer so that we have two, one for backup and one that we are going to give a slight Blur too.
As the focus will be on the Window you want the outside to be slightly Blurry as it would be in real life.
So click on Layer – Duplicate Layer and Press Ok.
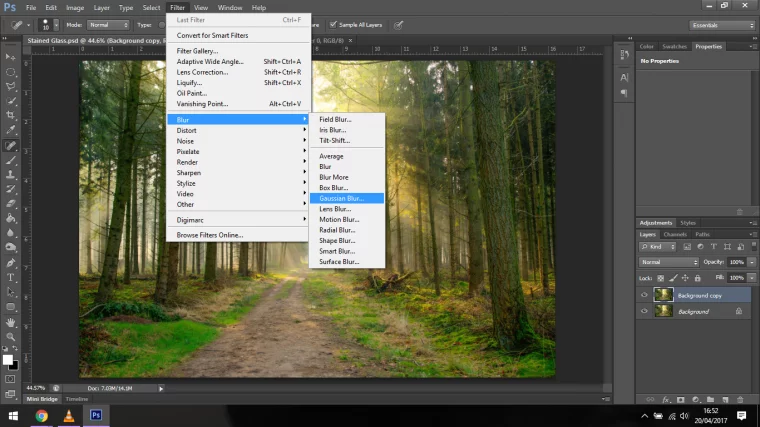
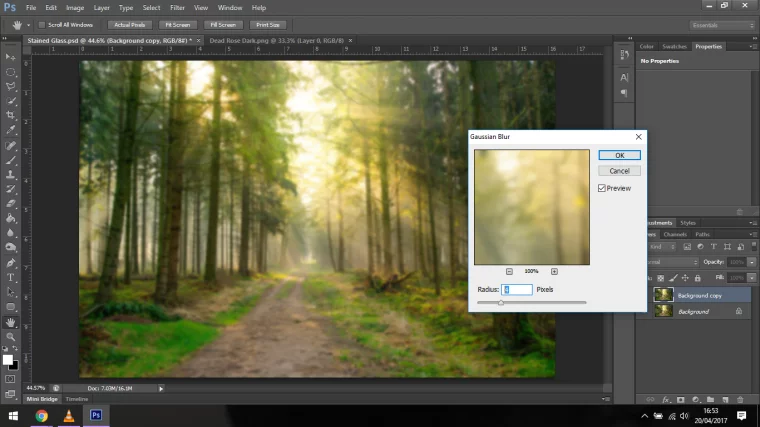
When you have your New Layer you will now have to click on Filter – Blur – Gaussian Blur
Anywhere from 3-5 Radius on the Blur will be perfectly fine.
Click Ok.
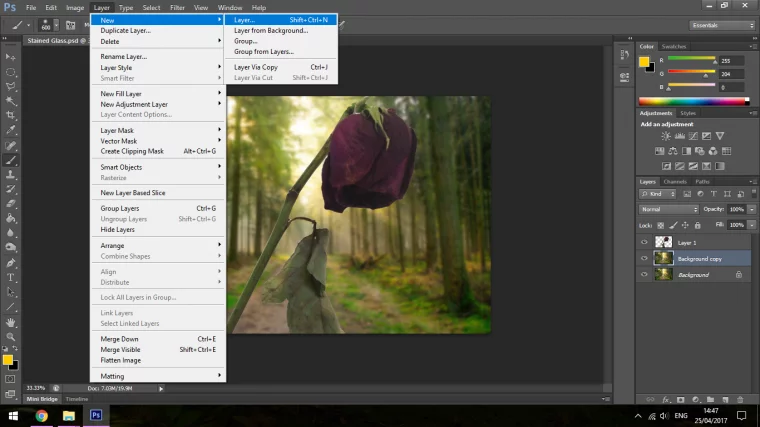
Now we are going to make the Lead between the glass.
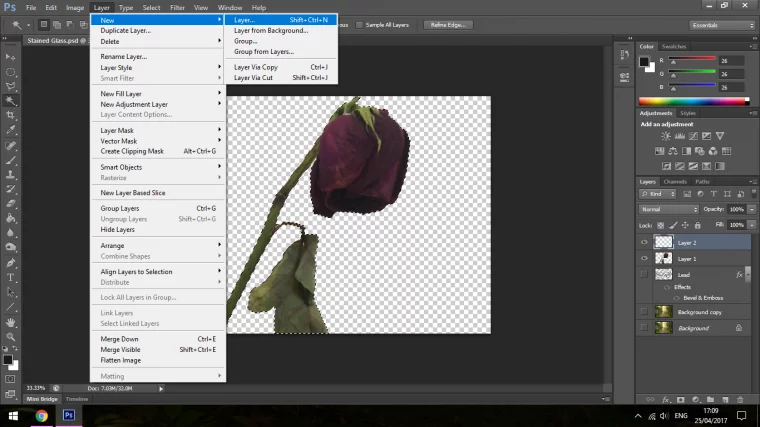
For this go to Layer – New – Layer
Now name your new layer something like Lead or Framing.
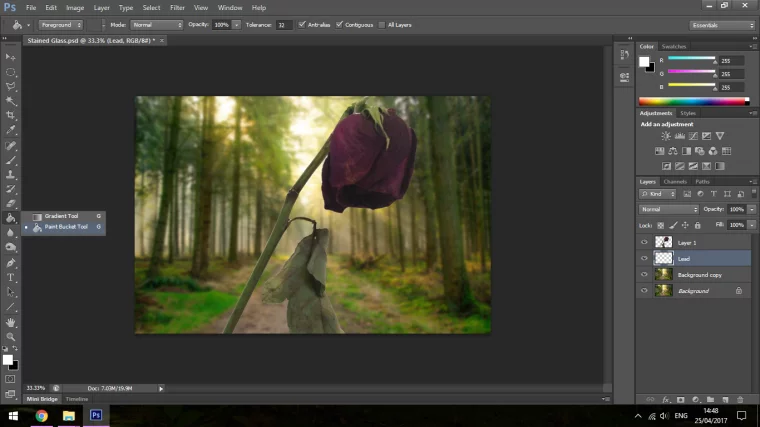
Once you do that then we’ll have to fill the layer with White as shown below with the Paint Bucket Tool.
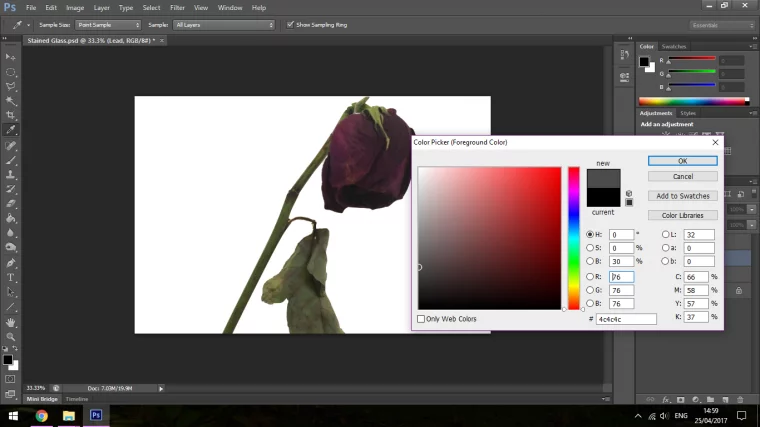
Now that this is complete the next step it to is to change your foreground color.
at the bottom left of the screen, you will see two little overlapping squares, one should be White and the other Black if you haven’t been using other colors.
Besides that, you will see a quarter-circle with two arrows on the end, this little icon indicates that you can flip the colors about, as mine is backwards at the moment, so I must click the icon to flip them so that Black is on the top.
Once you have this done then click on the black square to activate your color palette.
Now give your black layer a dark gray color as below.
Click Ok and we’re ready.
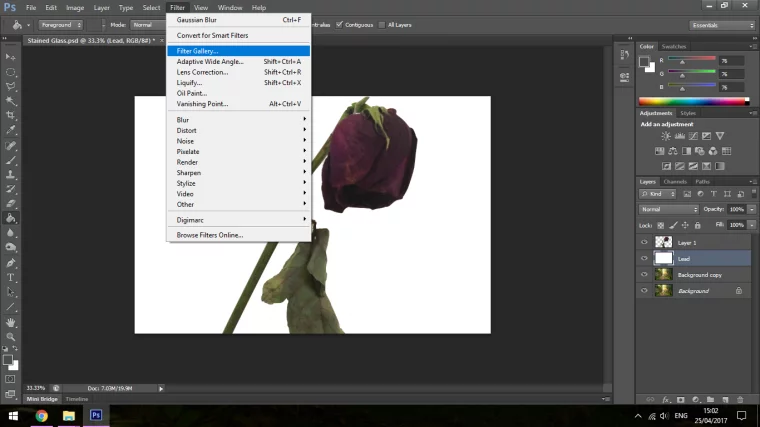
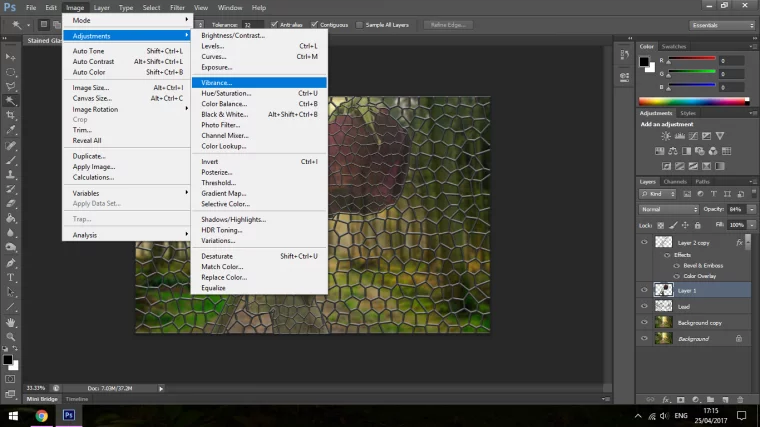
Now go to Filter and click on Filter Gallery.
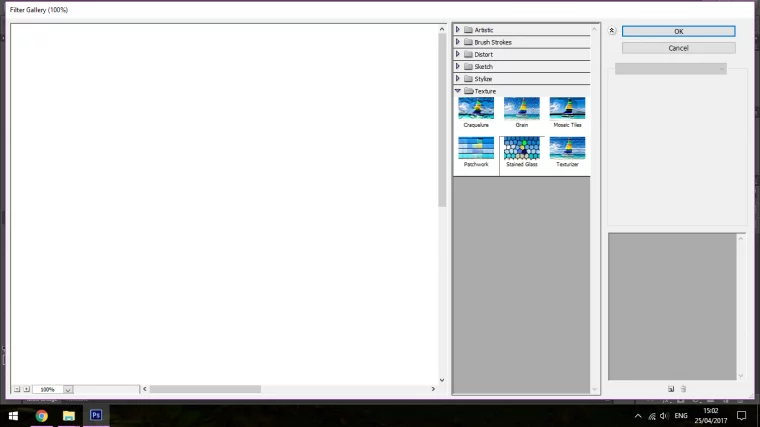
Click on the Photoshop Textures folder and at the bottom of that you’ll find Stained Glass.
Have a play with the Cell Size and Border Thickness for a sec till you get the size you’d like your Framing to be between the Glass.
Click Ok when you’re finished.
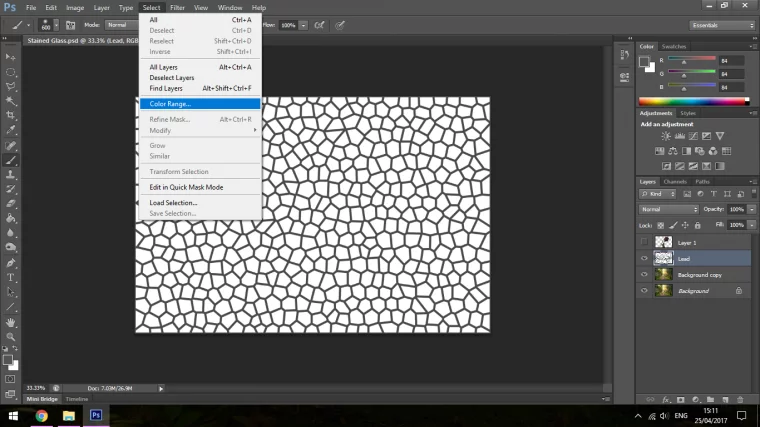
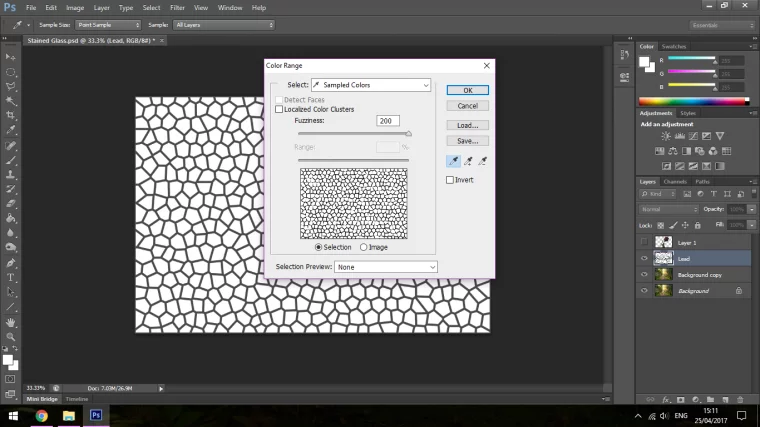
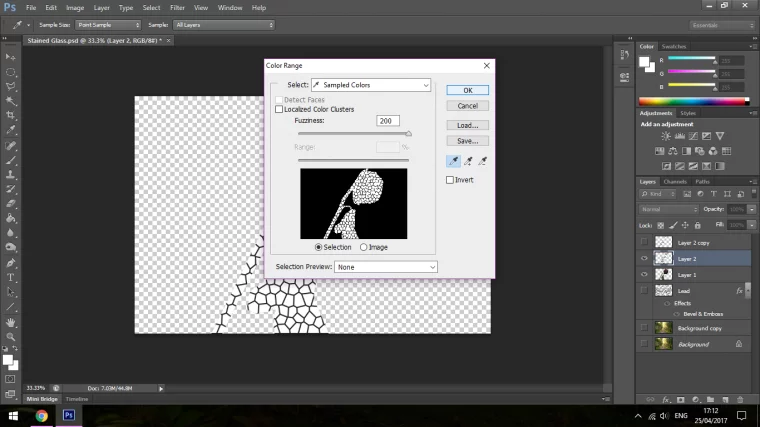
Then go to Select – Colour Range
Now click on a White bit of your actual screen/worktop to select all the parts between the Framing.
Click Ok and those will all now be selected.
Hit Delete on your Keyboard to get rid of them, and when you do you will be left with the Leading FrameWork ready for the next step.
Hit Ctrl + D on your keyboard to quickly deselect the Framing.
So as of no, we’ve everything set up with the Blurring of the background and the Framing of the Stained Glass next we will more on to the Glass and a few other Effects to make your Stained Glass window look more realistic.
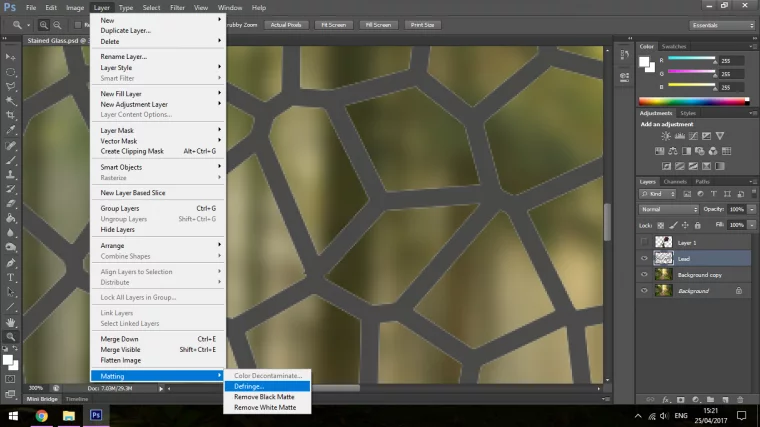
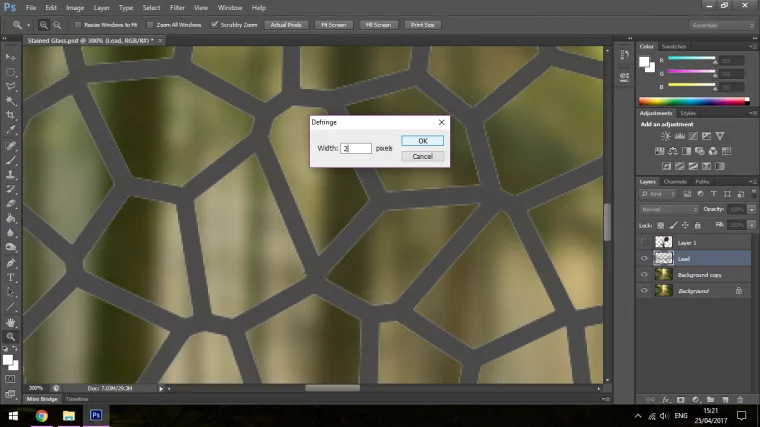
chances are at this stage if you take a close look at your framework you will see a white line running on the edges of it, the way you delete these is to go to Layer – Matting (All the way at the bottom) – Click on DeFringe and chose about 2 Pixels, when you click Ok you will see the edge now disappear and you will have a sharp 1 Coloured Image.
Excellent, now let’s add a little bit of realism to our Framing.
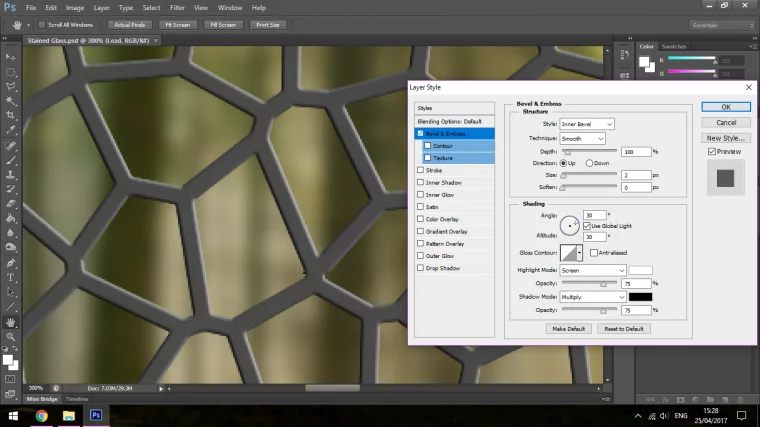
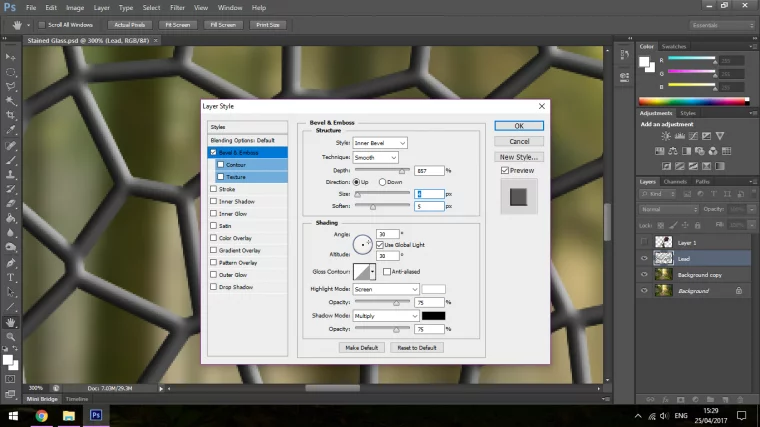
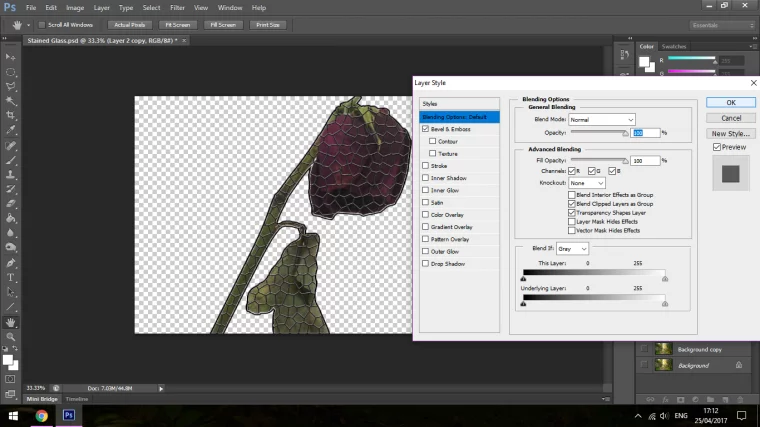
Double click on your layer and the FX panel will appear, now click on Bevel and Emboss.
In structure at the top of the Panel, you will be able to play around with the shape of the frame, below that is Shading, in there you will see a little circle with a dot in it.
When you move that you will be able to change the direction of the light hitting the object, so try to have it matching your actual image with the direction of the sun and all just to make it that little bit more realistic.
Now you can click the Eye on the layer to hide it till we create the Stain Glass Flower image.
If you haven’t already got a prepared cut out then take this time to cut out your image in whichever way you feel most comfortable, whether that be using the Pen Tool or the Polygonal Tool.
I do suggest though for this just search for an item with PNG after the keyword as mentioned in the first Tutorial.
You might also want to take a sec just to refine the edge again as we did with the Frame. (Layer – Matting – DeFringe)
If you have that all done and you’re ready to rock then the next thing you will have to do is to appropriately resize your image to how you would like it to appear finally holding Ctrl-T to activate your Transform Tool.
Sometimes the images will be bigger or smaller depending, but while searching try to get an image larger that you Stain Glass image as resizing down is a lot less destructive that sizing up.
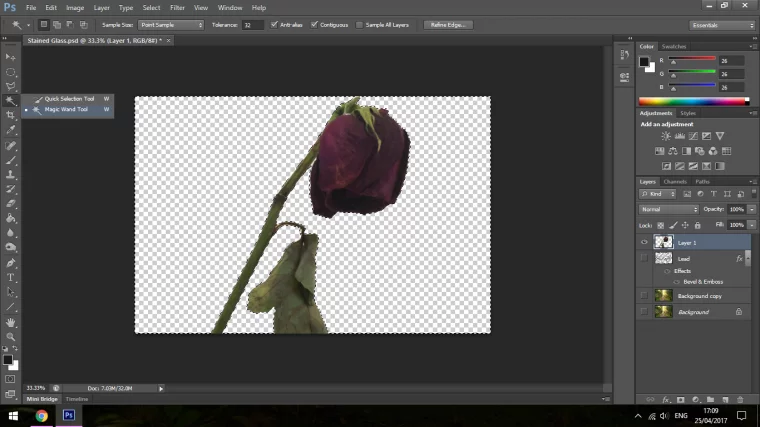
Next with your Image positioned where you want it, click the Eyes on the Layers of everything else to hide them.
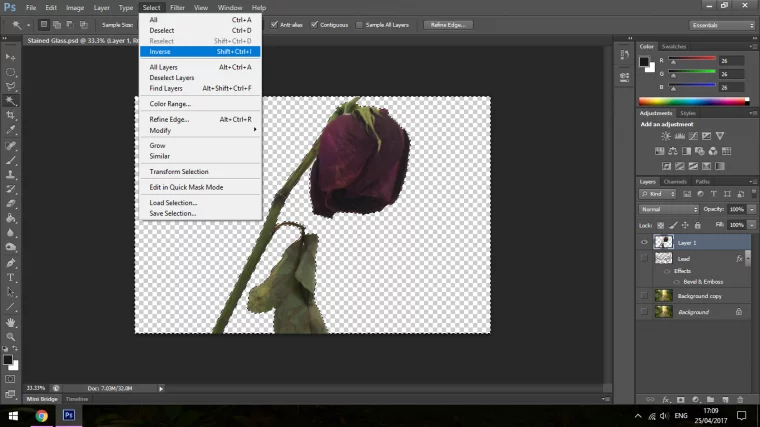
Then using the Magic Wand Tool Select the outsides of the image, and select anything inside the image that is transparent holding the Shift key on your Keyboard.
Once you do all that then Click on Select and choose Inverse.
Now create a new layer and using a Brush Tool paint inside that selection all White.
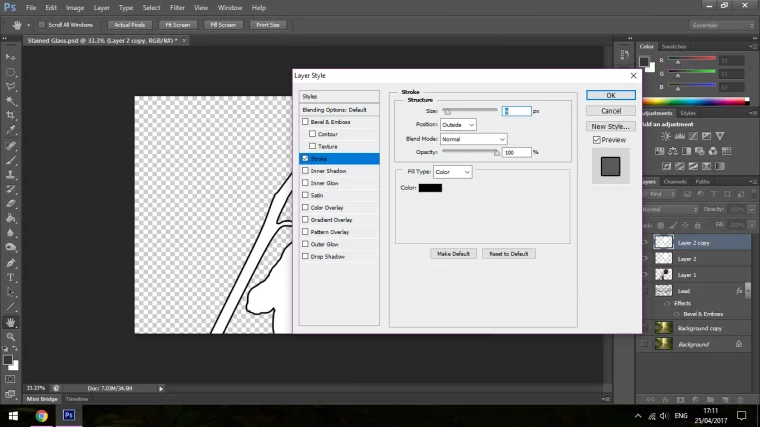
Now you have to create a Duplicate Layer, you do this by going to Layer – Duplicate Layer.
Once you have made your Duplicate double click on the Layer to open the Layer Style Panel, in there you will find the Stroke option, click on that and make your stroke a reasonable size.
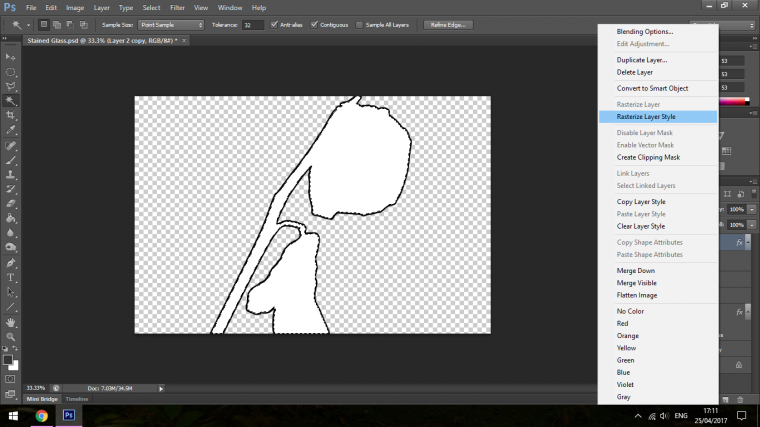
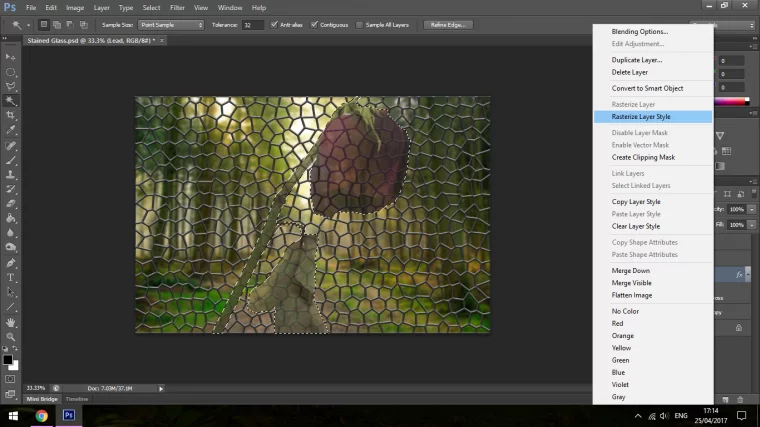
Click Ok, then Right Click on the Layer and choose to Rasterize the Layer Style.
This way you will be able to use the Magic Wand Tool on the White and delete it out so you can keep just the Stroke around the Flowers Template.
Then as before us Bevel and Emboss on it.
Now with the other Duplicate, we follow the exact same instructions as we did with creating the original Framework for the Window.
Delete all the White, Bevel and Emboss again.
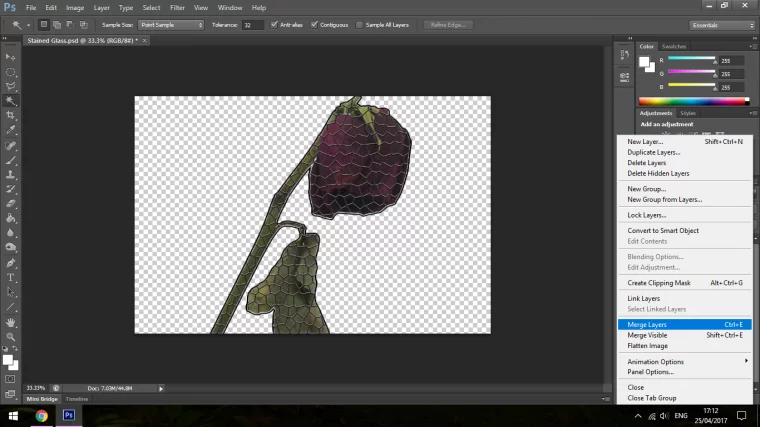
Once you have this completed Click on the Bottom Inner Flower Frame Layer and then holding Shift the Outer Layer, right click and choose Merge Layers.
For the next few steps you have to use the Magic Wand Tool again, selecting the outside of the new wireframe, then inverse it again just like we did a few minute ago.
Now unhide all other Layers by re-clicking where the Eye on the layer was before earlier.
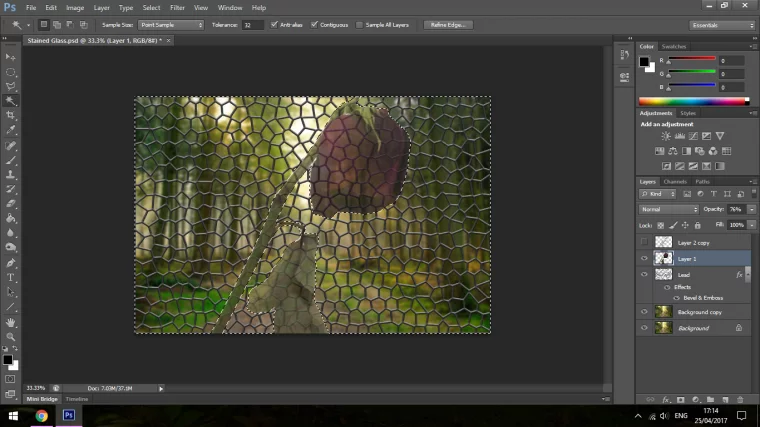
Click on the original Lead Frame, right-click on the layer and now rasterize that layer, then with the selection still active press delete to punch a hole in it so you rose can fit nicely.
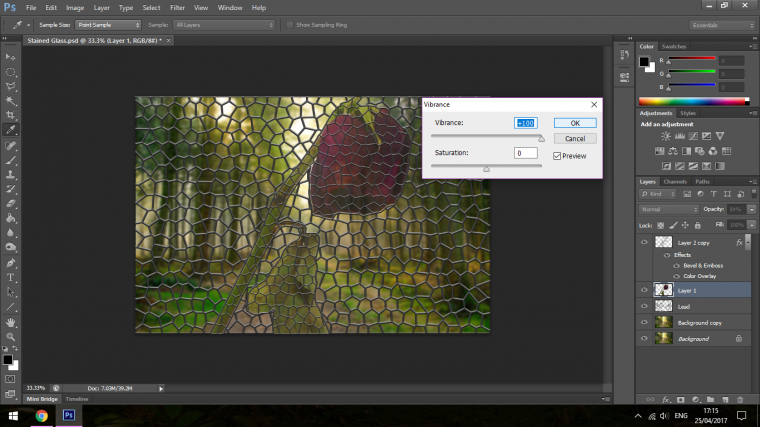
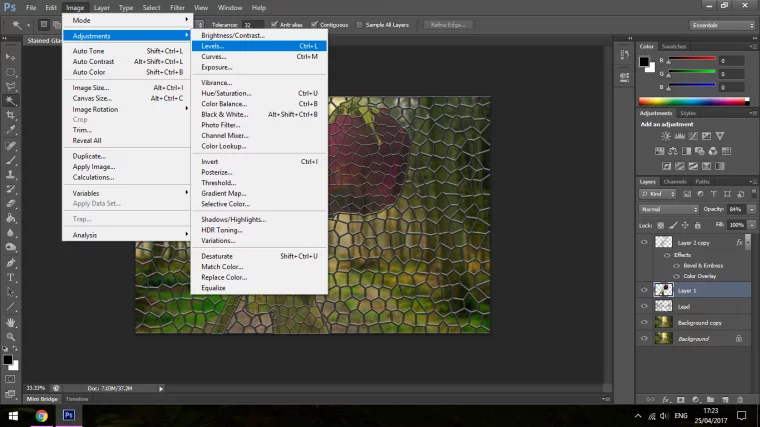
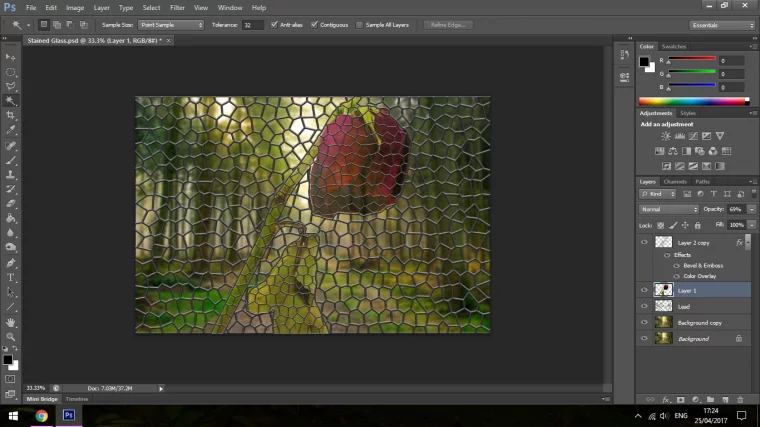
Last little steps to do is to increase the Vibrancy and Levels on the Flower Layer, with the Vibrance I push the top slider all the way to the right and with the Levels bring the two outer Sliders inward about 10% each side.
Last but not least, you just drop the opacity of the Original Flower Layer until it becomes see through.
Graduated from college in 2002 with a degree in Art & Design, I started exploring my way in Graphic Design and Professional Post Production. Full-time freelancer since 2011.
Great tutorial! I need to design a repeat pattern that tiles on four sides, so I’ll be drawing my own section lines & applying bevel & emboss effects. I’ll start from a pencil sketch w/ some watercolor (maybe) for color. Question I have – is there a quick way to make the transparent sort of shimmering color effect in PSD?


 Facebook
 Google +
Comments (1)
Great tutorial! I need to design a repeat pattern that tiles on four sides, so I’ll be drawing my own section lines & applying bevel & emboss effects. I’ll start from a pencil sketch w/ some watercolor (maybe) for color. Question I have – is there a quick way to make the transparent sort of shimmering color effect in PSD?