How to Become a Photographer and Start Your Own Photography Businesswww.sleeklens.com
Before You Start Dreaming About Becoming a Photographer…You have a camera, a few lenses, and a desire to start your own photography business; now what? A lot of photographers feel the need to start their own business in a variety of different fields but many don’t know where to start. Sure, having the idea of running your own photography business is great but actually implementing it is an entirely different story.
In this step-by-step guide, I will walk you through all of the things I wish I knew about starting a photography business and ways to make the most of your startup. This won’t guarantee your success but it will save you time and money to make sure you have the best start possible.
Table of Contents
How to Become a Photographer – Beginning: Learn Your Craft
Before you can even start thinking about providing your photography services to customers, make sure you learn the ins and outs of photography. Don’t just think you can flip your camera into Auto mode and start producing fantastic results. You must learn how to shoot in a semi-automatic mode like Aperture Priority or, if you have mastered that, Manual Mode. Now, just because you are shooting in these modes doesn’t mean you will get great results either, but it will give you more control over your images. For example, if you are taking portraits where your model’s face is really dark, you will need to learn how to adjust your camera’s settings to expose the face better. If you’re shooting in an automatic mode, you have very little control over this and have to rely on correcting this in post-production which might not work correctly and will make for a lengthy workflow.
The next thing to consider is to figure out what you want to photograph. A lot of photographers want to start out by taking photos of anything they can. They fill their online portfolios with tons of images that vary from weddings to pet portraits to landscapes and even family photos. In their mind, they think this will show potential clients that they are versatile and can accommodate any type of situation. In my experience, this actually does more harm than good. Usually, it comes off that you are unorganized and you don’t know exactly what type of photographer you are. This is the last message you want to send to a potential client. You want them to look at your online portfolio and see that you are a great photographer in a certain style. This is where you have to make a decision; what do you want to photograph? If you love working with people, then being a portrait and/or wedding photographer is probably right for you. If you enjoy taking photos of animals then you can consider yourself a pet or wildlife photographer. If you like hiking the outdoors and being surrounded by nature, then landscape photography is probably for you; the list goes on and on. The key is to promote yourself as one type of photographer. Sure you can photography multiple genres but I have found if you promote yourself as a “one style” photographer, you will have better exposure and be able to find your potential clients easier.
Find a Mentor
If you are just starting your photography business and you have never run a business before, you might find it helpful to look for a mentor. A mentor is someone who is willing to share tricks of the trade and help guide you through your journey. Sure it might be scary trying to find someone who you can follow around but the information you will get out of your experience will launch you forward in your journey as a professional photographer. Here are a few tips for finding a mentor:
Find your favorite photographer in your new field of study. This means gathering up a list of the photographers you would love to be mentored by and rank them on a piece of paper. Make sure you are finding photographers in the field you would like to practice then simply try contacting them and asking if this is something they might be interested in. Even if some of your favorite photographers aren’t local, you can see if they would consider a mentorship through Skype. Don’t be afraid to contact them; the worst they can say is no but the photography community is a very welcoming community so it shouldn’t be too hard to find at least one that will take you under their wing and show you how things actually run.
Know what you want out of the experience. If you find a mentor that might be willing to help, know what you want out of them and see if that is possible. Do you just want someone to bounce business ideas off of? Do you want someone to critique your photos? Do you want someone just for business advice? This is very important as it will keep you both in check about how the relationship will move forward.
Document EVERYTHING! If you happen to find a mentor who wants to help you as much as possible and really show you the ropes of running a successful photography business, make sure you are keeping notes about everything. Write things down. Take photos of behind-the-scenes things that might be going on. Even record conversations if they are okay with that. This is so important as this might be the only time you will have to learn in a real-world setting and you don’t want to lose any of the information.
How to Become a Photographer – Next Step: Discover Yourself and Find Your Niche
When it comes to photography, different situations require you to think about certain things. If you are a landscape photographer, you have different types of gear to think about and different settings you need to learn so you can get the best shots. Here are a few things to keep in mind depending on the type of photography you are getting into and learn how to become a photographer in that niche:
Wedding Photographer
Becoming a wedding photographer can be extremely tough. Not just because you have to concentrate on a couple’s special day and try not to miss out on all of the important moments, but the business aspect can be just as challenging. In addition to meeting with the couples many different times throughout the process, you also have to attend wedding shows, edit hundreds of photos from the day, and keep up with a second shooter (if you are lucky enough to have one). When you are a wedding photographer, you will need to make sure you have a very up-to-date website with your most recent shoots, contracts for the copyright release information, and contracts to secure the wedding date, as well as widespread social media presence so you can target newlywed brides and grooms. If you want to get your name out there as fast as possible, you will also need to attend wedding and bridal shows to talk face-to-face with the new couples. When it comes to gear, it is best to have two cameras; one with a wide-angle lens and one with a telephoto lens. This will allow you to switch between the two different cameras depending on the different situations. You will probably also need an external flash unit or Speedlite as a lot of reception gatherings tend to be on the darker side. When it comes to editing, it is best to work with Lightroom presets or Photoshop actions as you will be working with hundreds of photos at a time so using a workflow will not only make your photos look great, but also save you time.
Portrait Photographer
Much like wedding photographers, being a people person will really help you connect with new clients. A lot of portrait photographers shoot weddings as well but they tend to market mainly towards general portrait sessions. But unlike being a sole wedding photographer, portrait photographers tend to shoot many different things, such as, newborns, pets, professional headshots, senior portraits and much more. Shooting all of these different scenarios can be a good thing because you have multiple opportunities to make money but you might have a tougher time finding a specific demographic to market to. Choosing the right gear for your portrait photography is vital. If you are only wanting to concentrate on environmental portraits (portraits that are taken outside of a studio) then you can probably start off with a camera and a lens with a wide aperture (f1.8 to f2.8). If you are want to try shooting in the studio, first you will need a space to set up your gear. This can be inside your home in a spare bedroom or it can be a small office building that you rent out. You will also need to buy lighting. You can choose continuous lighting setups (which are good for beginners) or if you already have experience with lighting, you can grab a few Speedlite with radio triggers and stands. Regardless of the type of lighting setup you get, practicing with the lighting is much more important than getting more gear.
Real Estate Photographer
Starting out in Real Estate photography has its ups and downs. On the upside, you need minimal equipment to do basic home shoots, however, one of the major downsides is that you usually have to work during regular business hours. This means that if you have a full-time job already and intend to start being a real estate photographer part-time, you will only be able to photograph homes after your full-time job ends. This might cause you to lose jobs as your availability will be limited. You can certainly start out this way, as most photographers start out with working a regular job until they can go full-time, but growing your business can be slower than other types of photography. When it comes to equipment, you really don’t need too much to get started. Obviously, as your business grows, you can update your equipment and incorporate different services, such as drone work, but to get started you really only need your camera, a wide-angle lens, and a tripod. With these simple items, you can succeed at 80% of the shoots.
Landscape Photographer
When starting out and learning how to become a photographer, keep that mindset that you need to enjoy it too. So, out of all the types of photography styles listed here, landscape photography can be the most fun but also the least profitable. The main benefit of being a landscape photographer is the ability to travel and see some fantastic places. All of that being said, being a landscape photographer these days can be extremely tough as you will have to decide how you want to market your photography. If you want to try to make passive income, you could upload all of your images to a stock photography site and wait for someone to purchase your images, contact art galleries in your area and see about setting up a gallery show, or market your photos yourself by visiting local businesses to see if they would like custom artwork produced by you. Depending on the clients, they could be really responsive to the idea and pay good money for your art. When it comes to gear, the sky’s the limit. Obviously, you will want to have a camera with higher megapixels, a variety of lenses ranging from the super wide angle to telephoto lens, and a tripod. This is the basic landscape photographer set up. But depending on how adventurous you are going to be, you will also need a durable camera bag, extra batteries, lens filters, hiking boots, and comfortable clothing.
Sports Photographer
If you are wanting a super fast-paced style of photography then working towards becoming a sports photographer is the best fit for you. One really great benefit of becoming a sports photographer, especially if you are a sports fan, is that you are truly photographing something you love and enjoy. It is also fairly easy to get started. If you are not sure how to get images for your portfolio, all you have to do is visit a local high school and ask for permission to photograph a football or basketball game. Most of the time the schools don’t mind at all, especially if you offer to give the photos back to the school for free. Once you are able to get some great shots via the high school scene, you can possibly move toward the college areas and eventually work towards photographing some pro games. The photography equipment needed for sports photography can get pretty pricey. The most expensive item you will need to purchase is a long, telephoto lens with a wide-open aperture. This will allow you to fill the frame with the action and also get you closer to the action if it is farther away. Having a lens with a wide-open aperture gives you the ability to blow out the background and only focus on your subject. These lenses are usually fairly large as well so you may also want to have a monopod handy so you don’t have had to carry a heavy camera rig around with you.
Starting a Photography Business Checklist/Plan/Road Map
Making a business plan or “road map” for your new business might sound a bit clerical and not really that fun, but it is one of the most important steps to starting your new venture. Your business plan should not only have goals of what you want to achieve for your business overall, but it should be filled with short-term goals. What do you want your business to look like in three months after officially starting it? What about six months? What do you want to have accomplished in your first year? Do you have goals as far as income from your business? If you are shooting weddings, how many you would you like to shoot in that first year? If you are a landscape photographer, how many prints would you like to sell? These are the questions you want to ask yourself. The reason this step is so important is best summed up by a quote by Antonie De Saint-Exupery which says “A goal without a plan is just a wish.”. If you really want your new business to actually be a business, then you need to have a goal of what you want it to look like and how to get there.
When it comes to starting a photography business, here are a few things you might need:
Create your business plan. Your business plan is your detailed document that will clearly convey all of your goals, financial costs, and tracking information. You can download a simple, free business plan template below.
Startup Costs. Whether you have all the photography gear you need to start taking photos or you are just starting out, finding money to cover some start-up costs is very important. Having a photography business isn’t just about gear either. You will also need insurance, business licenses, a website, editing software, marketing materials, and a method of tracking your expenses and income from your business.
Have your personal financials in order. As every small business owner knows, you will not be super profitable overnight. It could take over 18 months to make enough money to live on and pay your bills with. If this is your only job, you might have to take up part-time work to help live on. If you already have a full-time job and are running your new business part-time, you have a little more flexibility. Just make sure to keep your business income and your full-time income separate. This will help when it comes to paying taxes and fees.
Equipment. Obviously, equipment and gear are very important. You are not going to be taken seriously as a photographer if you show up to a photo shoot with a point-and-shoot or an iPhone. You will need real gear to get real results. If you lucky enough to already have good, quality gear, you should be ready to go. But, if you are buying your gear now, then you need to set aside between $2,500 – $5,000 to get new gear (camera, lenses, bags, accessories).
Price to get clients, price to make a profit. One thing to remember when starting a business is that if you are not making money then you just have a hobby. That is why you need to know how much to charge so you don’t end up doing these jobs at a low wage. Look at what competitors are charging and see what is doable for you and your business expenses. Ideally, starting out you would need to be making enough income to cover your expenses for the first 6 months to a year. If you happen to make enough to turn a profit, then you can decide whether to bring it home as income or leave it in the business for future expenses.
Website. Your website is your storefront. It will most likely be the first thing clients see when they search for you. You want to make it as clean, simple, and attractive as possible. The better your website looks, the more potential clients you will be able to get.
Social Media. These days it isn’t as simple as just setting up a website and waiting for customers to roll in. You will need to be a bit more social than that. Setting up accounts for your business (never use your personal accounts) will give your clients more ways to find you and follow you for upcoming jobs.
How do you Create a Business Plan for Yourself?
Making a business plan or roadmap is very simple but very important! If you would like to download an example photography business plan, you can download it below. After filling out the road map for my business, I hung it up on the bulletin board in my home office. This allowed me to check on my progress as the weeks and months passed to make sure I was on the right track.
Download a detailed example of a photographer Business plan here:
[sociallocker id=”722162″] photography_businessplan [/sociallocker]
Tips For Starting a New Photography Business
Securing Funds for Startups
Finding money to use for your business is very important. It is possible to start a company with very little funds but this will cause your business to grow slowly which a lot of people don’t have the patience for. Finding money for your business can be tough but depending on your situation, you might have access to a few places to help your startup.
Banks. Getting a small business loan can be tough but depending on the relationship you have with your bank and the type of bank, you may be able to get assistance. Typically small banks, such as Credit Unions, will work with you to give you the types of funds you need. If you are a member of a larger bank, you can still potentially get funding, but you might have more luck using the smaller ones.
Friends and Family. When it comes to asking for money from family and friends, I would not recommend it, except on one condition: it is a gift, not a loan. If you do happen to ask your friends or family for financial assistance, ask for it as a gift in which you don’t have to pay back. What is the difference? If you happen to get a loan, then you and your “lender” will always have it in the back of their mind that you owe them. On the other side, if you ask for investment instead, you are asking for their faith that you will make the most of their money.
Full-Time Job. If you happen to have a full-time job already and are starting your photography business as a part-time gig, then it is possible to slowly save up money and bookmark it for your photography business. This might mean that you grow your business a bit slower but you will have a bit of relief knowing that you won’t have to pay anything back. This will obviously only be short-term until your business starts bringing in money.
Crowdfunding. One of the lesser used types of funding methods is using crowdfunding. Crowdfunding basically means what it says: a crowd full of people will give you money to achieve a goal. Using a service like Go Fund Me does this and allows anyone to donate money to your cause. The beauty of this method is that you don’t have to pay them back.
Buying the Right Photography Gear
So, now we know exactly what we want to photograph and where we want our business to be. Now we need gear. Most likely you have everything you might need to start but having a few new pieces don’t hurt. One word of caution, do not borrow a ton of money to buy new gear. This is something that I have found can really make or break a photography business. If you are starting out, a simple entry-level DSLR would most likely do the job. If your camera came with a standard kit lens, that should be able to accommodate most jobs. Sure, if you want to market yourself as a sports or wildlife photographer then you might need to buy a longer, telephoto lens but purchasing used will really save you a lot of money.
If you feel that your current equipment won’t be able to handle the type of photography you want to shoot, here is a list of some inexpensive gear you can purchase that would be great starting out.
The “budget kit” doesn’t exactly mean you are getting extremely cheap gear. It means you are getting a beginning set of tools that will allow you to grow your business faster which will enable you to grow into the new gear as you maximize your earning potential. With this budget kit, you are getting a Nikon D330 with an 18-55 kit lens, another prime lens (a lens that only has 1 focal length) that is a 50mm f1.8, a beginner studio lighting kit with 2 light stands, two bulbs, 2 umbrellas, and a carrying case. This setup will allow you to start taking the best portraits possible without blowing tons of money.
For those who have a bit of extra money to throw around, this collection is currently as good as you can get. You will get a Canon 5D Mark III which is one of Canons Prosumer models, a Tameron 24-70mm f2.8, and a 3-panel continuous lighting setup with a backdrop setup. This will give you the ability to take really high-quality portraits and the Tameron lens is great for both indoor studio and outdoor portraits.
The Best Budget option is kind of the best of both worlds when it comes to being less expensive and also high-quality. This option comes with the Canon 80D, a fantastic crop sensor DSLR, the Canon 85mm f1.8 lens for more bokeh backgrounds, and a simple two-piece continuous lighting kit.
When it comes to landscape photography, some really important things to consider are megapixels and a wide-angle view. In the Budget Pick kit, you get a Nikon D5500 which has 24-megapixel and also a Sigma 10-20mm wide-angle lens which will capture almost any view. You will also get a cheap but very steady tripod with a ball head. This kit will certainly get you up and off the couch and taking scenic landscape photos very quickly.
If you have the money to spend and want the best gear possible, the Canon 5D Mark III is a fantastic camera to use for any type of photography but especially for landscape photography. Also, combining that with the Canon 17-40mm lens will give you a wide-angle, sharp photo. The Vanguard tripod is also a high-quality built tripod that will surely handle even the toughest trips.
With the “Best Value” option you are getting a Canon T6i which has enough mega-pixels to get a super clear and high-quality image, a Sigma 10-20mm lens that will be able to capture any scene, and a sturdy, but light-weight, tripod for easy travel. This option is great for getting sharp images while still not breaking the bank.
It is funny how landscape photographers and real estate photographers can use the same gear to get a killer shot. Both styles need a lot of megapixels for high detailed shots, both need wide-angle lenses to capture a whole scene and they both need tripods to possible capture high-dynamic-range images. This kit will give you everything you need to start getting your first real estate shots at a low-cost entry point.
If you have the money to spend and want the best gear possible, the Canon 5D Mark III is a fantastic camera to use for any type of photography but especially for real estate photography. Also, combining that with the Canon 17-40mm lens will give you a wide-angle, sharp photo. The Vanguard tripod is also a high-quality built tripod.
With the “Best Value” option you are getting a Canon T6i which has enough megapixels to get a super clear and high-quality image, a Sigma 10-20mm lens that will be able to capture any scene, and a sturdy, but lightweight, tripod for easy travel. This option is great for getting sharp, detailed images while still not breaking the bank…I would know, this was my exact kit when I started!
Being a wedding photographer, much like a portrait photograph is mainly about the lenses you use. Long, telephoto lenses or lenses with a wide aperture will really give your images that professional portrait look. With this kit, you will get a Canon 80D that comes with an 18-135mm kit lens, the 85mm 1.8 lens that gives you a wide-open aperture and also a Yongnuo YN-560 flash unit for mobile lighting.
For those who have a bit of extra money to throw around, this collection is currently as good as you can get. You will get a Canon 5D Mark III which is one of Canons Prosumer models, a Canon 24-70mm f2.8, and a Canon Speedlite 600EX II-RT which has wireless flash shooting support built-in for those times you might need off-camera flash.
I know a ton of photographers who started out shooting weddings with this exact kit. Even though the Canon T6i is considered an entry-level camera, it still uses the same sensor as cameras like the Canon 60D and has very good quality images. The high ISO performance is not as good as other images but that is why you can use the Yongnuo flash to fill in some light. The Tameron 24-70 is almost like the Canon version but its build quality isn’t as good as the other high-end lenses. One thing to note when it comes to wedding photography is that a lot of these types of photographers will have multiple cameras with different lenses (one camera has a wide angle lens and the other has a telephoto lens) to capture different types of scenes. These kits only give one camera as a starting point but the more business you get, you should think about investing in multiple cameras.
For sports photographers, the name of the game is getting as close as you can to the action. With this beginners sports gear, you will get a Nikon D5500 with 24 megapixels along with a Nikon 70-300mmm f4-5.6 zoom lens and a standard monopod. Even though the telephoto lens isn’t as fast as most of the sports lenses out there (fast meaning the aperture isn’t less than 4 or 5.6 when zoomed in), for a beginner and budget-minded photographer, this is a great starting point.
The Canon 5D Mark IV is Canon’s pro-summer flagship camera right now and that is because it can basically handle any type of photography. The Canon 70-300mm will get you really close to the action but is still half the price of the f/2.8 option and the A-222 +M-1 Tripod is a simple monopod but includes feet at the bottle for a bit more stability.
This is truly the best budget buy for the wannabe sports photographer. You will get a Canon 80D, a 70-300mm f/4-5.6, and a basic monopod to help hold the weight. The Canon 80D is a high megapixel, crop sensor camera which when combined with the 70-300mm, will get you really close to the action.
When thinking about gear, let’s not just concentrate on cameras and lenses. Other accessories like lights, props, stands, even clothing can really improve your photography. For example, if you want to take family portraits, you can start off by photographing couples in natural light. This means going to a park or field and just using the sun as your main light source. This is how most portrait photographers start out. If you want to start learning new techniques using external lighting, you can start incorporating flash units. These are fairly cheap and when done right, can really set your photography apart from other competitors in your area. Another example would be if you are a photography who wants to photograph newborns. Not only will you need to think about gear, but you will need to start looking at props to place in your photos. Blankets, small toys, wraps, and even a heater to keep the baby warm during the shoot is something to consider. As you can see, there’s a lot to think about when it comes to “gear” but that doesn’t mean you need to buy everything right away. One of the keys to a successful photography business is to keep it simple but consistent.
For some, finding images to put on your portfolio website is relatively easy, especially for those who have been shooting their style of photography for a while. If you want to be wildlife photography and you have spent the last few months going out of the weekends and photographing deer, birds, horses, etc., you should have plenty of images to have a good start. Some photographers, however, have a difficult time finding images to start there beginner online portfolio, but the good news is new images are always available, you just need to know where to look.
If you want to start out as a portrait photographer, gather up a group of your closest friends to pose for you. You can even get a few of them to act like they are couples or have a family photo shoot. If you want to photograph weddings or bridal portraits, you can find a married friend who still has her wedding dress and ask to take a few photos of her. Are you interested in being a sports photographer? Try to get access to a few high schools or college sporting events in your area. This is an easy way to add a few images for your portfolio.
The beauty about finding images for your portfolio is that the potential client will look at them and have no clue that they are just friends of yours or that you asked to take photos for the sporting event for free. Subconsciously, they see the images and assume that you were a paid photographer for all of the events. This makes it look like you are not a “newbie”, therefore, giving you credibility.
Another option for getting images for your portfolio is to be an intern for another photographer. It might be tough finding a photographer to intern for depending on your location but this type of method is often used in wedding photography and that is because it works. Try to find a photographer that isn’t in your target area and see if you could intern for them. If they are a wedding photographer, ask to be a second shooter. If they are a commercial photographer, ask if you can help out around the studio. This might give you the opportunity to grab a few shots of your own while still learning a ton from practicing photographers. Sure you won’t get paid but the information and skills you receive are priceless!
One thing to think about when gathering up your images is to be critical. Don’t just find all of the images that pertain to your style of photography and think they are good enough for the website. Your first thought might be to add as many images as possible to make it look like you get tons of photography jobs but in reality, having a website with 10 really fantastic images is better than having 30 “okay” images. The images on your website are your online business card, your first impression. If you think the images you add to your portfolio are just ‘okay”, your client will too and move on to another photographer.
Posting to Social Media
Along with adding all of your best images to your website, you will also need to think about adding images to the most popular social media networks. Below is a list of the most popular social media networks for photographers.
Facebook
Obviously, Facebook is the king of social media right now. It is a great place for photographers to easily stay in touch with their clients and promote their business using promoted posts. Even though I wouldn’t recommend this, some photographers use Facebook as their online portfolio and have done very well. Click Here to see an example of how to set up your business Facebook page with fantastic work.
500px
One of the most popular social media sites used by photographers is 500px. Think of it as a network built by photographers, for photographers. It is not just a normal site where any novice is able to upload their blurry photos of cats. It is a place where the level of work is kept at a high standard. If you want a place to share your best work with other photographers and companies looking for great photos, 500px is the place. Click Here to check out the amazing 500px portfolio of Julia Krasovskaya.
Flikr
Flikr, much like 500px, is a place to keep an online portfolio of your best images separate from your website. The main difference is the quality of work that is added to Flikr. If you are just wanted to add your photos an album on Flikr, that will work out perfectly well, but if you are wanting to have a social media connection with other photographers, then Flikr might not be the best option. The upside to Flikr, however, is that you get unlimited storage for free! Click Here to see some impressive work from photographer Waldemar Weiss on Flikr
Instagram
Instagram is built only for photo sharing and that makes it great for photographers. When you add photos to Instagram you can place appropriate hashtags to the photos that will allow you to get a greater range of exposure. Instagram is one of my favorite social media networks for promoting photos to potential clients. For a few examples of some photographers on Instagram that are doing great, check out Dani Diamond, Mike Kelley, and Kristen Alana.
As you can see by Dani Diamonds Instagram account, he has a specific style with his images. Most, if not all, of his images, are edited and only showcase his work. One of the keys to getting a huge following on Instagram is to mainly showcase your work. A lot of photographers make the mistake of posting their professional images along with other personal images. If you really want an audience that loves your work, just posting your professional edited images only is a great step towards that goal. If you want to upload personal images to Instagram as well, you could always make a separate Instagram account.
Mike Kelley’s Instagram account is a great example of using Instagram’s hashtag searching to get more followers. If you look at a few of his images, you will see that he always adds hashtags that are really popular and relevant to his style of photography. Another thing that Mike posts to his account with his professionally edited images are behind the scenes photos and videos. This is a great way to gain more followers as a lot of photographers like to see exactly how he gets his images.
One of my favorite things about Kirsten Alana’s Instagram feed is that not only does she post amazing images but she includes herself in the images. Also, her general theme for her images is varied. This gives her the freedom to post almost anything and still have amazing work to showcase. Like Kirsten, I would recommend that Kirsten does is to comment on most of her images and respond to followers that comment and “heart” her images.
Is Social Media Important for a Photographer?
Well, the short answer to this question is simply, Yes! These days social media is one of the first places potential clients might find you. But which social media platforms are better than others for photographers? It would be a waste of time to keep up with all of the different social media platforms when only a few are actually worth using. In my experience, the 2 most important platforms are Facebook and Instagram.
Promoting on Facebook
Now one of the most popular social media networks, Facebook is almost required for any business but more importantly for photographers. Why? It is a way for your business to easily stay in contact with new or past customers. Let’s say you are a real estate photographer and you just finished editing the photos. Now it is time to share them on your Facebook account for customers to see. You don’t have to upload all of the photos but just a sample of about 5-8 photos. This one post will show up in your follower’s news feed and “remind” them that you are there to help. I say “remind” as it looks like you are just uploading photos to show off your work but it is an easy way to stay in front of them.
Now that you have that post live on your Facebook account, you can take it one step further and promote the post using a combination of location and interest-based targeting. Here is an example: let’s use the post we talked about earlier. You can click the “Boost Post” button on the bottom-right of the post. This will bring up a box that will allow you to advertise that post to almost anyone. Now you can promote this post to real estate agents in your surrounding cities. This means your post will show up in the news feed and it is your first real form of advertising. It does cost money, but you are able to select the amount of money you would like to spend along with the duration of the ad to customize to meet your needs. I have found that you should be able to get some really great results (people liking and commenting on your post) with spending around $15-$20 USD. Depending on your targeting, you should be able to advertise to 1,500 – 4,000 Facebook users.
Promoting Instagram
Instagram is one of my favorite platforms to promote photography. I mean, it is the platform that only uses photos so it is perfect for any photographer. Much like Facebook, you can constantly stay connected with your Followers and show your work on a regular basis. So you might be thinking, why not just use Facebook then if they are so similar? I have two great reasons; staying personable and hashtags.
I look at Instagram as a way to stay connected but also stay informal. One of the most popular reasons photographers use Instagram is for behind-the-scenes content. To use the real estate example from earlier, let’s say you were going to a house for the photo shoot. But if you were using Instagram, you could take photos of your camera or camera bag saying you’re are getting ready for a shoot. You could even take photos or video of you at the home which shooting the house. These few posts along with a few of the edited photos make for a great photo story to show your process as a photographer. Not only will potential clients see these posts but other photographers will as well giving you even more exposure.
Hashtags are one of the most important parts of Instagram. It is essentially one of the only ways to search for photos so if you want more exposure, you must use hashtags. Again, going with the real estate photography shoot from earlier; when you are posting the photos, it is important to include relevant hashtags to go along with your post. Instagram allows you to include up to 30 hashtags along with your description which gives you plenty of opportunities to get exposure. If you are having trouble coming up with relevant hashtags, you can use a free, online hashtag generator. One of my favorites is called Display Purposes. Using that service, you can type in a hashtag (in this case #realestatephotography) and it will display as many of the most popular, relevant hashtags available for you to copy and paste into your Instagram post.
How to Promote Your Photos on Instagram Using Hashtags
Obviously, when it comes to social media, you have plenty of platforms to choose from (like Twitter, Pinterest, Tumblr, Google+, SnapChat, etc.) but it is important to concentrate on what can jumpstart your business in the short term in order to get jobs quickly. Later on, when your photography business starts to grow, you can afford to experiment with other social media platforms to try and grow your business even more.
Photo Editing and Workflows
When it comes to getting great images, it isn’t just a matter of buying a nice camera and clicking a button. Editing is also extremely important. Editing your photos is where you start to develop a style of how your images will look and your style is what potential clients fall in love with. When it comes to editing these days, two main software platforms really stand out from the rest and are used by the vast majority of photographers today; Adobe Lightroom and Adobe Photoshop.
Lightroom vs Photoshop for Beginner Photographers
Lightroom vs. Photoshop
Adobe Lightroom is fantastic editing software. It was specifically built and designed to make the editing and organization process as easy and fast as possible. One of the main benefits of using Lightroom over Photoshop is that you are able to organize your photos within the program as well as rate them, put them in collections, and even send them to printers directly from the software. On the other hand, Photoshop is way more powerful than Lightroom. With Photoshop, you can perform advanced editing techniques such as background removal, swap features, combine two photos together, etc. Below are a few pros and cons for using either Photoshop or Lightroom:
Adobe Lightroom Pros
RAW Processing all in one program – Unlike Photoshop, you are able to edit your RAW files in Lightroom. In Photoshop, you have to edit your RAW files in Camera RAW then they will open in Photoshop.
Organization – Unlike Photoshop, you are able to import your photos into Lightroom and keep them organized.
Beginner Friendly – Editing in Lightroom is extremely easy and very user-friendly.
Adobe Lightroom Cons
Limited Retouching – Lightroom does allow you to do some very simple retouching but there may be times with you need to remove something from a photo that Lightroom can’t handle.
Importing – Importing your photos into Lightroom can be a bit slow and take a while depending on your RAW file size.
Slowness – Depending on the computer you are running Lightroom on, it could run a bit sluggish. This can be very frustrating when you are trying to edit multiple photos.
Adobe Photoshop Pros
Advanced Retouching – With Photoshop, you can do even the most advanced retouching from swapping faces to removing items from photos entirely.
Layers and Blending Modes – Being able to work with layers and blending modes can give you many different advanced editing techniques that you can’t get in Lightroom.
Clone Stamp and Healing Brush – Sure Lightroom has some cloning and healing features but you get way more control in Photoshop.
Adobe Photoshop Cons
More Difficult to Learn – Understand the many different features and tools in Photoshop can certainly take some time and might require a bit more patience than using Lightroom.
No Organization – Unlike Lightroom, you can basically only edit one photo at a time, and once you are done, it is up to you to create a regular file structure to store your files.
Camera RAW then Photoshop – When editing RAW photos in Photoshop, you will have to not only learn Photoshop itself, but you will have to learn another program called Camera RAW.
When it comes to editing and running a photography business, one thing to keep in mind is the time it takes to edit your photos. You don’t want to spend tons of time editing your photos as this will mean you are working too hard for your money. One way to edit your photos faster is to use Lightroom Presets or Photoshop Actions. Lightroom presets and Photoshop Actions let you apply different effects to your photos with just one-click and once you find a style that you like, you can apply that same effect to all of your photos which will save you time. Using these editing methods are not mandatory but if you have a specific style you like to edit with and want to make sure you get the photos back to the client as quickly as possible, these are a really great addition to your workflow.
If you are new to Adobe Lightroom, one thing you might want to check out is our Beginners Guide to Lightroom eBook. This ebook goes over everything you need to know for starting out in Adobe Lightroom and even includes video tutorials and real-world editing examples to show you how powerful Lightroom can be.
Ways of Getting Clients as a New Photographer
Now that you have got all your “starter” images, let’s build your online presence. It used to be that all you needed was a website and you were ready to get jobs but now you need so much more. Potential clients want to be able to find you in as many places as possible. This gives them a sense of security as it implies you are a legitimate business.
Your first step is to start with your home base, a.k.a your website.
Websites: All You Need to Know About Them
There are many different website hosting services available to photographers. Some of the most popular are Smugmug, Squarespace, Zenfolio, WordPress, and Wix. All of these offer different features and some work better for different photographers. For example, if you want a service that will print photos for you once they are purchased from your website, SmugMug or Zenfolio is probably your best option. Let’s take a closer look at these photography website hosts and you will get a better idea of which one will work best for you.
Using WordPress to build your own Website
When it comes to building your website, there are a few steps you need to following order to get started.
Buy a domain name – You first step is getting a domain name, or commonly referred to as a URL or web address. This will be the address clients and viewers of your website use to actually get to your website. To do this, you can visit a site like Bluehost and purchase your domain name that way.
Setup your hosting – If you are using a website platform like WordPress, we recommend using Bluehost as a hosting service. (Siteground is also recommended as we tested them and it’s cheaper!). They have great pricing, very easy to use and have a 1-click WordPress install to get your website up and ready for you to design.
Install WordPress – With Bluehost or Siteground, all you need to do is click one button and they will automatically install WordPress for you and walk you through setting up login credentials.
Install a WordPress theme – A WordPress theme is basically the look of your website. There are thousands of themes to choose from so spend some time looking at all of the themes and choose the best one for your content.
Add your pages – The typical pages you can add to your website are the photo gallery, about, contact and blog page. Once you have those pages set up, you can think about adding other pages that can target specific clients.
How to Buy A Domain, Setup Hosting, and Install WordPress
How to Build Your Own Photography Website in WordPress
Examples of Good and Bad Photography Portfolios
WordPress is one of the most popular content management systems on the internet. It is an open source platform used to create any type of website or blog. One of the best things about WordPress is that the software used to run the website is completely free. All you need is a URL and hosting service. There are many bad and good hosting companies out there. We have personally built over 50 sites with on Bluehost or Siteground. It has a one-click WordPress installs which they will install everything for you once you sign up. Obviously, if you are “website-savvy” and have your own hosting you can skip this step.
One of the major advantages of using WordPress is that you have the ability to install what are called “Plug-ins”. These Plug-ins allow you to completely customize your site. If you want a different style photo gallery to showcase your photos, all you have to do is search for the free plug-in you like, and install it. This also works for the look of your website. To change the look, you will need to change the “Theme” of your site. This can also be done free. Just search for the look you like, customize it and activate it to be live on your site. All of your content should transfer over. Some of the most popular themes for photographers are called “Oshine” and “Uncode”. These are paid versions but come with tons of bonus materials as well as support. If you want some free options, check out the “Aperture” or “Divinia” theme.
One disadvantage to using WordPress is that it does have a learning curve. It could be a bit overwhelming when trying to update it and make a few custom changes. If you are not as familiar with CMS (Content Management Systems) and web plug-ins, it is still possible you could play around with it and learn along the way but if you are looking for something very simple and easy, you would probably benefit from using one of the other services.
One of the most popular, and well-known photography portfolio host is SmugMug. It has many plans from just a simple place to put your photos, to really advanced plans that give you complete control over every inch of your website. The themes are gorgeous and plentiful and with the second tier plan, you can start customizing it to make it look exactly how you want to. Even though you can completely customize your website, the backend, the user interface isn’t as intuitive as its competitors.
Smugmug also gives you the opportunity to set up a store with their built-in Shop feature. You are able to sell your prints as well as sell instant downloads if you like. Smugmug will take care of all the payment processing but they take a 15% cut per order.
The pricing is decent compared to other online hosts but it does lack a free account option. You can, however, try it free for 14 days without entering any credit card information.
Squarespace
If I had to rate all of these hosts, I would put SquareSpace towards the top of the list. This is the hosting service I personally use because it fits my needs perfectly. Much like other online website platforms, it offers themes that allow you to customize as much of the website as possible. One of the taglines they promote all of the time is that if you can move files around or send an email, you can use Squarespace and that is certainly true. It is easy to use and ability to quickly update your site with new images and text is fantastic.
When looking at the themes that Squarespace has to offer they are some of the most beautiful and functional of all of the website hosting services I have used or seen. When it comes to setting up your photography website, having a clean and minimalist design has always been key. You really want your images to stand out as much as possible and having a really cluttered or horribly designed website can really take away from letting your images shine. If you look at the themes under the “Photography” section that are great for getting started. They are clean, simple, and show off images beautifully. But, if you look at other categories, you will find that you can get a website look that can really make you stand out above the rest in your field.
One other aspect I really like about Squarespace is all of their themes are mobile-responsive. This means that all the changes you make on your website will instantly be reflected on any mobile device and they look great. No need to have to worry about how your new website or images will look on a mobile phone or tablet.
Currently, you are able to try Squarespace for 14 days Free with no credit card required. This should be plenty of time for you to upload all of your images, add your about page, and add custom fields for pricing and services. Once you get familiar with the service and you feel it is the right one for you, then you can sign up for a month-to-month plan or even sign up for an entire year and get a free domain. This will save you from having to go through a different company for your URL which can be a real hassle.
Zenfolio
When I first starting my photography business, Zenfolio was the first hosting service I used. I was only interested in selling prints, landscapes, fine art prints, etc., and I liked it because it was fairly easy to use. There was a learning curve on the backend of the hosting site but it wasn’t too bad and the themes were decent. Since that time I have moved to Squarespace and am happy there but after testing Zenfolio again, I am very impressed with how they have changed. It seems to me that have really made it a priority to show that a Zenfolio website is for photographers and not just for everyone. Sure, you have the ability to customize it to fit any business need but it is really meant for photographers.
First, let’s start with the look and feel of the websites. They have really concentrated on the look of the websites and it really shows in the themes they offer. Much like Squarespace, they offer great looking, clean themes that really concentrate on how your photos are displayed. They offer a variety of themes that have huge photos that take up the entire screen or you can choose awesome thumbnail views that give the viewer a chance to see a lot of photos all at once.
One feature that I really like about Zenfolio is the ability to sell prints and accept payment directly from your site. This means no matter what type of photographer you are, if you want to sell your prints this is one of the best website hosting services to use. Let’s say you are a portrait photographer and you just got done photographing a couple and want them to have the ability to pick and choose which photos they would like to have. With Zenfolio, you have the ability to set up a custom site just for that couple (you can even password protect it) which can showcase only their images and they can choose which ones to download. Even if they would like a physical print, they are able to select the photos, choose the size and order directly from there without you having to lift a finger. Zenfolio has a larger list of photo printers incorporated into the site and will print the image and ship it for you. All have to do is sit back and let them do all the work.
Right now you can give Zenfolio a try to see if it is the right service for you without even entering a credit card. They have plans starting at 5$ USD a month and you can always upgrade your account to unlock new features.
Wix
Not many people have heard of Wix but it is a great service that allows you to build a website from scratch using a WYSIWYG interface (what you see is what you get). This means that you can just drag and drop different elements onto your website and it can go anywhere you place it. For example, let’s say you want to put a small gallery of your photos in the top-right corner of one web page. You can easily do that by dragging the Gallery widget there and then put in your photos. It is that simple!
Wix is template based just like most online website builders but you are also able to freely move the elements around. For Wix, it seems like the templates are only a starting point. It gives you an idea of how a website will look but you will still need to remove all of the default content and start adding your own.
One of the most popular reasons to choose Wix is that you are able to build your entire website for free without any time restraints. You can take your time building your website without spending a dime to make sure it looks perfect and ready to attract customers. The only drawback is you will have a small banner at the top and bottom of your page that advertises the website was built using Wix. Obviously, if you pay for the service (which is fairly inexpensive) the Wix branding will be removed.
Website Design
The look of your website is very important and can really show clients the type of photographer you are without them even looking at a photo. What do I mean by this? Well, if you want to come off as a photographer who gets paid “big bucks” for the type of work you produce, then having a website with a purple background, red frames around your images, and piano music that plays in the background won’t have the best first impression.
There are tons of different photography websites out there and they all look very different. Even if you use one of the hosting services listed above and select one of the most popular templates available, your site will look different because of the types of images you select. One of the things I have found to help when designing your website is to just keep it simple. This means choosing colors that are neutral and less saturated. One way to achieve this simplified look is to simply make your background white. Even if you want a small textured background, make sure the background is a light, white tone. This serves two purposes; first, it helps to automatically declutter your website while keeping it clean and secondly it helps your photos pop off on the site more than a colored background.
Another aspect of having a successful website design is to select your best photos and display them in the right way. Let’s say you want to sell you’re fine art landscapes on your site but you currently have all of your photos in one huge gallery. You have waterfall images mixed in with beach photos along with cityscapes. If a buyer was scrolling through your website and was looking for a particular image, they might be frustrated because they are looking through a ton of other images that don’t interest them. In this scenario, it would probably be best if you separate your images into different galleries. This means separating your images by subject matter so your clients can easily find what they might be looking for. This can also be applied to other types of photographers. If you are a portrait photographer who shoots all different types of family and people portraits then separating your images into groups such as families, high school seniors, weddings, babies, and headshots will be best.
This is great once you have tons of images but when you are starting out, you might not have enough images to fill a gallery. That is perfectly fine. Just try to have about 10-15 really solid images to include into one gallery. Once your business starts to grow and you start getting more and more clients, you can then separate your images into the different subject matter.
One of the last elements on your website to concentrate on, and something that is normally overlooked by a lot of photographers, is their About page. Your About page is a page that 80% – 90% of potential clients look at before considering your for a job. This is the page where you sell who you are, what you can do for the potential client, and separate you from the other photographers in your area. When writing your about page, there are some key items that are imperative to include:
“Who are you” – This is something that a lot of photographers like to include near the top of the page. This section doesn’t have to be long, it is just a small introduction of who you are.
“How are you unique?” – In this section, it is important to tell your clients how you are different from all of the other photographers in your city. Tell them why you do what you do and the type of passion you have for your photography.
“Gear and Skill” – A lot of photographers don’t like to talk about what type of gear they shoot with on their websites. It is almost like a secret they don’t want to reveal but the truth is this type of information only lets clients know you have all of the necessary gear to get the job done. Believe it or not, this is a popular question a lot of photographers get and it is great to have a small section of your website devoted to your gear.
Optimizing Your Website
If you are new to building your photography website even if you already have one that is up and running, it won’t do you any good if the search engines don’t know you exist! This is where Search Engine Optimization (SEO) comes in. Search Engine Optimization is extremely important when getting the most visitors to your website as possible. There are tons of search engines out there but for the sake of this article, we are going to talk about the most important and the most widely used, Google.
Domain Name/URL
So one of the easiest ways to start optimizing your website is with your domain name. Your domain name is the address you type into an internet browser (i.e. www.photographynorthcarolina.com). It is important to pick a domain name this speaks to the type of photography that you want to take. A lot of photographers choose to use their name plus “photography” as their domain name (www.johnsmithphotography.com) which is okay but it could be better when it comes to the search engines. In the first example shown I selected my photography business URL name to be www.photographynorthcarolina.com. This is because I want to show up close to the top of the search results if someone were to type in North Carolina Photography. This method won’t work all the time but with all of the other techniques we will discuss, this will certainly help.
Add Keywords to Your Images
After editing your photos and exporting them, do you even go back and change the filename to something other than the default name? You might be wondering why that even matters. One main reason why this matters is that when you upload the photo to your website (or any other public site) the search engines can see the filename of your image. This is where keywords come in. Instead of naming your image MountainPhoto1.jpeg, try stringing in a bunch of keywords relevant to your photo. For example, if you took this mountain photo at a specific location, you can name it rocky – mountain -landscape – photography.jpg. So now, when someone does a Google Image search for rocky mountain photography, your image will have a better chance of showing up under the results. If you were to name the photo by the original name, it wouldn’t have shown up and you could have missed an opportunity to get your image seen. If you are struggling with the types of keywords to use, below are a few examples to get you started.
Wedding Photographers – bride, groom, wedding, husband, wife, ring, photographer, love, marriage, [name of the city and surrounding cities]
Real Estate Photographers – real, estate, architecture, photographer, photography, homes, luxury, interiors, [name of the city and surrounding cities]
Pet Photographers – dog, cat, portrait, puppy, kitten, cute, animal, photographer, [name of the city and surrounding cities]
As you can see this is only a starting point but one thing to note is I would always include the city you want to advertise to in the keyword string. This helps with locational searches and will give you better search results for your area.
Google Webmaster / Submitting your URL to Google
For some, this might be a little bit over there head but it is really not too difficult. I will do my best to try to simplify this process for you. Once you have created your site it is best to let popular search engines like Google know what your site is there so it can “crawl” your site. What does “crawl” mean? Crawling a website is something that search engines do to help index all of the information on the internet. They will send out internet bots, known as crawlers or spiders, to browse through your site and index all of the content, including photos and keywords, and make them easier to search by the end user. By letting Google or any of the other search engines know you are there, you are telling them your site is up and running rather than waiting for the bots to get to your site.
There are a couple of ways to do this so we will start off with the easiest one first. To simply tell Google your URL is there, go to https://www.google.com/webmasters/tools/submit-url. From there you will see a brief description of what will happen when you type in your URL:
“Google adds new sites to our index, and updates existing ones, every time we crawl the web. If you have a new URL, tell us about it here. We don’t add all submitted URLs to our index, and we can’t make predictions or guarantees about when or if submitted URLs will appear in our index.”
Basically, this means when you type in your URL, you are asking Google to index your site but they can’t guarantee when or if this will happen. Another method to help Google know your site is up and ready to be indexed is to sign up for Google Webmaster (Gmail account required). Setting up a Google Webmaster account is really simple and it gives you tons of different options for maximizing your website’s search capability. A lot of these features are intended for more advanced users but the “crawl” feature is the one that I use most of the time. Once you add your property (your website) and go through the verification process, you can click on the property URL and have tons of options to choose from. To force Google to crawl your website, click on Crawl and select the option to Fetch as Google. From there, you will see an option to Fetch and Render, select that option and this will force Google to crawl your site and render web page images. You don’t have to do this often but I would recommend asking Google to fetch your website again if you happen to make any major structural changes to your website; renaming pages, adding a new gallery of images, adding hyperlinks, etc.
Documents, Contracts, and Payments
One very important aspect of starting a photography business that a lot of photographers overlook is documentation and payments. It is best to have these items ready to go before you start getting tons of jobs and had to scramble to find a form that will work for your shoot.
The type of form you will need all depends on the type of photography you are taking. Below are a few generic forms/contracts that you are free to download and use for your new business.
Note: Sleeklens is not responsible for any damages, lawsuits, or disputes that may arise from the use of the downloadable forms. Please consult a lawyer or legal professional for more information about the legality of this form
Model Release Form
A model release form is usually needed when you are photography a person that is recognizable (silhouette photos or detail photos usually do not qualify for these forms unless your subject is identifiable). Having a model release form is used to protect against liability lawsuits and does not only protect you, the photographer but also your model.
Another popular form that is used is a Copyright Release Form. The main purpose of this form is to allow your clients to use these photos to print or put on social media. Technically signing this form doesn’t mean you do not own your photos anymore, but allows your clients to use them without recourse.
This form is a general agreement between you, the photographer, and your clients. This form is fairly simple and is a small contract stating you have been hired for a job and have been requested to photography at a certain date and time.
If you are a landscape or fine art photography who wants to sell your prints in a gallery setting, this form is important to use as it is a simple contract between you, the photographer, and the gallery or shop in question.
What is Copyright? Copyright is actually very simple. It basically means the photographer who took the image, owns the copyright to the photo. This means that once you press the shutter button, the photographer who took the image will own the copyright for those particular images for a period of that photographers lifetime plus an additional 25 years automatically without having to file anything with your local government or copyright office. The copyright for your work is automatically applied to your images once you post them to the internet or have them printed. This is due to your photos then living on a “tangible medium” meaning “when its embodiment in a copy or phonorecord, by or under the authority of the author, is sufficiently permanent or stable to permit it to be perceived, reproduced, or otherwise communicated for a period of more than transitory duration.” This is just a fancy way of saying it is out in the open and you own it. Do I have to register my photos? Copyright registration is totally voluntary and is completely up to the photographer on whether they ever want to register their photos. Many photographers these days don’t worry about the hassle and cost of legally registering their photos. So then why do it? Well, the main difference is if someone happens to steal or uses your work without your permission and they refuse to stop or remove a photo from a website, as an example, if you have your photos registered legally, you will be entitled to “statutory damages”. This means you would be able to sue for a higher value of damages that are at your discretion. If you haven’t filed your images with your local government’s copyright office, you could only ask for “fair market value’ for your work which would be significantly less. What to do if someone uses your photo?
So, let’s say someone uses your photo without your permission. What can you do? What are the steps you need to take? Below are some things you can do to try to correct the situation:
Photo Credit – If you see someone using one of your photos and you are Ok with it, you can simply request that the credit you for the photo. Most of the time, sites are more than willing to give you credit for a photo if you contact them directly.
Send a Cease and Desist Letter/Email – If you want your photo removed and you have contacted the party that is using your photo without your permission without hearing back, you will need to send a formal Cease and Desist letter. This basically states that you want them to remove the photo immediately or you will be forced to take legal action.
File an Infringement Lawsuit – This step is the most forceful of all the steps as this means you are actively wanting to sue the party that is using your photo and request damages. As discussed above, depending on if your photo has been filed with the copyright office, you will only be able to request a certain amount of compensation.
For U.S. readers, you can register a copyright for your images be visiting the U.S. Copyright Office website. If you are outside of the U.S. make sure you check with your local government on their copyright laws.
How To Accept Payment For Your photography Work
Having all of your images on your new website, your social media accounts setup up, and your advertisements on Facebook going are great but now that you got your first couple jobs, it is time to actually collect your money. Collecting payment these days is extremely easy for small businesses and, in this section, we are going to talk about all the different types of ways to accept payment online.
Paypal
Paypal has been a trusted source for accepting payment online for over a decade. It is extremely easy to use and for small businesses, you can use the free invoicing service they provide. This allows you to send a simple, but professional looking invoice directly to your clients via email (or you can print it off and mail it to them if you wish) and they will be able to pay you directly from the invoice. Your money will be deposited directly into your Paypal account where you can keep it there and let it grow, or you can withdraw it to bring the money home.
One drawback of using a service like this, most other online payment services operate this way as well, is that for every transaction Paypal will take a small percentage of the money for a processing fee. Currently, Paypal will subtract 2.9% + $0.30 USD from your transaction. So this means that for every $100, they will be taking out roughly $3 plus $0.30. This might not sound like much but the more money you invoice, the more money will be taken out. There is good and bad to this for photographers who are starting out. The good is that you do not have to pay a monthly fee to use the service. If you happen to not have any clients for a month, you are not charged anything. You will only be charged when your client pays you. The bad is that over time, as your photography business gets bigger and bigger, you will start seeing these fees grow and you could be losing out on some major profits.
Square
Square (not to be confused with SquareSpace) is another great company for accepting payments either in person or online. Much like Paypal, it offers free invoicing services plus the cost of processing online payments is exactly the same (2.9% + $0.30). The main difference between these two popular methods for accepting payments is that Square is known for its smartphone apps and accepting payments on the go. As a photographer, you might have rare occasions that you would accept payment in person, usually, if this is the case you will be written a check, but it is always good to be prepared. Square also offers a free Magstripe card reader that they will send to you to help start accepting mobile payments. Did I mention it is free?
When it comes to accepting payments whether online or in person, you have tons of options. Even if you don’t choose Paypal or Square as one of your methods, just make sure you try to find one with zero monthly fees and a low-cost processing fee when starting out. Once your business grows and your clients become more regular, you can afford to get a more comprehensive invoice and payment service.
Spread the Word
Probably one of the most important aspects of starting a photography business, or any business for that matter, is advertising! I mean, what is the point of having this awesome business where you can provide an amazing service to so many people if those people don’t even know you exist! The great thing about advertising is that it is extremely easy but you have to make sure you stick with it. Just because you printed a flyer and hung it up on a bulletin board in a coffee shop doesn’t mean you will have tons and tons of customers coming to you for photography jobs. Below are a few new and old ways of advertising that can help jumpstart the growth of your business.
We have made it easy for you to start out with your marketing items. Even if you don’t have any design experience, you will be about to download these FREE Photoshop Templates that will allow you to replace all of the information to suit your business. With this starter pack, you will receive a free Facebook cover photo design, postcard design, business card design, and pricing guide. Also, if you want to try a starter pack of Lightroom presets, you can click here to download those as well. With all of these offers, you will be ahead of all the other photographers who are starting at the bottom.
Subscribe to download the complete starter pack.
Customizing Your FREE Photography Business Starter Pack
Photography Business Cards (included in the pack above)
Business cards are one of the oldest forms of advertising there is. Handing out business cards is something that almost every business does and it is mainly to have a physical reminder of the meeting you. Think about it, if you are needing tax help and you find a business card laying around of the time you met a guy you knew that does taxes, you are more likely to call him. The same is true for a photographer. If a family finds your business cards laying around, they are more likely to call you because the search for finding a photographer is half over. Also, the good news about business cards is they are cheap. I personally get 500 printed and keep a handful in my wallet so I always have some to hand out to anyone I meet. Even if you give your card to someone who isn’t looking for photography services, they might know someone who is.
Postcards/Leave Behinds (included in the pack above)
One of the other methods of advertising a business is to have a postcard design for your business. It doesn’t have to be anything super creative, although that does help, it just needs to be something simple that shows the type of work you do, your contact information and maybe a special that you are running. I have found that it is good to always have a small special that you are advertising and then during certain events like holidays, you can offer different specials. The reason I call these leave-behinds is, much like business cards, they are cheap and something you can leave places that allow certain businesses to advertise. Depending on the type of photography business you want to start, you have tons of places you can leave these leave-behinds. If you a portrait photographer you can leave these types of cards in subdivisions that have tons of family housing, apartment complexes, salons, etc. If you are a real estate photographer, you can leave these at open houses, realtor offices, and drop them off to For-Sale-By-Owner homes. If you are a wedding photographer, you can leave these wedding shows, bridal shops and beauty schools. Of course, no matter what type of photographer you are, you can always drop these off at coffee shops, restaurants, breweries, and any business bulletin board. As you can see you have plenty of opportunities to advertise your business and even if you don’t hear back from potential clients the first time you leave them behind, keep trying!
Word of Mouth / Referrals
Word of mouth is one of the best forms of advertising and certainly the most effective. It may sound simple but having others be your advertisers is one of the best ways to spread the word about your new business. But before you can have all of the folks running around telling others about your business, you need to tell them first. Tell everyone you know about your new venture and how you would really like their help finding clients. Tell your parents, grandparents, aunts, uncles, brothers, sisters, friends, coworkers; tell anyone and everyone you know. Don’t be shy about starting your business and asking for help looking for clients. You can even say “I know of anyone who wants photos taken, send them my way and let them know I will give them a discount”. You do not have to tell them what the discount is but you can give them a small price reduction if they choose you as their photographer.
Google Business Listing
When you are starting a photography business, Google is your friend. Even if you are more of a Yahoo or Bing kind of person, Google is extremely important to getting clients. Normally when potential clients are searching for photographers in their area, they are using Google and having a Google Business listing is how they can find you. When you set up a business listing you are letting Google know that you are a real business and you service a certain area. You can add in all of your normal business information, as well as set up a Google Business page. On this page you can have your contact information, website, hours, and photos showcasing your work. Since setting up a business page, I have seen an amazing increase in traffic to my website.
Facebook and Instagram Promotions
As I mentioned before in this article, promoting your business on Facebook and Instagram is both easy and cost-effective. When setting up a promoted post, you are able to select a specific area to promote add interest categories and even gender. Let’s say you are a wedding photographer and you want to promote to newly engaged brides in your surrounding cities. From either Facebook or Instagram, you are able to create a post with one of your best wedding photos advertising your services. From there you can select engaged women and the closest cities around you. Next, just specify your budget for the post and how long you would like it to run then you are set! Doing this won’t guarantee clients, no form of advertising can do that, but it will get your name out there. It is also possible you might have to run a couple of ads back to back with different photos and announcements to test the market but this is all normal when trying to advertise a business.
Mailing List
Another tried and true way to keep your advertising effects going with minimal cost is to create a mailing list. We all joined mailing lists before and why? Because they are the perfect way to stay in touch with the businesses we care about. You don’t need anything fancy, just a simple name and email capture form and you know have valuable customer information. One simple way to entice clients to sign up for your mailing list is to offer a special just for those clients. For example, if you what to encourage people to sign up for your mailing list, maybe offer them a 20% off discount on their next photo shoot. If you are not sure how to set up a mailing list, make sure you check your website building. Most online website platforms have a built-in mailings list feature that will handle the capturing of names and emails for you. All you need to do is add it to your site. If you want a different way of doing this outside of your website, check out the service MailChimp. MailChimp is a great tool for capturing and sending free newsletters, up to a certain amount of subscribers.
YouTube
Now I know the thought of being in front of the camera when you are usually the one who is behind it can be a little scary but producing video content about your photography can be an extremely powerful method of advertising. These days, more and more photographers are producing videos to advertise their services and the reason I would put those videos on YouTube is that Google owns YouTube; that’s right, it all goes back to Google. The videos you make don’t have to be super long or some high-quality Hollywood production, it could just be a short video of you telling your story about a recent photo shoot. However, if the thought of being in front of the camera really scares you then even creating a nice collage of photos, a slideshow, can work. Just having another piece of content can really help drive traffic to your website and hopefully give you more clients.
The Right Pricing Is Important
One of the main things to consider when starting a photography business is pricing. Pricing is important as that is the way you keep your business alive. If you price under your target market, you will probably get a ton of jobs but you are going to be working way too hard for that money. If you price slightly over your target market, you will get fewer jobs but make more money for each. It is best to find a happy medium and to do this, here are some things to consider. What Exactly Is Your Target Market? In a nutshell, your target market is the collective group you wish to generate business from. For example, if you are wanting to sell you fine art photography prints, you are not going to go looking for newly engaged couples to buy your prints; you are going to look at local art galleries in your area instead. This is true will almost every type of photography. When it comes to pricing your target market you need to consider the type of business you want to offer. If you are a wedding photographer and only want to shoot the really high-end weddings, your cost will probably reflect that, may being around the $3,000 – $5,000 range. This means that you are not going to market to every newly engaged couple you meet. You are going to advertise towards the very high-end clients who want services that the vast majority of wedding photographers won’t provide.To help figure out your target market, just look at your location. If you are in a larger city, like Los Angeles, California, USA then you will probably charge more than someone who is in a small town like Cabot, Arkansas. This isn’t the only thing that can dictate your pricing but it does play a huge role. Calculate Your Time On An Average ShootOne easy way to figure out a base of what you should charge is to take an average photo shoot scenario and calculate the hours it takes to finish this job. Below is an example of how to do this for a real estate photographer but it can be tailored to all types of photography.
The time it Takes to Photograph an Average Home: 1 Hour Maximum
Average Travel Time: Between 25-30 minutes
Average Time of Editing: 1 Hour
Average Time for Misc Task (Invoicing, Sending the Photos, etc.) – 30 Minutes
Total Time: 3 Hours
So now that we know it takes an average of 3 hours to complete this type of photo shoot, we now need to test a couple of pricing options. If we are thinking of charging $50 for this type of shoot, we can use this to see what our hourly rate would be. To do this, you basically divide your possible charge amount ($50) by the number of hours to complete the job. $50 / 3 Hours is $16.67 per hour…this is way too low. If you want to charge this amount, you will be working way too hard for very little pay. Now, if you want to charge $100, we can do the same equation; $100 / 3 Hours is $33.33 per hour. This hourly rate is much more doable. Usually in most marketings, if you can keep your potential hourly rate between $25 – $35 per hour, you have a solid base cost for your market.CompetitionAnother way to figure out what you might want to charge is to simply look at your competition. Spend a few hours doing a few Google searches for your type of photographer in your area and see what they charge for your quality of work. If for some reason they don’t have their pricing listed, you can email them and ask to know what a typical shoot would cost. It might also help to look on social media accounts and see the type of following they have. This won’t give you a number to go by but it will show you the photographer in your area with the most followers and then you can see your top competitors and ask them what that might charge.
If you happen to have a number in mind of what you would like to charge, say $200 per shoot and, based on your competition, you see other photographers charging $100 then you need to figure out if you can justify you double cost or lower your price and still keep the same quality of work. There’s really no easy, sure-fire way of figuring out the amount you should charge but these steps should certainly get yours in the ballpark.
Referrals: Creative Ways to Market
These days, photography is mainly a word-of-mouth business. Sure, you can get jobs from people visiting your site, looking at your portfolio and contacting you for a job but most of the time your past clients are doing the marketing for you. If you did a great job for them, they are more likely to throw your name out in any conversation that involves photography but if they had a poor experience, they are also going to give you negative word-of-mouth advertising and it is up to you to minimize that. When it comes to word-of-mouth to more past customers you have spreading their happiness with you the more jobs you are likely to get; it is a simple as that. So how do we get our past customers to talk about us to their friends? One of the best ways is to start a referral program. A referral program is a fantastic way to thank your clients for helping you spread the word about your business but it also gives you a huge amount of potential business and the beauty of starting a referral program is it is as easy as sending an email. First, you need to figure out the type of referral reward you would like to offer. Depending on your type of photography, this could be in many different forms. If you are a portrait photographer, you could ask your past clients to tell their friends and family about you and in return, they will get half off their next photo shoot with you. If you are a real estate photographer, you can tell your clients that if they refer someone to you and you get the job, they will get their next shoot for free. If you are a wedding photographer, you could offer a free photo book of their recent images. The level of customization is completely up to yo u.There are many types of referrals out there that do not involve you starting your own program. Other types of offers are sometimes called “Something for Something” programs. These types of programs usually consist of you providing your photography services in exchange for being able to advertise. Let’s look at the many different ways you can use the “Something for Something” method.
Restaurants
If you have ever been in a small, local restaurant or cafe you have most likely seen artwork that is done by artists in the area. Typically they are also for sale. Why would the restaurant own what to hang this type of artwork up? Well, it achieves two different goals: passive income for the owner and nicely decorated walls. You see, having our artwork hung in this type of setting gives the restaurant or cafe owner a way of decorating their shop for free but it also gives them income if the print happens to sell. This mains good things for you, the photographer as well. You are able to get exposure to hundreds of people every day and if print sales, you get some money! Typically in these cases, the owner will take 20%-30% of the sale and you keep the rest. All you need to do is provide the print!
Corporate Offices / Hotels
Believe it or not, a lot of corporate offices struggle with finding quality artwork for their business. When furnishing their new company, they usually will have some cheap artwork installed it is both generic and ugly. We as photographers want to help them with this. Much like the advertising the restaurants and cafes, you could approach the new business owner and ask them if they would like photos of the area to display in their office. You wouldn’t be offering these photos for free, you would just give them a discount as they would hopefully be ordering your prints in bulk. If they happen to say no, that is when you would still thank them for their time and leave a few business cards so if they change their mind, they will know how to reach you!
Boutiques and Bridal Shops
Wedding/portrait photographers make up a HUGE amount of the overall photography industry. Almost all of the new brides have “find a wedding photographer” on their pre-wedding checklist. A lot of business comes from word-of-mouth but a lot of business comes from the brides visited local boutiques and bridal shops. These days, when you walk into a bridal shop you will see tons of framed photos of beautiful brides on their wedding day and these are basically advertisements for wedding photographers in your area. Why are they having up in the shop? This is because the owner of the shop and the photographer have made a deal that if they are allowed to hang up their photos, the shop will get a small fee when the bride selects them as their photographer.You will also see tons of business cards and postcard sized advertisements that will be laying around for local photographers in your area. These can typically be left at the shop for free but if you plan to go that route, you just need to make sure your marketing materials are very well designed and stand out.
Free
Free…the word that every photographer doesn’t want to hear. If you are new to getting clients and want to start out slow to make sure you have everything setup, you could go to businesses in your area and ask them if they have a need for a photographer. This could be anything from asking a restaurant if they need professional photos of their food, asking a real estate agent at an open house if they need shots of the home while you are there, and even asking random couples at the park if you could take their photos for free and email them a professionally editing portrait. Now, why would you want to do this? Simple, you offer a service for free now so they will remember you in the future. Maybe that real estate agent is in a pinch and they need photos quick. They could contact you to see if you are available to shoot a home for them. Even if you never hear from them again it is always possible that they could pass your information off to a coworker or friend and then go right back to being a positive word-of-mouth communication. Now you can see how word-of-mouth advertising is so important!
Shooting to Charity and Non-Profits
One really great way to get exposure and help out those less fortunate or shoot for a good cause is to photography for charities. Obviously, you will not get paid for the shoot but in most cases, you are providing a service to your community or an organization for free in return for being able to advertise your business. If you do happen to photograph for a charity, make sure you have cards made promoting yourself and ready to hand out at any moment. Not only are you doing a good thing by helping out local charities, but you are getting really good exposure.
Maintaining a Job While Starting Another
Most photographers who have started a successful photography business started out really small. With that being said, a lot have also started their photography business while still having a full-time job. Some even still have a full-time job when they run their current photography business. That is the beauty about this type of work; you have the flexibility of doing it part-time or full-time. With all of that being said, there are still some things to consider when you have a full-time job and a part-time photography business and that is time and money.
Time
You will quickly find that time is going to be a huge factor. Your days of coming home from work and relaxing the rest of the night will be few and far between. Once you get home that is your time to start your second job. This is when you can answer customer emails, update your website, work on getting new marketing materials, looking on social media trying to get new leads and promote your business, and tracking expenses. One of the best ways to get a good grasp on the amount of time you have to dedicate towards your business is to make a schedule. Let’s say you work a normal 8am – 5pm job with a one hour lunch. You could consider your lunch as your work hours, a working lunch. Find a quiet spot in the office you work at or even go to a local park and have a quiet lunch while you work on your part-time gig. Then, once you get home, you can spend some time with your family and after the kids go to bed and you have spent some time with you wife/husband, it is time to get back to work. In my personal experience, I usually start my part-time work around 9pm and go until midnight or 1 in the morning. It isn’t exactly easy to stay up that late and still get up at 6am but when you are trying to start a successful business and your goal is for it to become full-time, this is something that you might have to do. It really is all about putting in the work now, so, later on, you can slow down a bit once your business takes off.
Money
When it comes to business, money is king. Sure you need to make your clients happy and create a positive culture but without the money, your hobby turned business can quickly go back to being a hobby again. This is one of the benefits of having a full-time job while working on your part-time job at night is that you will always have the “cushion” knowing you don’t need to rush starting this part-time photography business. But, there will come a time when, hopefully, you put in all of the hard work and it is getting too difficult to keep up with your full-time job and still have a successful and thriving part-time job. This is the when you need to decide do I want to take the photography business full-time to devote more time to it and potentially make more money or stay at my full-time job for the security and steady income? If you stay at your full-time job, your part-time business can only grow so much. But if you quit your full-time job and concentrate only on your part-time work, you will have to work even harder to keep it going. It is really up to you and how passionate you feel about your photography business. One thing to consider is it isn’t really work if you enjoy doing it…just something to think about.
Keep It Legal
As with any business, you want to make sure you are doing everything you can by the letter of the law to make sure your business is totally legal. Depending on your location and government, you will have to do certain things to run your business right. As I am currently in the United States, I will discuss the things to do here but remember to check your local guidelines for running a business.
Register your Type of Business
If you are running any kind of business you need to make sure you structure your business appropriately. This means classifying your business as a sole proprietorship or LLC. Let’s look at a few of these a bit more.
Sole Proprietor
A sole proprietorship is one of the easiest types of business classifications and most widely used for young businesses. The reason for this is you don’t have any forms to file with the state or government and any taxes you need to pay back are just files on your yearly tax return. Sounds like the perfect way to run a business right? Well, one of the main dangers of this is you are completely liable for anything that happens regarding the business. This means if you are on a photography job and someone trips on your camera bag and breaks their arm, they can sue you and even take your personal belongings in the process.
LLC (Limited Liability Company)
Running your business as an LLC is commonly considered as the first legal step a business might take. If you run your business as an LLC, you are given legal separation between your personal assets and your business. Much like the above example, if the person that broke their arm wanted to sue you and your business is an LLC, they could only sue the business and all of your personal assets are safe. You will have to file LLC forms with the IRS (internal revenue service) and it might help to get a lawyer to help with the paperwork to make sure it is filled out and filed correctly.
Frequently Asked Questions
What is the best way to track business expenses?
One of the best ways I have found is the u ofse a simple Excel spreadsheet or Google Sheets doc. I know it might seem easy but when you are starting out you don’t want to spend tons of money on accounting software. You also have the option of using smartphone apps to track expenses. One of my favorites is called Expensify. It allows you are tracking both mileage and regular business expenses and, when you need to, you can get a PDF of the report.
How do I know what to charge?
Unfortunately, there is noa t real solid answer for this as it depends on a lot of factors. One way to get an idea of what you should charge is to look up as many photographers in your area as possible and see what they charge. This should give you a good range to base your costs off of. Then from there, you can decide if you want to be on the upper end of the range or the low or in the middle. Typically if you are charging towards the higher end, you will probably get fewer clients but you will make more per shoot. If you charge towards the lower end, you will get more clients but make less per shoot. This is all based on whether the quality of your work can support the price you choose.
Is it possible to work from home or do I have to rent a space?
Most photographers work from there home. Even if you shoot studio work, as long as you have a spare bedroom, you can have a good photography studio. One major benefit of working from your home is obviously low overhead, meaning no additional cost. If you happen to have the start up capital to afford a studio space then you will just need to figure out if your monthly income can support the space as well has your monthly expenses.
Is buying used gear a good option when starting a business?
Buying used gear can be either really great or really bad. You can find tons of good deals on sites like eBay and even used gear on Amazon. A coup ofle things that might give red flags are little to no description about the product or the listing having very few photos. For example, if you are wanting to buy a used lens and the listing shows only a couple photos but a picture of the front element (the glass) is missing, they might be trying to hide that it is possible cracked or scratched. You would need to either contact the seller and request a photo or move on and find another listing.
What is the best way to deliver the final files to the client?
One of the best and cheapest ways to deliver the final files is either flash drive or using an online source like Dropbox or Google Drive. Many portrait photographers and wedding photographers will give out flash drives with the photos on them but the flash drives will be branded with the photographer’s logo. This just adds a personal touch to the whole experience. On the other hand, if you are a real estate photographer, for example, using a service like Dropbox or Google Drive works perfectly. You can send a link to the client and they can download all the files within minutes.
Do I need to purchase insurance for my business?
In most cases, insurance is recommended for any photographer. This includes liability, errors and omissions, and certainly equipment insurance. So why is insurance so important? Let’s say you are photographing a wedding and you leave your camera bag sitting in a corner away from everyone. While the reception is going on, you go to change lenses or the batteries in your flash and you find that your bag is gone. If you didn’t have insurance, you would be without a bag full of gear but with insurance, theft is covered in most cases. Another example is maybe you are flying a drone over some houses to photograph some real estate photography. Something goes wrong, and your drone just falls out of the sky and lands on a car causing a huge dent. Not only is your drone probably damaged but you also have to pay for the damage to the vehicle. In most cases, insurance will cover this as well. Like most insurance, it can be a pain to pay for because you don’t feel like you are using it all of the time but you will be glad you have it when accidents happen.
This also includes buying other types of insurance such as medical, dental, or vision insurance. If your full-time job offers medical insurance and you end up quitting your full-time job to become a photographer, you will need to make sure you are making enough to cover this cost as well.
How do I come up with a name for my business and where can I get a logo?
Most photography businesses are named after the photographer, i.e. John Turner Photography, but some photographers like to get a bit creative. If you are a regular portrait photographer, I would recommend just using your name. Not only does this help with making everything easy but when you are buying your domain, your URL, you will probably have more success getting a domain name that isn’t already taken. As far as the logo, if you are not too graphic savvy, you can come up with a simple logo in Microsoft Word. However, if you want to get a more professional or creative logo, you can go through a service like Fiverr, 99 Designs or Free Logo Maker. Fiverr allows you to hire a designer $5 USD and they will send you are logo after your feedback. 99 Designs are more expensive but the quality of your designs you will find are a bit more professional. Free Logo Maker is a service that allows you to make your own logo free through an online design program. SquareSpace also has a free logo maker that is included in your membership if you decide to go that route when building your website. You can still use this service even if you are not a SquareSpace user but you will have to pay for it separately.
Is it a good career move to sell stock photography?
Stock photography can be tough but if you put in a lot of work and you are patient, you can certainly make a good income. One of the most popular genres of stock photography is the people and lifestyle sections. If you have access to models and have to time to work out the different posing scenarios, you can continually upload new photos and start developing a large catalog of stock photos. One thing to note about this type of stock photography is that if you are photographing people, you will need a model release for everyone in the photo. You will have to upload this signed model release to the stock photography site as you are uploading the photos. Sites like iStock Photo will not accept your people or lifestyle photos unless you include the model release. The key to having success in stock photography is to have as many photos as possible while still having the best quality possible.
If I am going to start accepting business phone calls, do I need to buy a business telephone?
Accepting business phone calls on your personal phone can save you money but most business owners don’t want to have their personal phone number out for the public to find. Thankfully Google has a service that is FREE called Google Voice. If you haven’t already heard of it, Google Voice allows you to set up an account with an entirely different phone number to use for your business. It even offers voicemail and texting features. Once of my favorite features is the ability to forward to a different phone. You can set it up to when a potential client calls your Google Voice number, it will automatically ring to your forwarding number, normally your personal phone, and you can answer the calls that way. This allows you to make or take business calls on your personal cell phone without anyone ever seeing your personal number. You may even set up Do Not Disturb business hours which will automatically not accept calls based on the hours you set. This is especially helpful if you have set contact hours for your business such as not accepting phone calls in the evening or weekend hours.
How much money do I need to start my photography business?
This is a typical question that is asked by anyone who is wanting to start a business. It can be tough starting a business with little to no money but with photography, you might already have what you need! If you have a basic DSLR and a kit lens, you should be able to handle most of the situation starting out. Sure you will have to eventually buy a new lens or a new camera in the future but starting out and growing a successful business is all about slow and steady progress. One thing you might want to do is advertise your new business. As I mentioned earlier in the article, you can promote posts on Facebook as an example of cheap advertising and this could cost around $25-$50 US for a good, solid post but if you are looking at spending hundreds or thousands of dollars on buying a ton of gear I would strongly advise against that. As your business grows, you can start upgrading your gear.
Should I do work for free starting out to get business?
This is a touchy subject when it comes to any creative field. Unfortunately, a lot of people think that because you are in a creative business like being a photographer that you will do work for free or at a lower cost just to get work. A few lines that a lot of photographers might hear are “Can I get a discount on this photo session and then I will pay full price for the next shoot?” or “Can you do this for free? It will build your portfolio!”. These lines, in my opinion, are the clients trying to take advantage of you being a creative person and thinking that you are struggling to get business. When I first started out, I made sure to charge what I am worth and that doesn’t mean I will do it for free or at a steep discount. Always charge what you are worth and don’t let the client try to tell you otherwise. If they ask for a discount on the first session, your response could be “Unfortunately I can’t do that, but if we continue working together I can give you a discount on future shoots.” When it comes to “building your portfolio” you can respond with “I have enough jobs to build my portfolio so I don’t really need assistance with that but I would love to include you in my portfolio!”. However you respond, just make sure you always charge what you are worth. You don’t want to be known as the photographer that will always do cheap or free work.
Conclusion
As you can see, starting a photography business isn’t as easy as just grabbing your camera and photographing anything you want. Just doing that can still be considered a hobby. If you want to get serious with your business and hopefully take it full time, following these steps will certainly get you in the right direction. One of the main things to remember when it comes to starting a successful photography business is no matter how good your website looks, how much time you put into your SEO tactics, how much gear you buy, or even how much marketing you do, if your photography isn’t creative and different from your competition, then you are just another guy or girl with a camera. Really concentrate on learning all of the ins and outs of your photography and developing your own personal style so your business is the photography business that everyone wants to use.
Disclaimer – Some of the outgoing links contains affiliate tags meaning we get paid a small commission for the referral. We have chosen to only mention businesses and products we have tested and trust ourselves.
I am a Real Estate and Landscape photography as well as a Graphic Designer based in North Carolina, USA. My passion for photography started with taking photos with a point-and-shoot and now I own a successful photography business. My goal is to help others learn the art of photography, develop their creative side and just have fun.
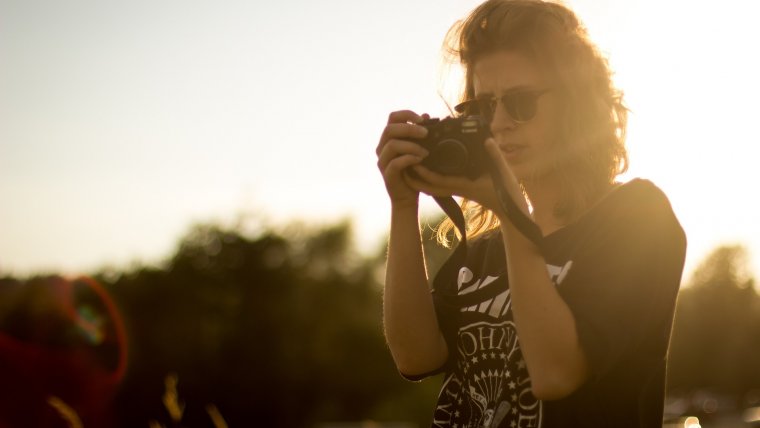
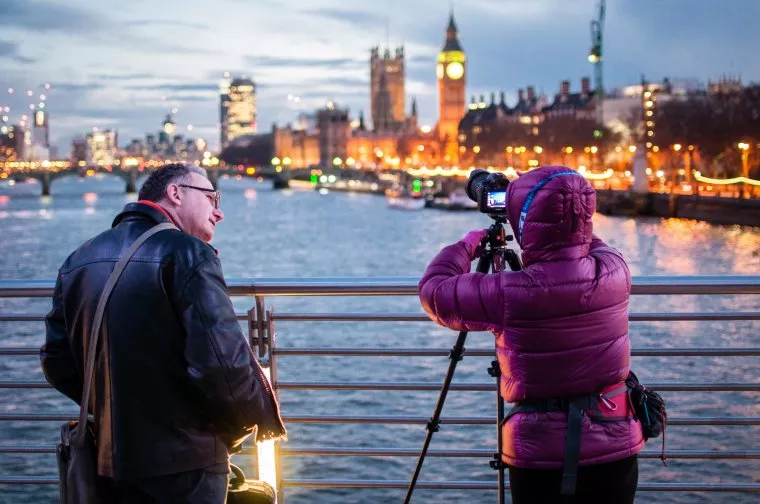


 Facebook
 Google +
Comments (3)
The best guide about business photography…!!! Amazing. Thanks so much!!
The links should be working now. Give them another shot!
The links for the contracts and forms isn’t clickable. Is there another article to get those? thanks!