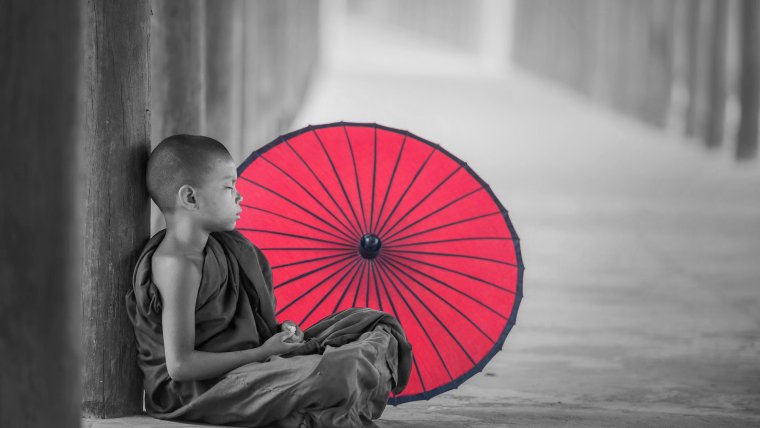
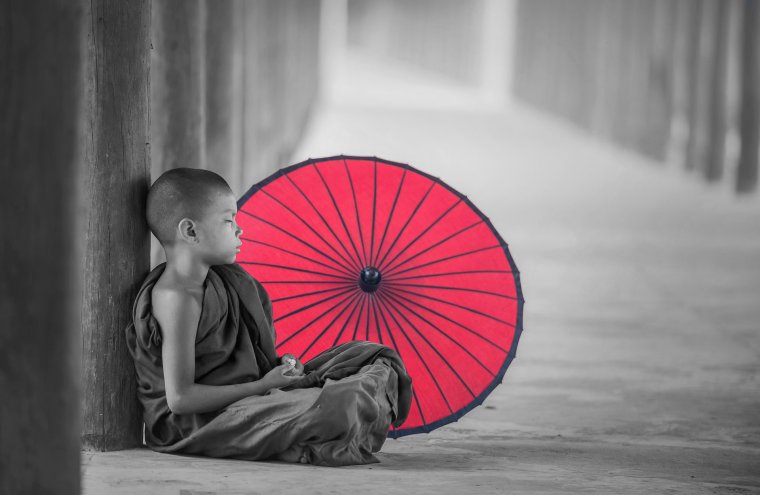
This isn’t exactly as it sounds, it’s more like isolating a colour, but this is the name it has been given, so don’t think that it has anything to do with Splashing colours on so to speak.
So I’m going to be going through two ways to do this today, one we’ll be looking at using selection tools and layers, and the other we’ll be looking at how to use masking to do the same job.
Then it’ll be up to you to choose which on you find most effective or just like better and go with that.
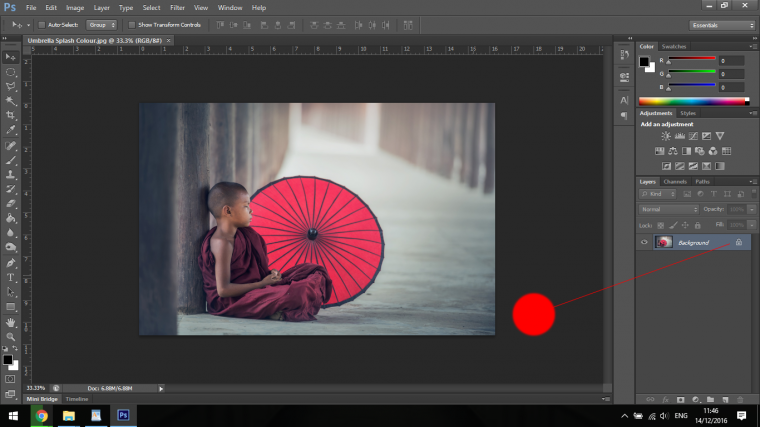
The first thing you’ll need to do is if you look at the layer holding the small thumbnail image of your image you will see it has a little padlock icon on it, you will need to double click on this layer to free it up.
Now you are going to create 3 more layers, you do this by dragging the first layer down to where I have indicated below (or at the right bottom hand side you will see a little recycling bin, you want to drag your layer on to the one beside that)
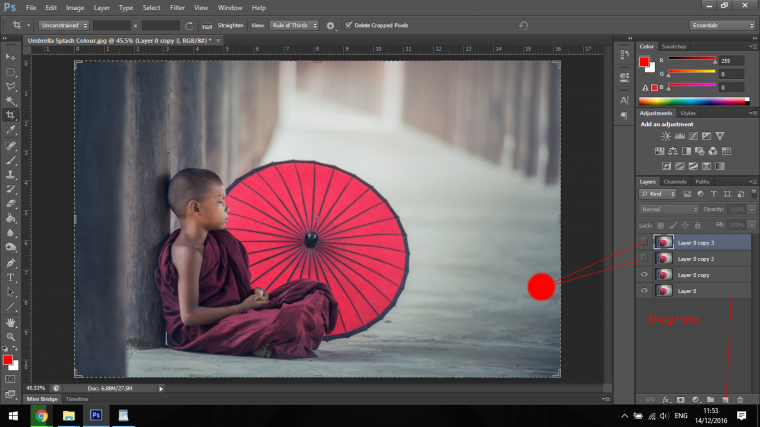
Then click on the Eye Icons on the top two layers to make them invisible because we’re going to use the 2nd layer from the bottom, so click on that one now.
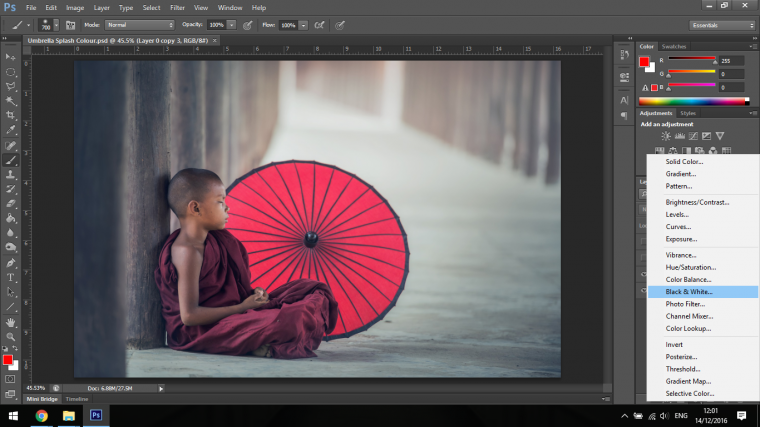
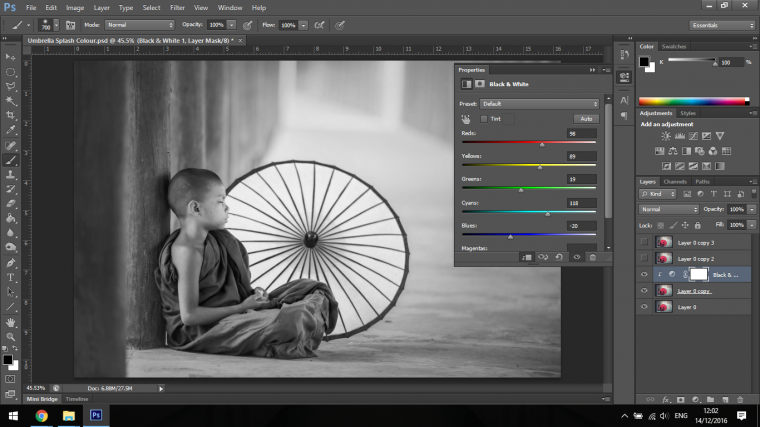
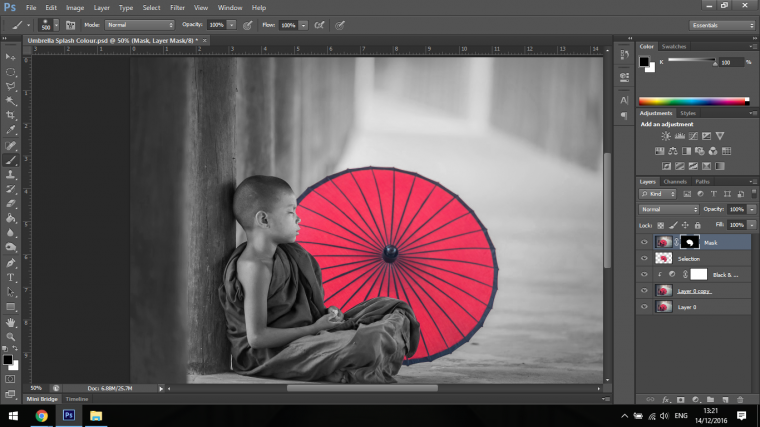
Now that you have this all sorted you can then click on the 4th icon from the right, which look like a black and white circle.
In the you will find black and white, click that and you will have created a black and white adjustment layer.
You can also play around with the Sliders if you’d like and see if you can make any improvements on the black and white image.
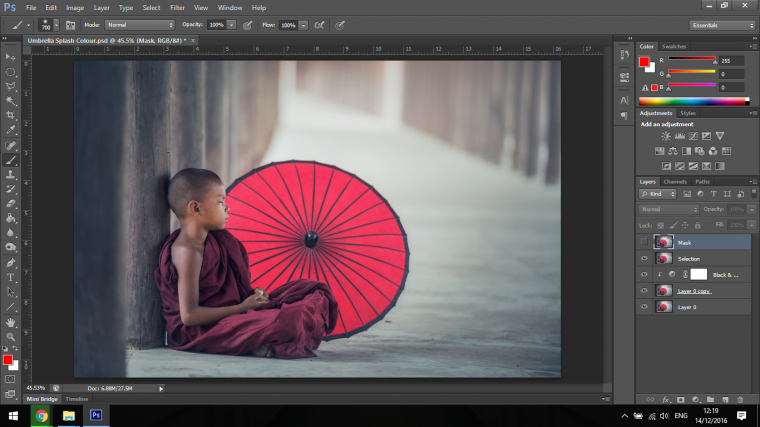
Ok so now we’re going to be working with Layer named “Layer 0 copy 2” activate it, double click on the text and label it “Selection” and while you are at it, double click the top layer and label it “Mask” but don’t activate it just yet.
Right now we’re ready.
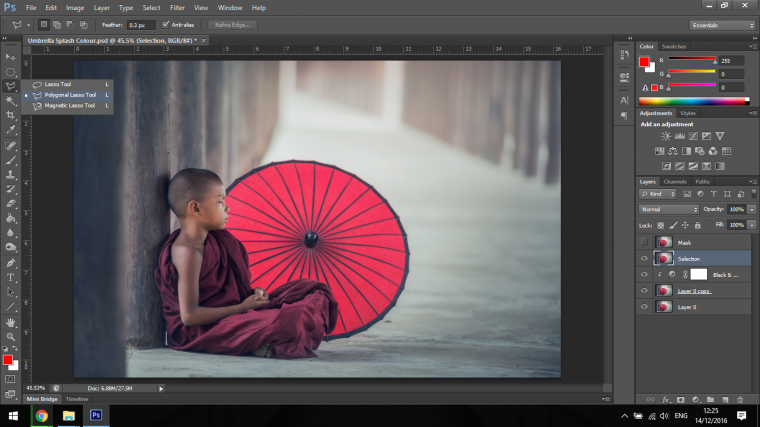
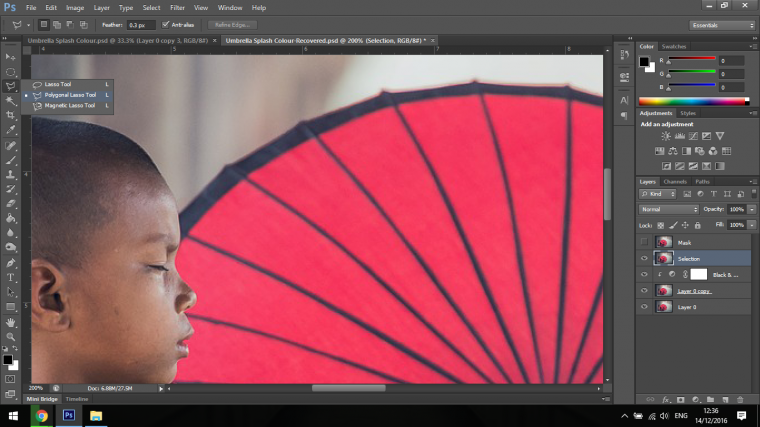
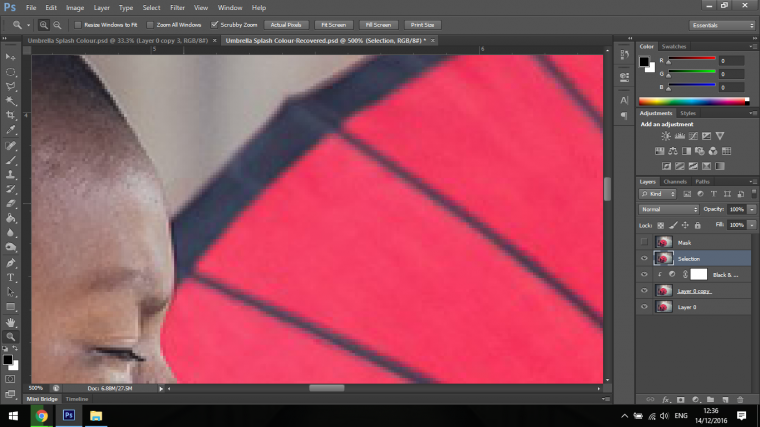
The First way is to make a selection around the targeted area, so for this particular tutorial we will use the Polygonal Lasso Tool.
The way to use the Polygonal Tool is to click around the targeted area in very small increments making up the shape, you can then press the space bar and hold it so you are able to move around the image with control.
You will have to zoom right in so you are able to make the selection better.
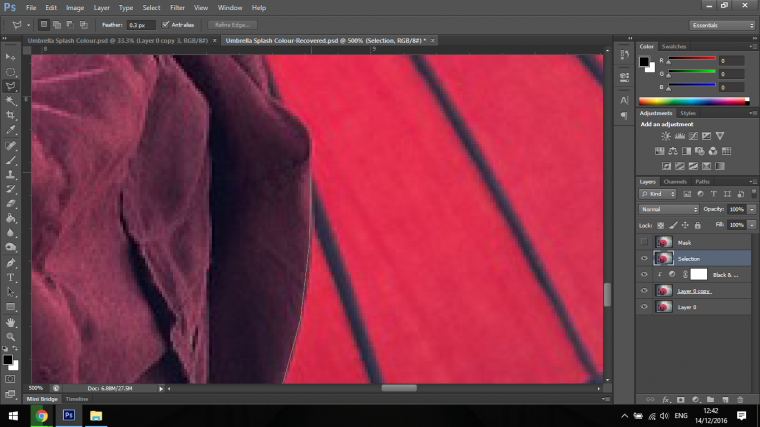
Then make your way around the image, clicking with the Polygonal Tool bit by bit, I also added a 0.3 Pixel Feather to my selection before I started so it doesn’t look so sharp but more blended.
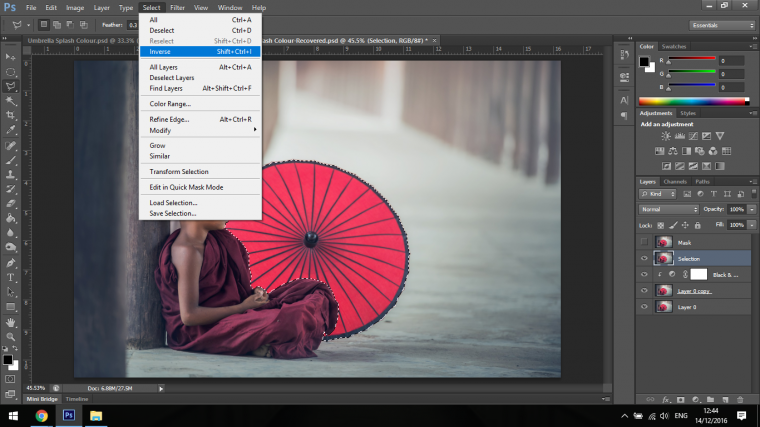
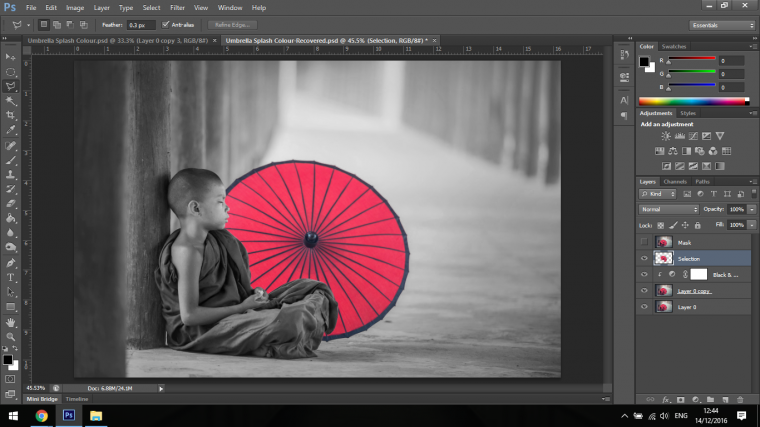
Once you have created your selection go to Select – Inverse.
Then you can simply press delete and that will remove the rest of the image and just leave the Fan colour.
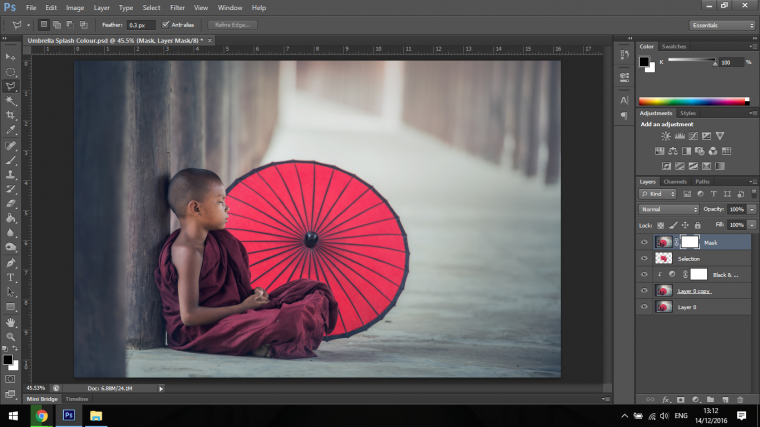
The 2nd way is creating a Mask.
So click on your top layer and activate it.
Then beside on the bottom right hand side where you clicked to get the black and white adjsutment layer option you will see another icon to the left of that.
It will look like a circle within a square.
Click that and your mask will appear beside the Thumbnail of your image as a white box.
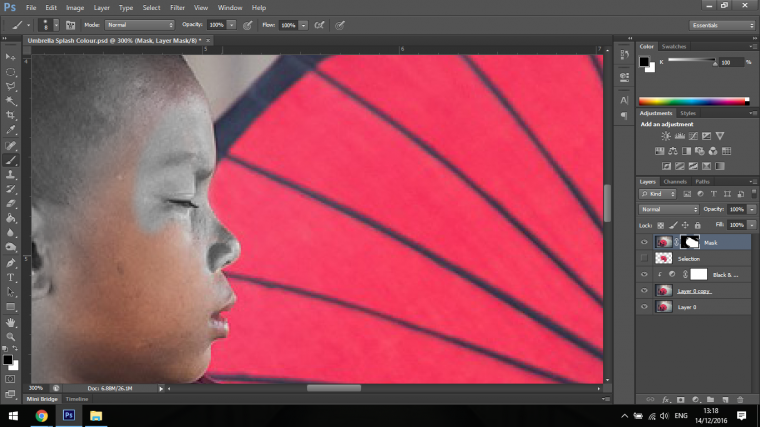
The way to use masks is number one you have to be clicked on to the white box, once you do this you use the Paint Brush Tool to paint on it.
Black Removes White Brings back.
You then start to paint around the Targeted area to “erase” out the areas that you don’t want in your image.
As you do this you will have to zoom in and change the size of your Brush Tool to fit the situation, if you make a mistake then you can fix that mistake using the Brush Tool with White.
Once you have worked at this for a little while you should end up with a similar/same effect to the selection.
Graduated from college in 2002 with a degree in Art & Design, I started exploring my way in Graphic Design and Professional Post Production. Full-time freelancer since 2011.


 Facebook
 Google +
Comments (0)
There are no comments yet.