How to Take Good Photographs of a Meteor Showerswww.sleeklens.com
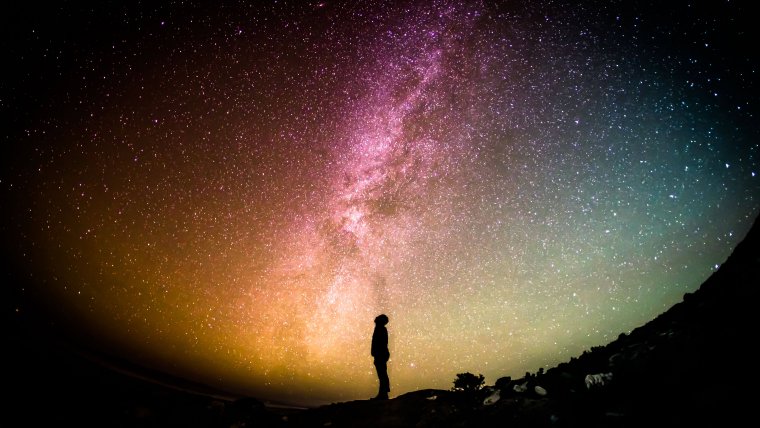
Photographing meteor showers is always a challenging task. Not only that you need the equipment and the correct settings on your camera, but you also need a lot of patience. Perseid meteor shower this year was expected to be one of the biggest in the past few years. For those of you who are new in shooting the night sky, the meteor shower means you will have a chance to take a picture of approximately 100 meteors in one hour.
First things first. You can take shots of a meteor shower with any DSLR camera, but you will need fast wide angle camera lenses, tripod, a memory card with at least 16GB and extra battery for the camera is always a good idea.
To get the idea, I’m using Pentax K-3 with Pentax DA 50mm f1.8 lens (14-24 is much better solution thou). I have the extra battery for it, 32GB memory card and tripod. I’ve done some night shots even with 18-55 kit lens (f3.5-5.6), but the faster the lens is the better the image will be.
Aside from this, you need to find a really dark place, climbing on a mountain is always a good idea, the place needs to be free of light pollution. Oh, and make sure you check the forecast, you need a clear sky.
Shooting the stars is always trial and error procedure. The focusing is the most important thing if you want clear pictures so you will have to experiment and try several different settings before you dedicate the entire night to this. You can forget about autofocus during the night shooting, turn off auto focus and move the lens focus to the infinity position. Please note, some lenses will produce better results if you slightly move the knob before or after the infinity mark. This is where you will have to do the trial and error procedure. Try several images with the zoom on infinity, then slightly move the focus to left and right, zoom in to max on the display of your camera and check where do you have clearest results.
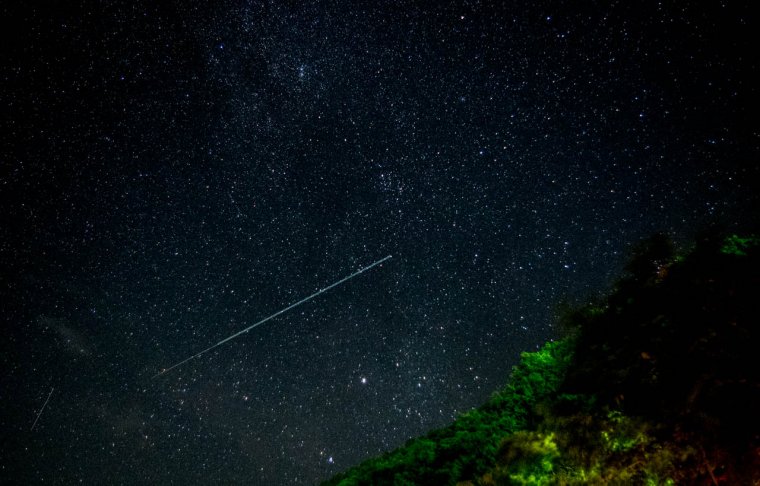
Taking the picture itself can be done in several ways, either you can manually press the shutter button (set it on the timer to avoid any shaking), via cable or wireless trigger depending on your camera. The important thing here is the shutter speed, it needs to be 15 seconds or longer to actually see the meteor trails, otherwise you will just get black sky if it’s lower or trailing stars if it’s longer. The exposure time of 50 will definitely catch the meteor but it will also add trails to all stars in the sky due to the Earth’s rotation. You can get good results with camera exposure time set between 15-25 seconds. Now depending on the conditions (light pollution) you should set the ISO to 800-1600. Set f/ratio to lowest possible setting, but check the images, sometimes you will need to step it down if there is light pollution. For example, even thou my 50mm prime can be set to f/1.8, I get the best / sharpest image results with f/2.8. For start this would be enough, later on, you can fine tune the settings, play with the metering options, noise reduction, and even the color balance.
As soon as you prepare everything, set the camera on the tripod, tight it up and start shooting. It’s a wide sky up there and the meteors fall everywhere so you will need to cover as much of it as possible. When you shoot with 14-24 lenses you will cover the larger area, but if you are stuck with 50 or larger then you will need to either focus on one part or move the tripod. Moving the tripod won’t guarantee that you will catch them, but at least it will keep you busy during the night.
As with anything else, when you are starting out with new stuff, it’s important to experiment, test different methods and fine-tune your procedures to find out what works best for your equipment and your night sky. Not every camera and the lens are the same, so what might work for you might not work for others the same way. Don’t be strict on the setting, for example, I’ve said to use ISO 800-1600, but feel free to take shots with 400 and 3200, sometimes even 6400 can do the trick.
I always shoot in RAW, thou is smart to shoot both RAW and JPG so that you can easily find the images with meteors. It’s really time-consuming job when you have several hundred images, and this is before you even start with the post production. Checking the jpegs is faster, just rename those with meteors so that you know which RAW images to keep. I’ll discuss the post-production in a post next week, so keep an eye here.


 Facebook
 Google +
Comments (0)
There are no comments yet.