Awesome Hidden Gems in Lightroom: Get the Most Out of Graduated Filterwww.sleeklens.com
Hi, let’s get back to it, so we left off our LightroomTutorial by opening up the Graduated Filter, do you remember how?… give it a few seconds to think, if you can’t then look below our image below.
So the way we would usually use the Graduated Filter would be to just go to your image and drag it up or down and then adjust from there.
But the way we are going to do it is to go to one of the corners of your image, doesn’t matter which, I’m going to go from the bottom right as it’s the closest to me and I’m right-handed, you can start from the top or bottom, right or left whatever you like.
Then when you do that you click as close to the edge as you can, and then drag it off of the actual image, you will see in my image below at the bottom right my gradient is off the actual picture.
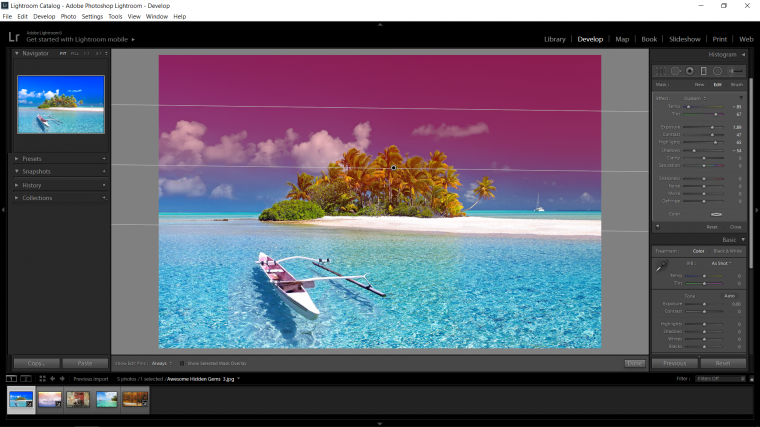
When you hit (O) on your keyboard you will see a mask appear over your image which will better help you see what is going on.
What this indicates is that the Graduated Filter is affecting the entire image equally.
Ok, you can hit (O) again to turn it off.
When we do that go to where you see the Shadows and Highlights on the right-hand side just like we had done in the first part of the Tutorial.
Then you can decrease the Highlights and increase the shadows just like we did before to get a little bit more range and detail out of our image.
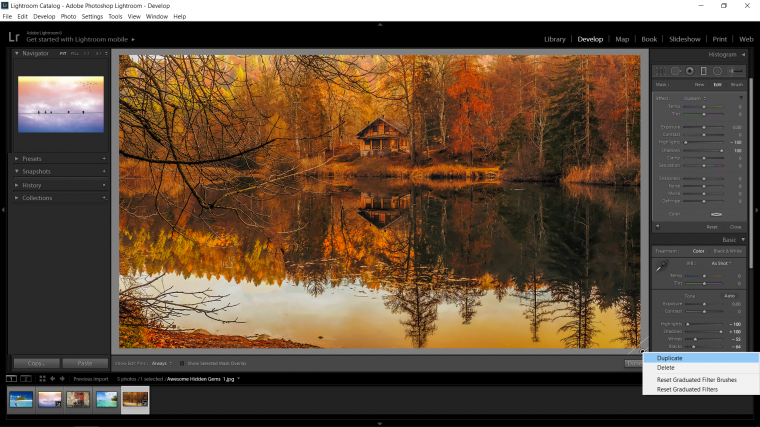
One other little thing you could do, when you go to the bottom where you have your Graduated Filter you will see that there is a little circle there.
If you right-click on the circle you will see a little drop down appear where you will see an option to duplicate which mean you can add another Gradient Filter to your image, a copy of the one we just did, it may or may not add a little bit more range but I think one should be enough.
Ok cool, let’s move to the next hidden Gem.
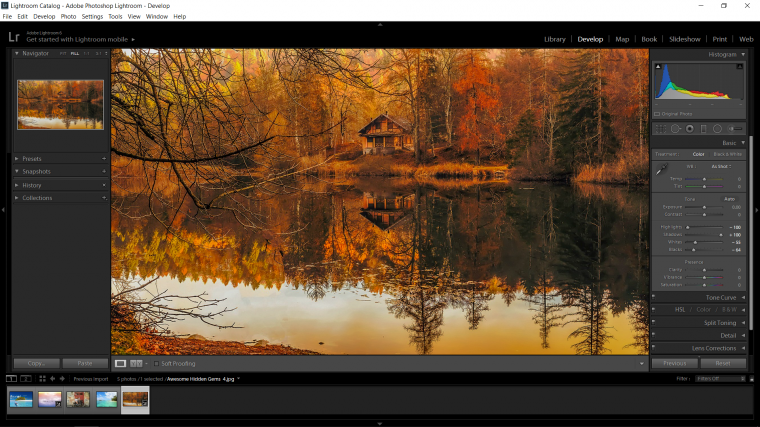
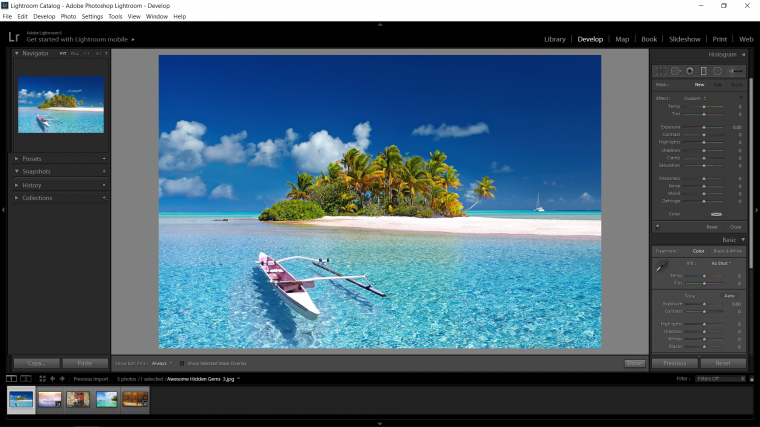
For this get a nice image that has a cool sky in it.
Ok, so let’s get the Graduated Filter up again (M)
When you do that click in the middle of the sky and drag it out so that it covers the entire sky.
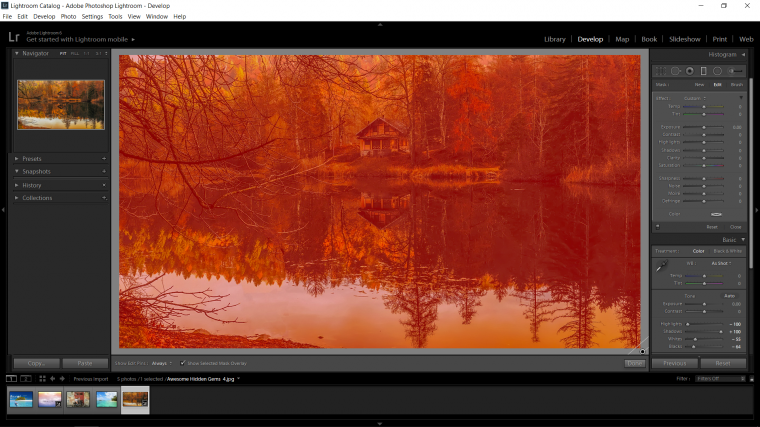
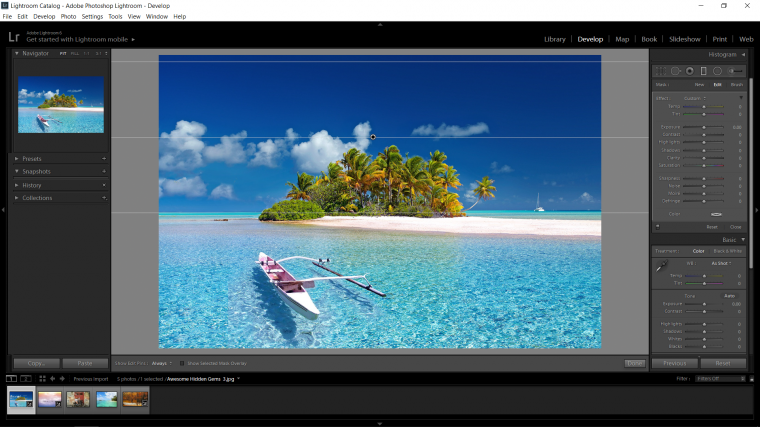
So just to see what happens here we are going to go over to our sliders and mess them up a little, don’t be afraid to just click and drag them in whatever direction you like for this, we’ll fix it all up very soon.
What we are just simulating here is a botched editing job, something I’m sure I am very familiar with 😀
So mess with the Temp, Tint, Highlights, Shadows and Contrast and really prove a point that you ‘messed up’
So now you look at it after a second away and you think that you filter is way too strong.
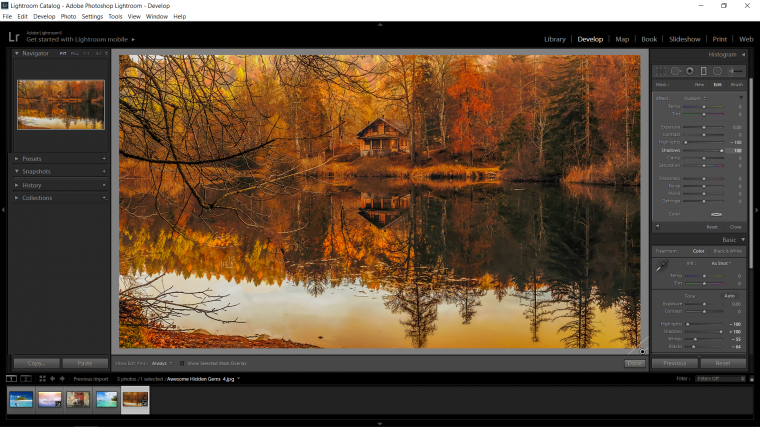
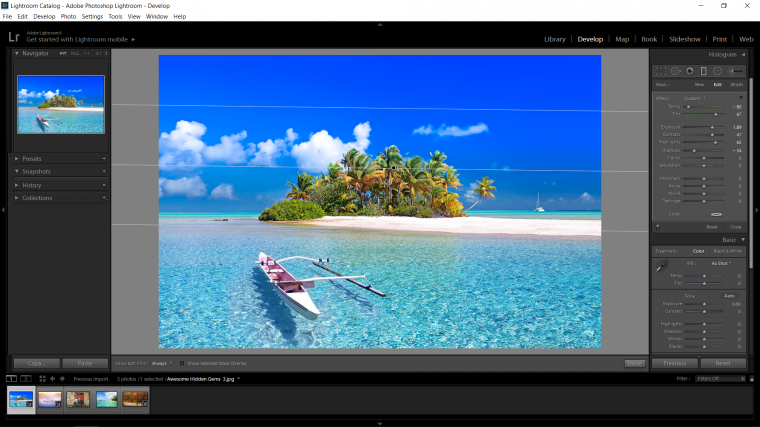
What you could do is you could play around again with your sliders to try to reduce the strength of the filter or! you could do something a little less destructive and troublesome.
So the other thing that you could do is to place your mouse cursor over the circle in the middle of the Graduated Filter, you will know when you’ve hit the sweet spot when your image suddenly turns red with a mask.
Just leave your cursor there for a sec until that shows up.
When that happens you can hold Alt on your Keyboard and you will see a slider indicator appear.
What you can now do is drag it either right or left to increase or decrease the strength of the Filter, think of this kinda like or pretty much like using opacity in Photoshop, if you look at the right side where the sliders are you will see that the sliders will move out or towards the center proportionally so if you then need to go back and add some tiny little adjustments then you can.
Graduated from college in 2002 with a degree in Art & Design, I started exploring my way in Graphic Design and Professional Post Production. Full-time freelancer since 2011.


 Facebook
 Google +
Comments (0)
There are no comments yet.