Blending Photography: How to Remove Unwanted Subjects Seamlesslywww.sleeklens.com
One thing that often experienced when taking a photo at a very popular place is that it is going to be packed with a lot of tourists and other photographers. At such situation, sometimes it is unavoidable to have people entering your frame. When that’s happened, it is either you move and look for another angle or try to ask the person that entered your frame to move, in a polite way of course. However, moving can also mean that giving up the initial composition that you want. Besides that, people do not have any obligation to move away for you to take the photo and you can’t really do anything about that if they choose to stay there, it is a public area after all. Another situation that I have often seen in the other way around is that photographers yelling or even scolding at any passer-by that walked into the photographers’ frame, which personally I feel that is kinda rude and we should have a better way to sort it out through communication.
Here is an alternative option, instead of going through all the hassle that may ruin your mood, what you need to do is just applying a simple blending technique. Let me go through with you all on how to do it.
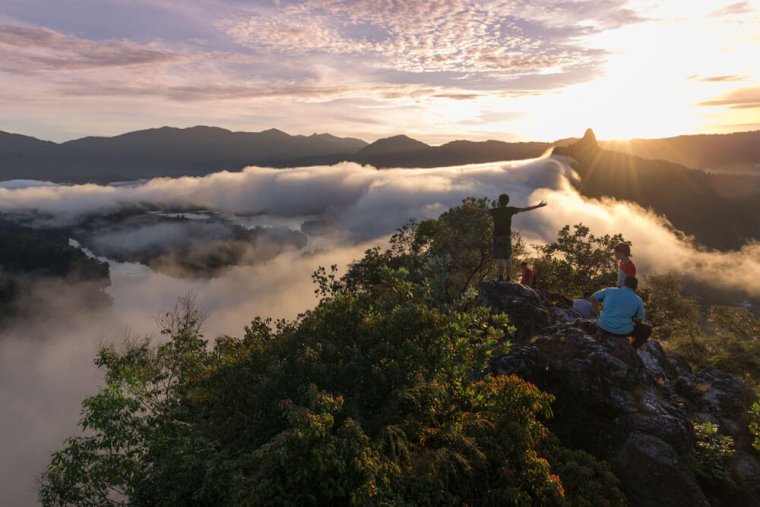
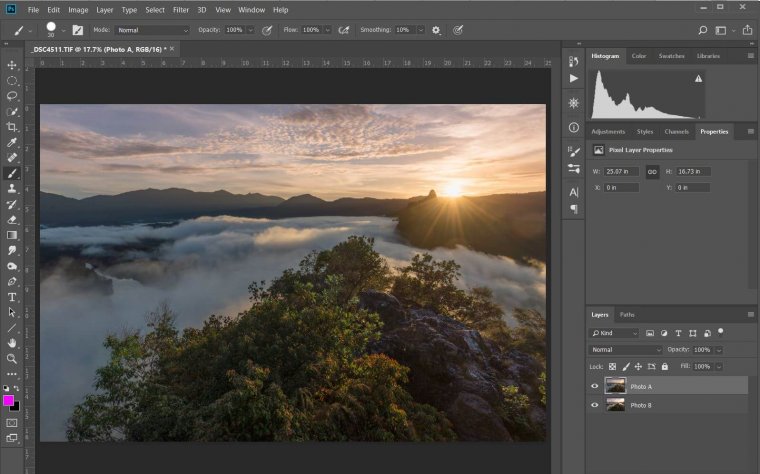
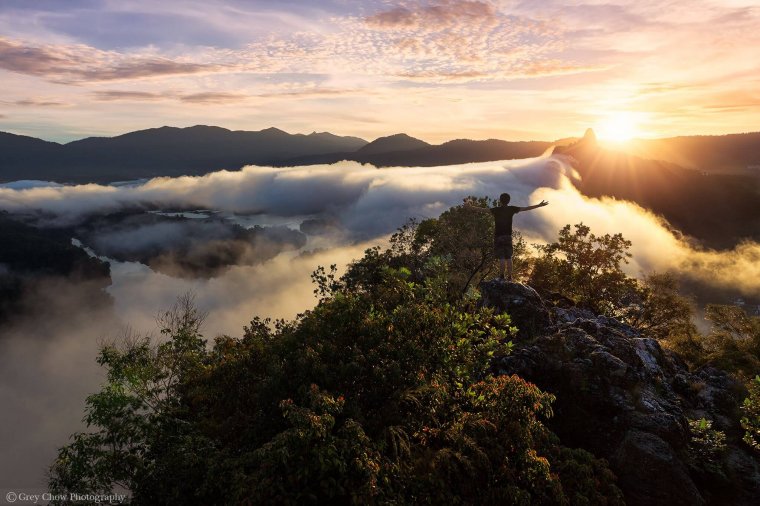
Above original photo was taken during one of my hike at Crystal Hill (Bukit Tabur) in Kuala Lumpur, Malaysia. It is a very popular hiking destination due to its beautiful views and also the nearest mountain to the town. On top of that, it only required a 45 minutes hike to reach the peak.
As you can see from the photo, the viewpoint here is simply breathtaking and the weather is just nice with a beautiful sunrise together with some sea clouds around the mountain. Just to make the photo more interesting, I decided to position myself on the rock there, giving everyone a better sense of scale about the place. However, the biggest problem with the photo is that I’m standing just right at the side of the hiking trail and there are many other hikers that going up and down through the trail. This is why there were a few hikers resting on the rock when the photo was taken.
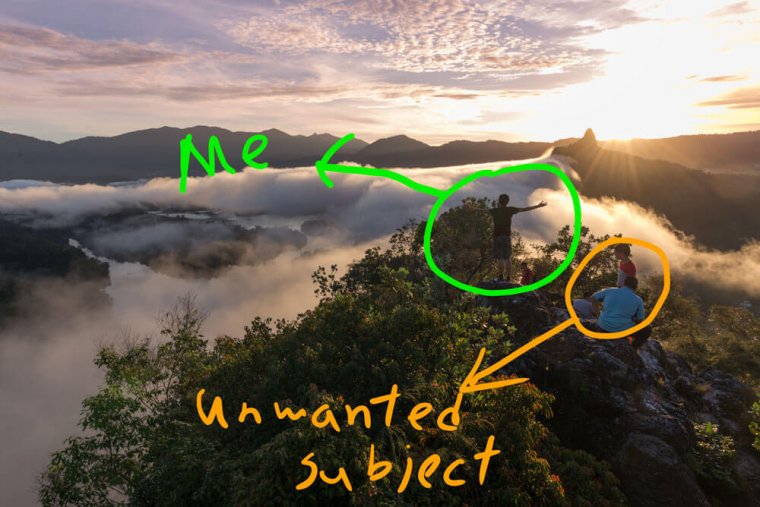
Obviously, in this photo, the hikers are the subject that we would want to be excluded from the photo. So what can we do? The answer is simple, just take another photo with the same composition before or after this, when the place is clear.
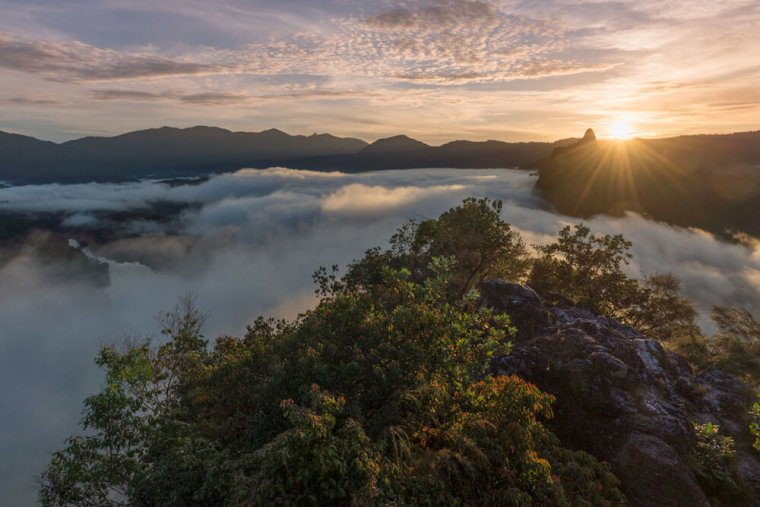
Here is the 2nd photo that I actually took slightly before the first one, when there was a short moment that the place is totally clear off of hiker.
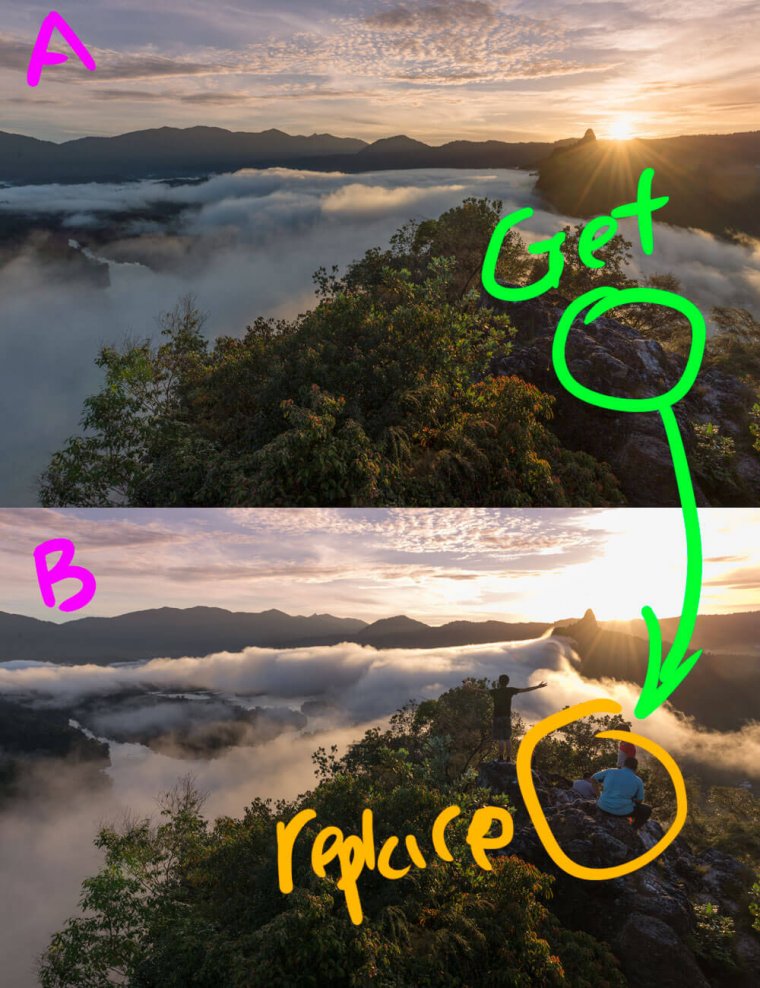
What I need to do next is simple, by putting both photos side by side, I just need to use that specific area from photo A (circled in green) to “replace” the same area in photo B (circled in orange). Let’s start the post-processing part now.
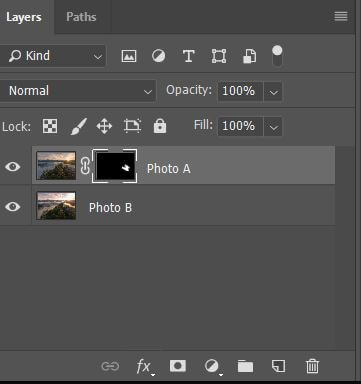
After you loaded both photo A and B into same Photoshop file, next is to ensure the photo A is positioned as a top layer and photo B as a bottom layer. If it is not, just move the photo A layer to the top.
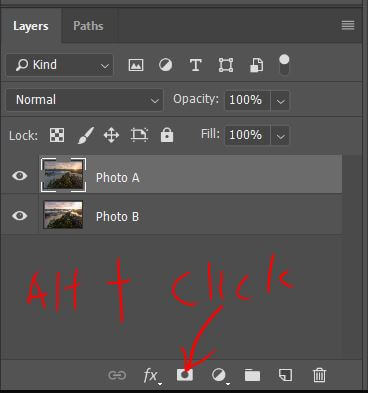
Now select the photo A, holding the Alt key and Click on the layer mask icon. (As shown in the screenshot)
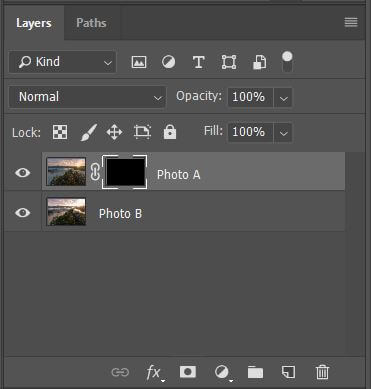
You will notice a black rectangle icon is created right beside the thumbnail of the layer. This rectangle icon is what we called the Layer Mask.
When the rectangle is all BLACK, it means that whatever is in this Photo A layer will be hidden and this is why only the Photo B is displayed on the screen. (On the other way round, if the rectangle is all WHITE, it means that whatever is in this Photo A layer will be displayed)
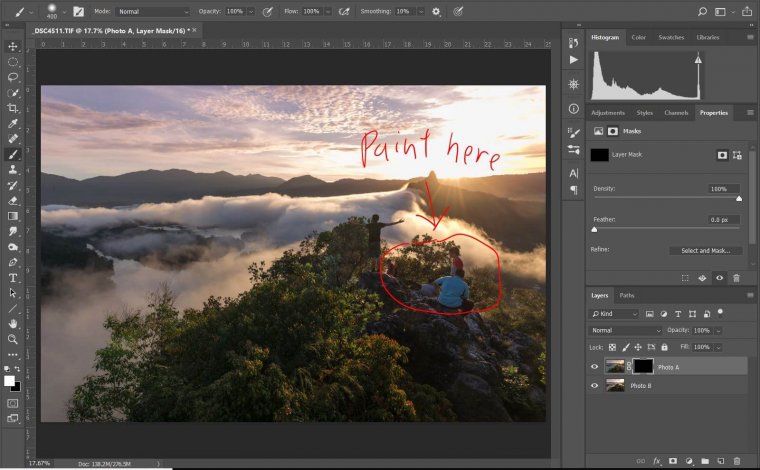
Next is to use the Brush tool to paint on the picture. Select the Brush tool, ensure that it is a soft brush (edge) that selected and the Opacity is 100%. Another thing is to make sure the foreground color is WHITE, if it is not, just press the D key to reset it to default. Also, double check to ensure the layer mask of the Photo A is selected.
Now you can start to use the brush tool to paint on the area that you want it to be removed. You can also play around with the opacity to have a smooth and seamless paint.
Just simple as that, now the hikers are all gone (without killing anyone of them :P)
Notice that after the painting, the Layer Mask is now no more ALL BLACK. On the thumbnail view there, you can see there’s a WHITE spot on the BLACK. The WHITE spot is actually indicated the area that we just painted with WHITE color using the Brush tool.
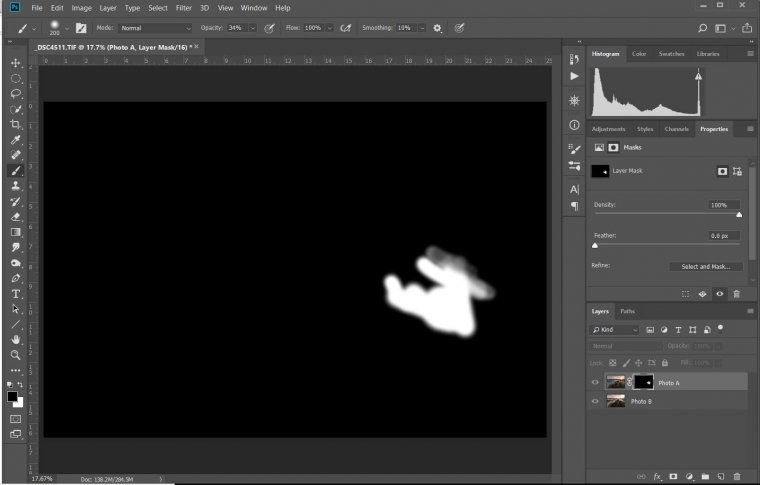
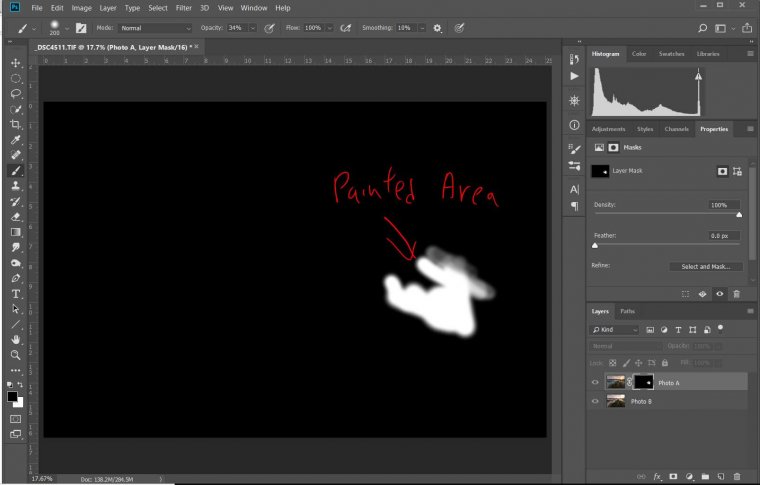
Just to have a better view of the Layer Mask, holding your Alt key (Option on Mac) and click on the Layer Mask. You will see the photo that was displayed in the center is now changed to what you have seen in the Layer Mask’s thumbnail.
The WHITE color area here is the painted area and only that area of the Photo A is shown, the rest of the area is covered by the BLACK color and will remain hidden.
Now, holding your Alt key (Option on Mac) and click on the Layer Mask again to exit the Layer Mask view. From here, you can start to apply any adjustment you want on the photo.
This is actually a simple blending technique in Photoshop but then it can give you a lot of usage such as remove sun flare, blending different light trails into a single photo if you add in a bit of creativity here. This article is just the 1st part of my Creative Blending series tutorial, in future I going to share with you all how to apply this blending technique in different scenarios, together with a much better way to fine tune and generate a better blending result, stay tuned!
Grey Chow is an award-winning landscape photographer, having his work published in several media including the BBC News. Currently, he is also sharing his experience and expertise through articles and hosting several photography workshops and tours around the world.


 Facebook
 Google +
Comments (0)
There are no comments yet.