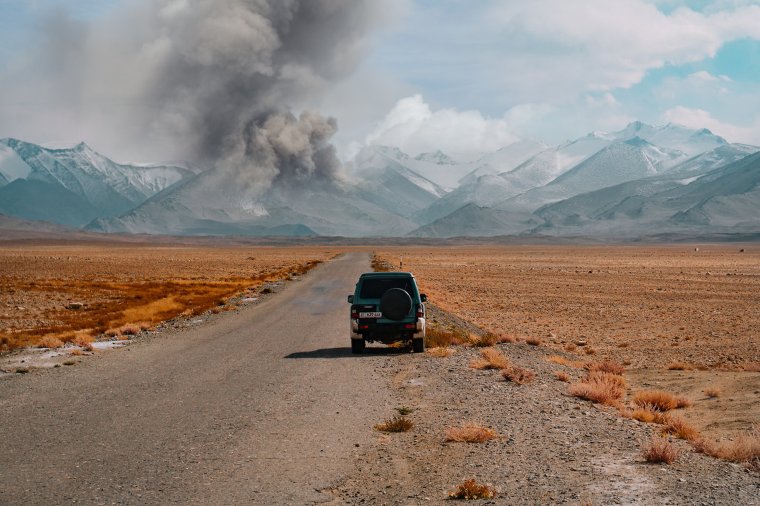
So for today, we’ll be creating an intense volcano scene using our own Photography or stock images whichever doesn’t matter.
If you have your own shots then it would be cool to pick out a nice mountain scene that you can transform into making a magnificent scene with an erupting volcano.
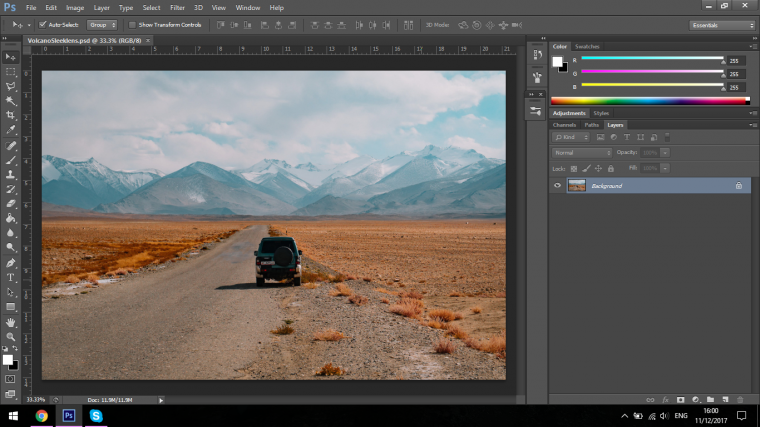
The image that I’m going to be using today will be this mountain scene.
I chose this one because I liked the look of the desolate landscape/lone Vehicle and thought with a volcano it would be a moving image.
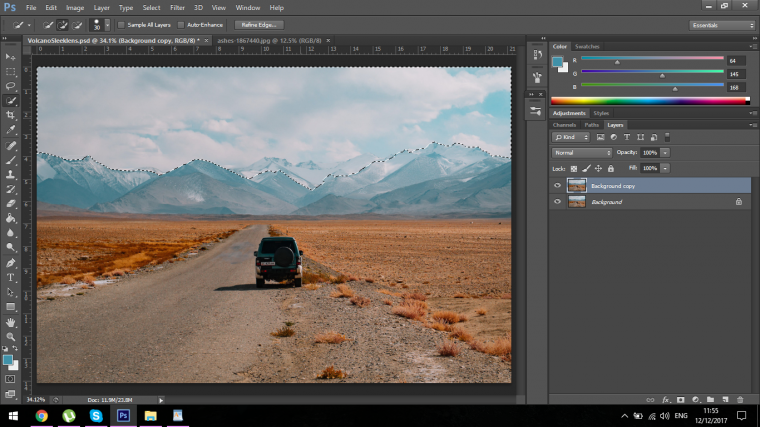
First thing I’m going to do is to create a Duplicate layer, I always do this even if at the end I never actually needed it just in case.
I don’t want to create fire and explosions and all that I want it to look real and massive, so I’m going to be working with different clouds and smoke images, but first I have to get rid of the sky behind my mountains.
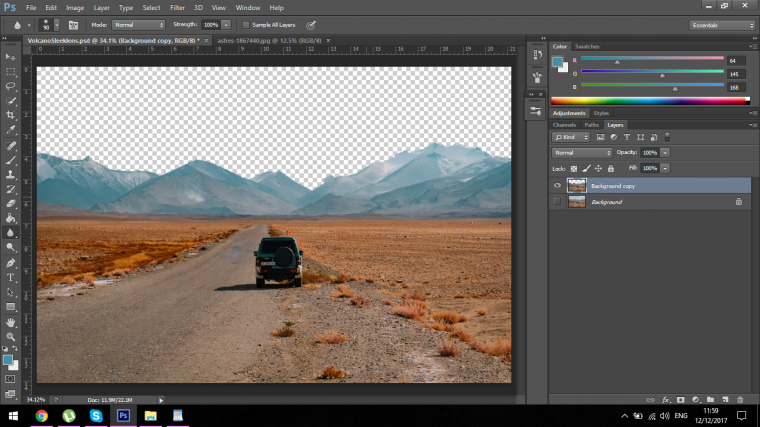
When I do this the Tool we will be using will be the Quick Selection Wand Tool.
All you have to do is click and drag over the area that you want to remove, so make sure you are on your duplicated layer and click and drag across the screen.
Don’t worry about settings, the default settings will do just fine in this case.
You will notice that there may be some mountains that were not included in the selection, with this unless it’s drastic don’t worry about it, we’ll be working with opacities so you will be able to see through layers and it will get picked up from the original background layer at the bottom.
There’s going to be a lot of blending involved so what we have now is perfectly fine.
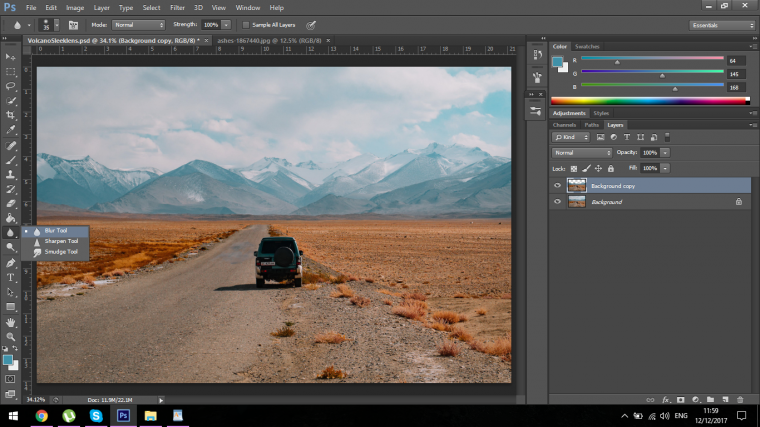
Now I’m just going to soften the edge of the mountains by using my Blur Tool, I didn’t change any settings for this and I just used it exactly as I would the Paint Brush Tool.
To see clearly I clicked the eye icon on the bottom layer and then I just ran the brush along the edge of the mountain.
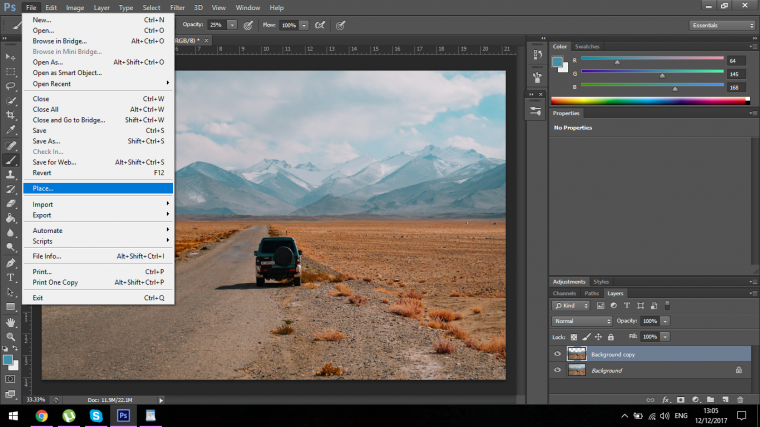
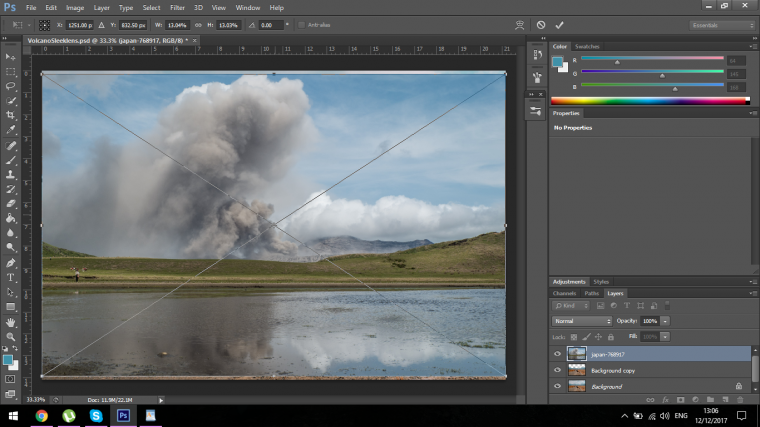
Now we are going to go to File – Place and find the file that we want to use for our Volcano Smoke, if you haven’t already found one, take a while to look using foresight of how it will fit your image, not all volcano scenes will fit, I myself took a good 30 minutes before I settled on my image.
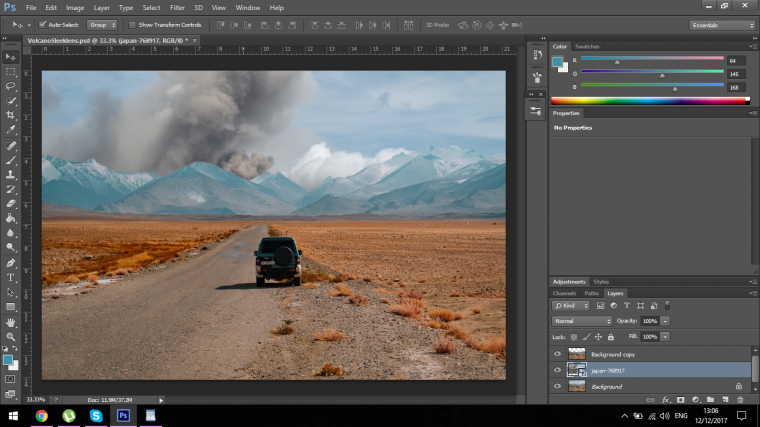
When you have it placed you now have to move it between your two original layers, you do this simply by clicking and dragging, you will find the panel on the bottom right-hand side, there you’ll see the layers.
It may not remain here as we edit but for now, it gives us a good indication of where the mountains are.
Usually, as I edit I’m constantly changing things up and trying new layer positions etc depending on the image so don’t be afraid to do the same.
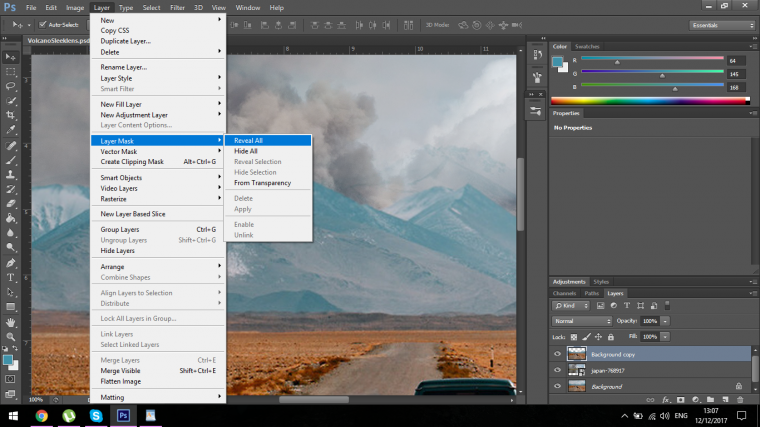
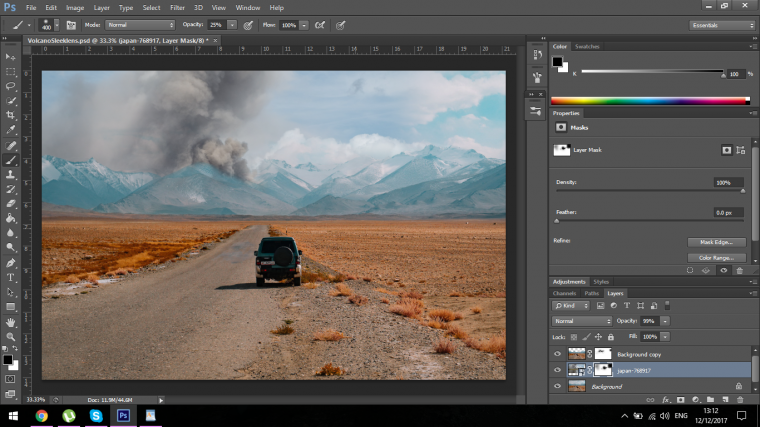
Now clicked on your Volcano Layer go to Layer-Layer Mask – Reveal All
Now you will see now on your Layer a White thumbnail will appear, when you click on the thumbnail and use Black with the Paintbrush you can hide the ares on the canvas you want to hide.
When you right click on the screen you will see options appear.
Click on the first circle there just to make sure you have the soft Brush.
The brackets on the keyboard with an increase or decrease the size of the Brush.
Holding Space will let you click and drag around the image freely.
And if you look at the top menu under 3D and View you will see opacity, lowering this will let you multi-click with the Brush to blend better and build, 40% should work pretty good.
Now I’m going to start to Blend as best I can, I blend more on the outside of the cloud to try to blend the sky more.
What I did at this point has I now moved the Cloud layer to the front, then I continue to Blend both layers, I also dropped the opacity of the layer a little.
At this point it really comes down to Artist licence, try your best and try to make it look as realistic as possible, it will take some time but the techniques are the exact same, it’s going to be hard but this is the only way to learn, so try your best and don’t be disheartened, you may not get this the first time.
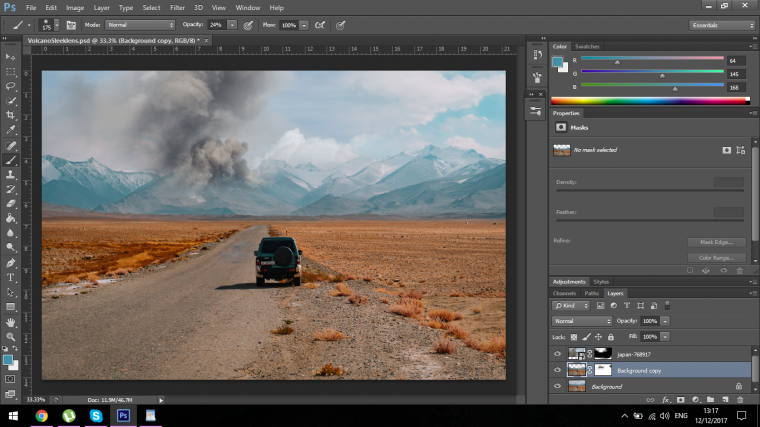
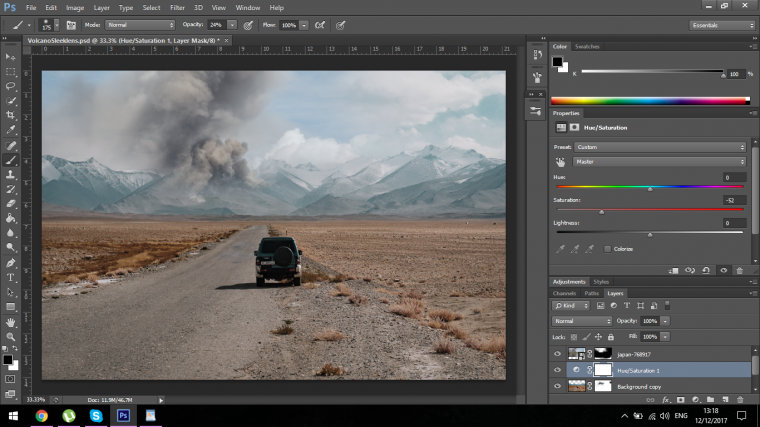
Once I’m happy with the blend click on the middle layer which should be the original duplicate layer, then I’m going to go to Layer-New Adjustment Layer – Hue and Saturation.
I want to match the grey slightly.
So I slide the middle bar to the left.
Note that if you slide it to the right you’ll get more vibrancy, and the bar above the Hue will change the color.
You may need to play around to get the best blend of your image will be different.
Now, exactly like you did with the masking technique using a Black Brush paint out the bottom and Blend the sky and little.
With a bit of Artistic work and fore vision, you should end up with a nice finished image at the end.
Graduated from college in 2002 with a degree in Art & Design, I started exploring my way in Graphic Design and Professional Post Production. Full-time freelancer since 2011.


 Facebook
 Google +
Comments (0)
There are no comments yet.