How To Fix Up Hair And Facial Hair In Photoshopwww.sleeklens.com
Hi all, today I want to share with you for this PhotoshopTutorial how I would go about fixing up Hair and Facial Hair if I was to go to for Clients in the Fashion Industry who require their Raw Images to be Retouched.
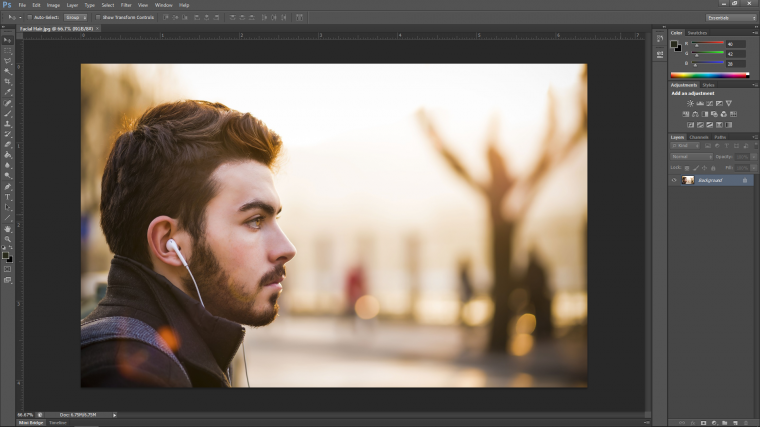
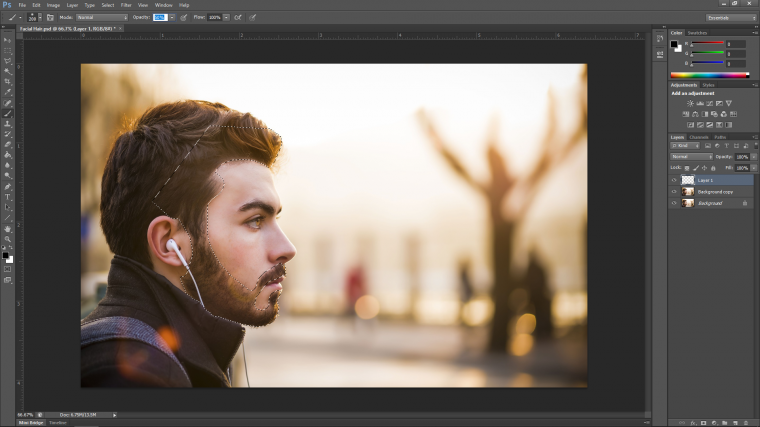
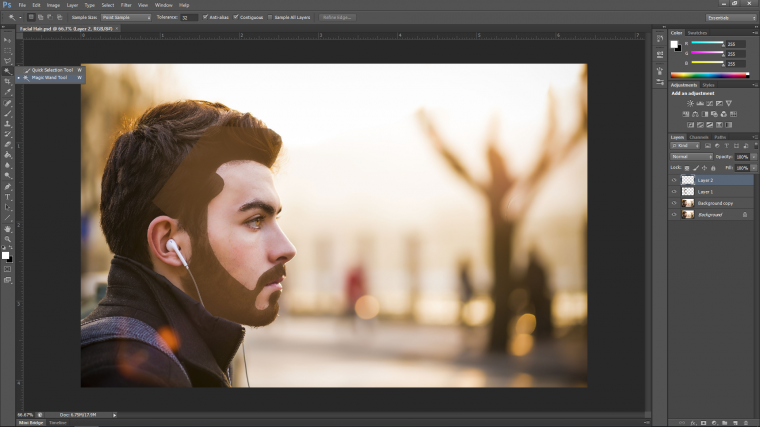
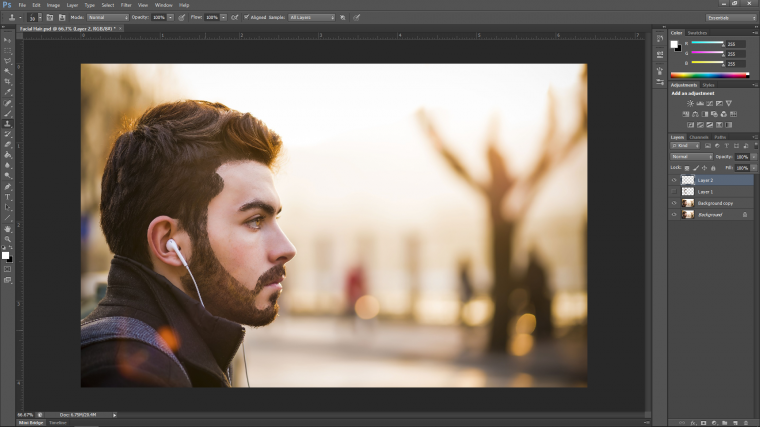
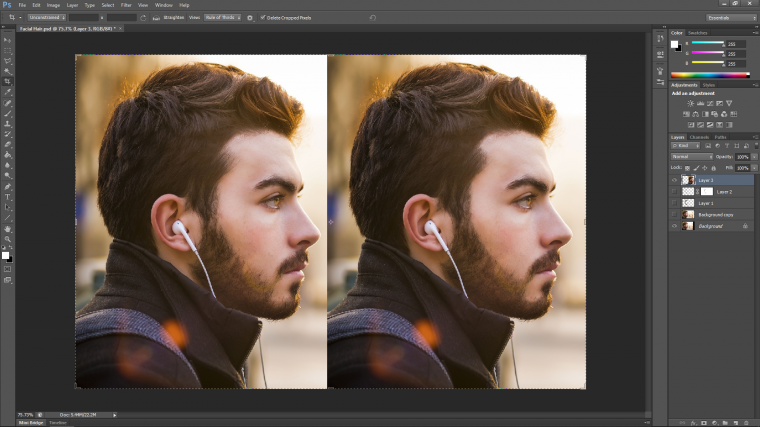
So this is the Model that we will be working with today if you want to follow along find yourself an image that’s something similar to the one that I’ve got.
As you can see from the image above that the model’s hair is very natural at the minute and hasn’t been doctored yet on Photoshop.
So say hypothetically my ‘client’ says to me we would like to ‘tidy’ up certain parts of the hair this is how I would do it to make it a lot more mathematically pleasing so to speak.
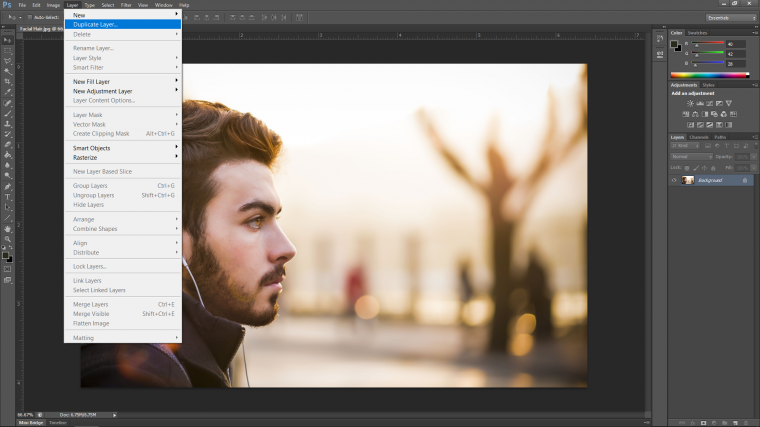
Ok so the first thing that I do, and I do this basically Automatically even I don’t need it right away, I’ll create this just in case I ever need to come back to it, so what I do is to create a Duplicate Layer by going to Layer – Duplicate Layer.
Now if I ever need a backup I have my original Layer there for protection.
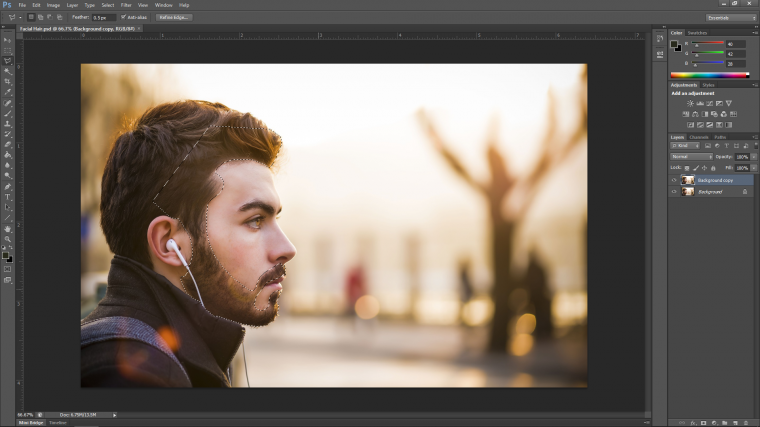
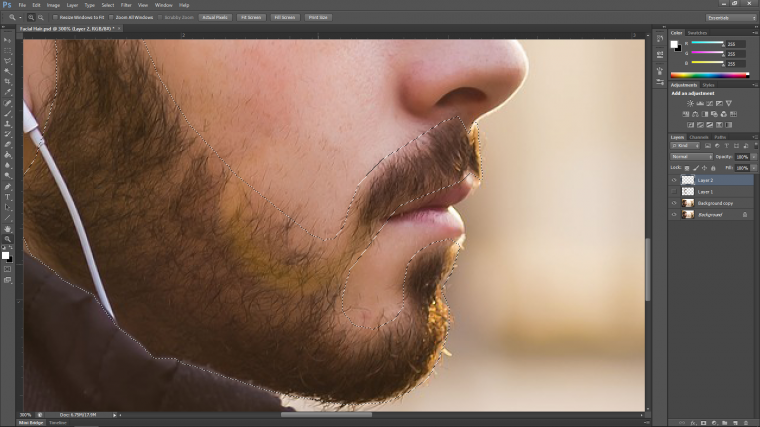
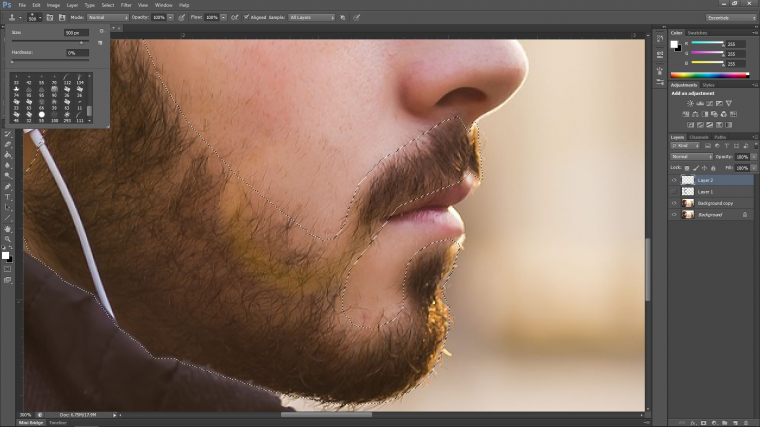
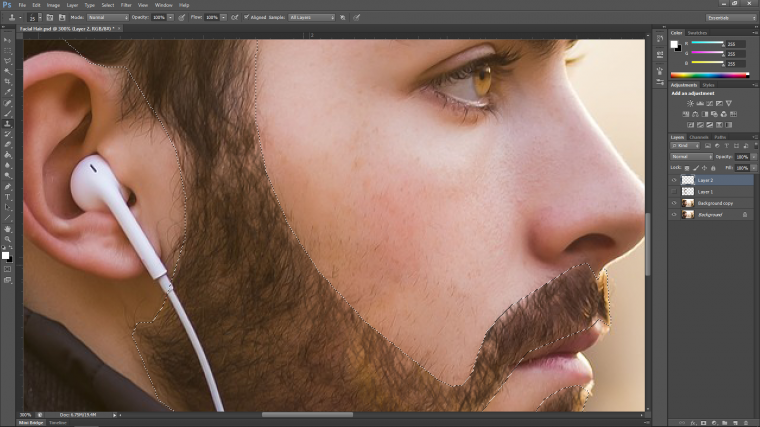
Now let’s grab the Polygonal Lasso Tool. [Another option here is to use the Pen Tool if you know how to use it or if you just prefer it] but for simplicity of explanation, we will go with the Polygonal Lasso Tool for this one.
Zoom into your image if you want to for a better view of what’s going on, to do this I simply hit on my keyboard the Plus / Minus key while holding Ctrl [You will find the Plus / Minus Key just beside the Delete Key on the right-hand side of your Keyboard if you own a standard keyboard]
Now just click around the areas that you want to tidy up and create a fake hairline around those areas, to move around your hairline as you work without disrupting your workflow you can hold the Spacebar on the keyboard so that the little hand icon appears on your screen then you can click and move around.
So what I’m aiming for here would be like a perfect hairline shape so use your imagination to help you with this, if you’re stuck think of how an Artificial Human/Robots hair line would be like or something along those lines lol I’m just throwing that out there 🙂
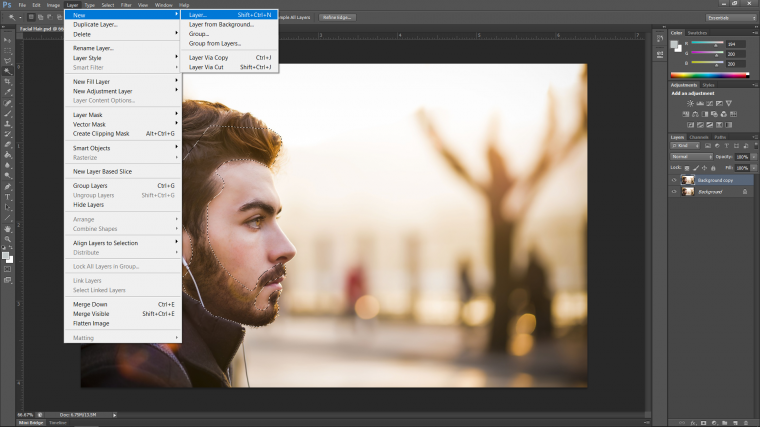
Ok, so now that we have our Selection we are going to create a New Layer.
Go to Layer – New – Layer
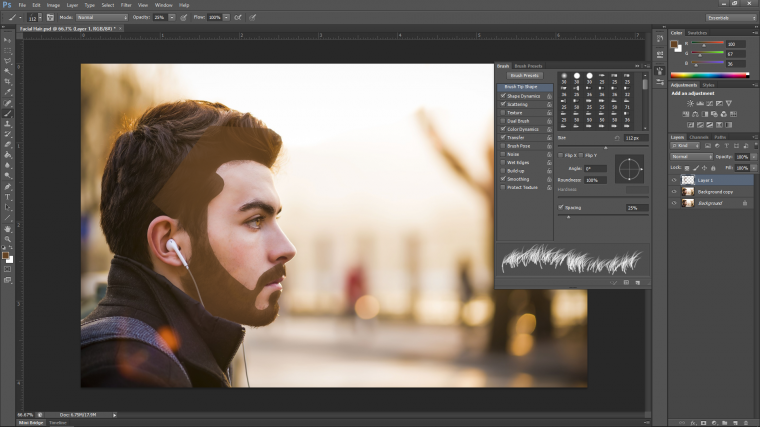
That will now appear on top of all the other layers, you can see this in the example image below to the right named ‘Layer 1’
Now press ‘B’ on your keyboard, this is the shortcut to the Brush Tool, now at the top of your screen you will see all the options such as File and Edit etc.
Well below that is the options for the Brush Tool, look across them until you spot Opacity and drop it down to 25%
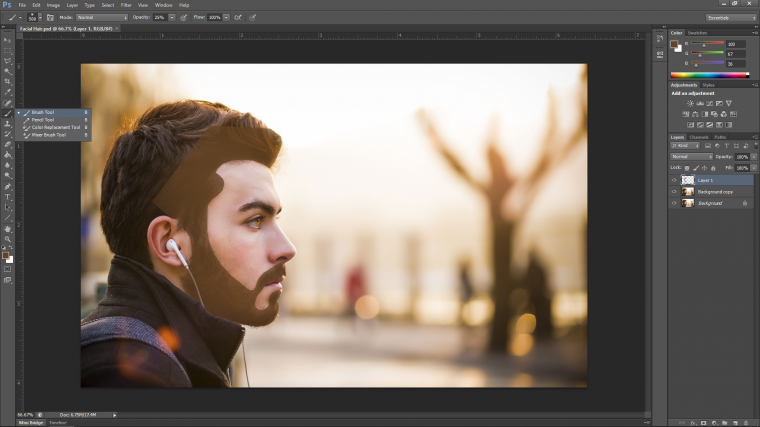
Once you do this go to your image and hold Alt to click on it which chooses the color we are going to paint with, then you can paint within the selection of your image the general shape of the beard for safe keeping, I do this because I will always be able now to come back to my work and re-select the beard shape if I need to.
This allows me a few little options here.
It will allow me to create duplicates of the beard shape and edit it a little if I want to create different shapes.
I can also add new fades to each by creating different selections with different gradients of Feather added which mean that you can create cool looking fades at certain points if needs be, so for example if you look at the top part of his head at the crown you will see that the hair is faded back a rather transparent, the feather allows this and if needs be at the time you can do further edits.
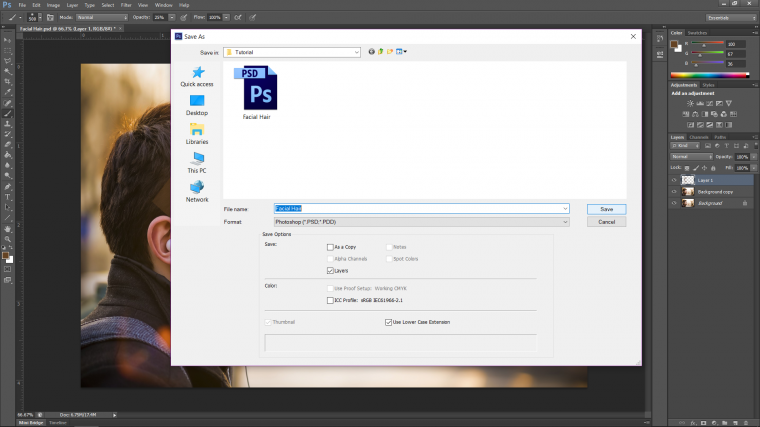
Now let’s save up and make sure everything is safe.
Go to File – Save As
Then in the option box, choose your location, name and in the Format drop-down box choose Photoshop PSD as seen below.
OK so let’s start working on the settings that we are going to use for the hair.
So in one of my other PhotoshopTutorials I showed you a practical way to create a Brush that we are going to use to simulate the hair.
I would suggest that you take a look at these tutorials if you want to make more realistic/larger edits with different variations but for now we are just going to use a preset brush, so to find this brush open up your brush tool by clicking on the icon on the left or by simply pressing [B]
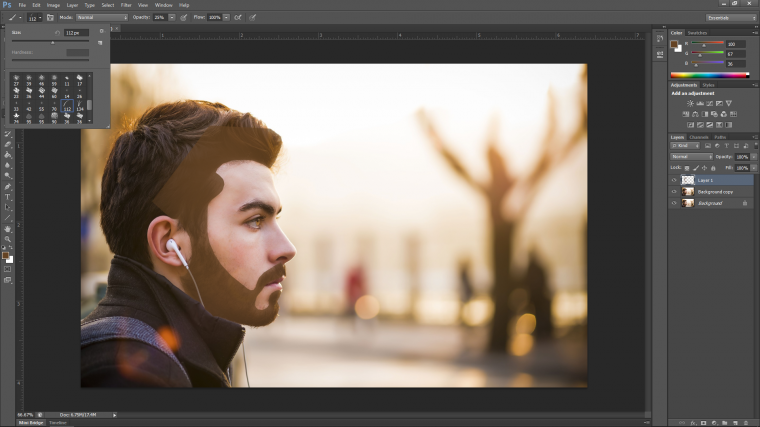
Now as you can see from the example image below I have my options open for what brush head I want to use, in case you can’t find how to get into that it is the second icon across from the brush icon and under ‘Edit’.
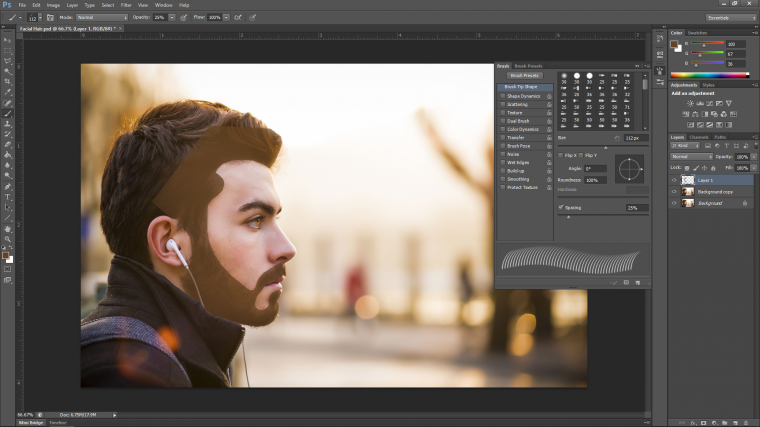
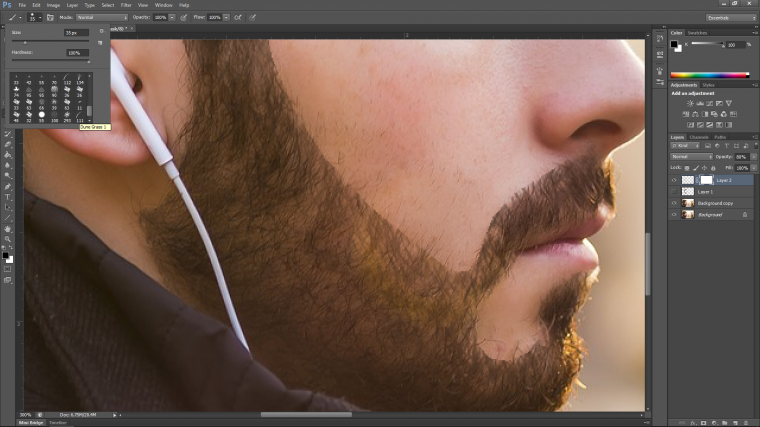
So click on that, then at the bottom of that you will see all the different little brush head options, scroll down those until you see the one called ‘112’ when you left your mouse cursor over it for a couple of seconds, it will say ‘Dune Grass’
Next, we are going to start tweaking the setting for this brush so we get a more random pattern once we start to paint on to our actual image.
So this brush will already come with its own preset options but we need to change them as they don’t just work the best for this image.
To open up these options you have to click on the little icon just beside the icon that we clicked on to find the brush heads we were after, it’s just to the right of that and looks like a folder with three little brushes in it just under the word ‘Image’
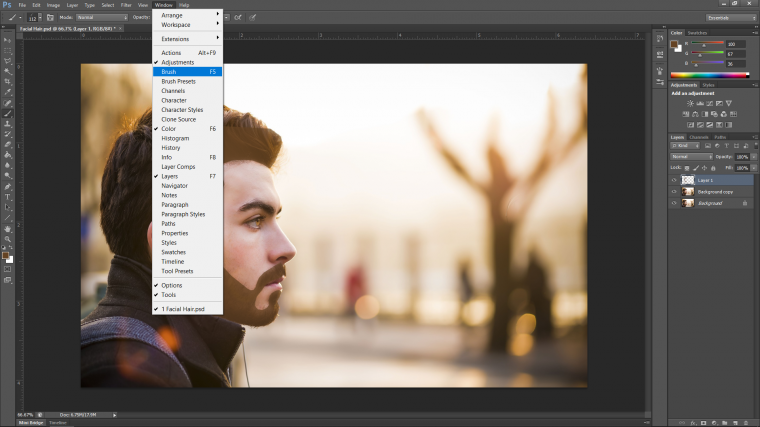
If you are totally stuck you can just go to Windows – Brush or hit F5 on your keyboard.
So just to start to uncheck all the boxes.
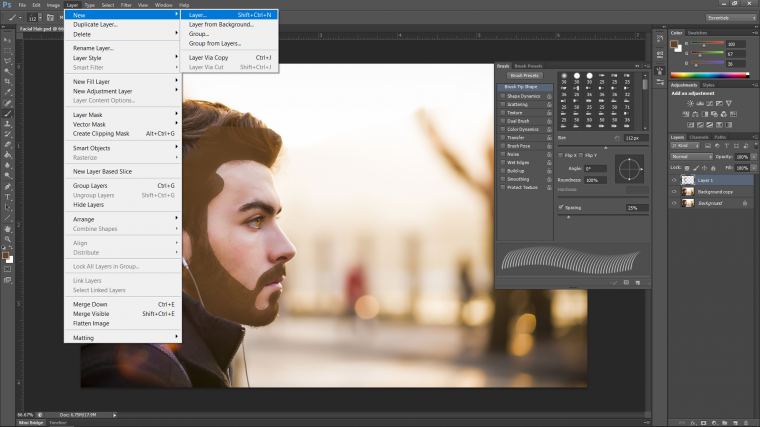
Then let’s just create a new layer to work on.
Layer – New – Layer
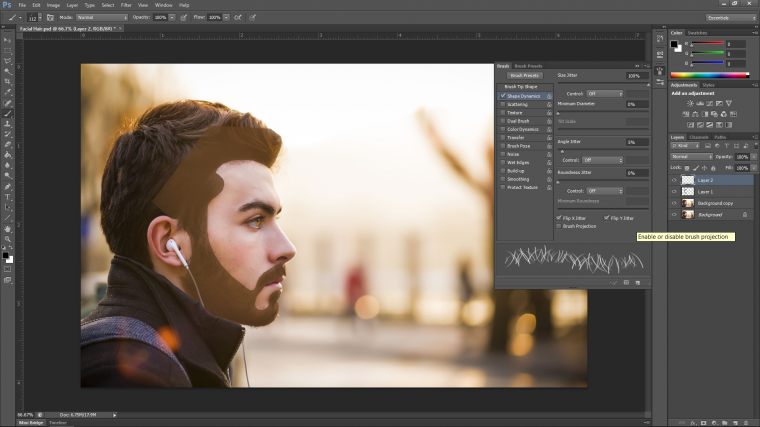
The first set of setting that I want is in the Shape Dynamics and they are as follows…
Size Jitter 100%
Control Off
Minimum Diameter 0%
Angle Jitter 5%
Control Off
Flip X Jitter Checked
Flip Y Jitter Checked
Brush Protection Unchecked
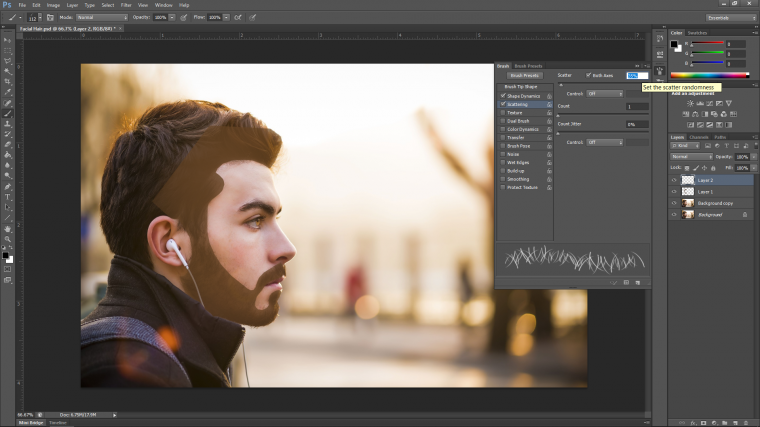
Cool, next we are going to go to Scattering.
Make sure Both Axes are checked
Increase the Scatter to 35%
Control Off
Count is set to 1
Count Jitter 0%
Control Off
Ok next let’s take a look at the spacing for the brush, for this I would suggest looking at the actual hair that you are going to be working with and using that as your reference point.
So right at the top of those options, you will see Brush Tip Shape.
At the bottom, you will see ‘Spacing’
Adjust this to whatever fits the model you are using, for me the magic number was 10%.
The last thing to do here was to make sure to check Smoothing on the same list of Shape Dynamics and Scatter etc.
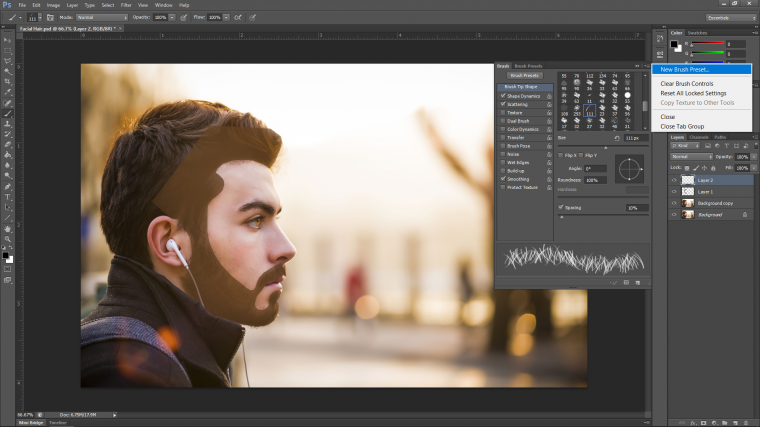
So with this all sorted now all that’s left to do is to create our own Brush Preset, so take note that you can do this with any of the brush presets that Photoshop provides, you can even do this to random Brushes you download from the web, it’s all very much modifiable which is awesome!
Ok so to create the brush preset on your brush options panel you will see there is a little icon at the top right-hand side, it will look like a little downward pointing arrow with a few lines to the right-hand side of it.
When you click that ‘New Brush Preset’ will appear at the top of the drop down box that appears.
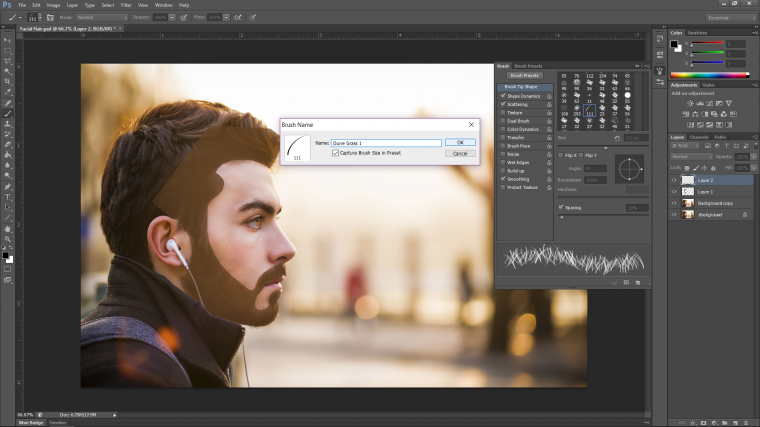
when you click that another box will appear enabling you to name your brush with I just names Dune Brush 1 which was the automatic name, but take note of its number because this is how you’ll actually find the brush, and the number given to our new brush is ‘111’
click OK.
Save up, next we are going to start applying this brush and filling out the areas with hair we want to be sorted.
Ok so now we are going to start to use our Brush Head.
But we are not going to use it with the Brush Tool funny enough! there’s a whole other trick to this and this is where the real magic happens with Photoshop.
The first thing to do is to open up the Magic Wand Tool.
You can also use the keyboard shortcut of (W)
You will see both below in the example image!
Now you need to make sure that you are going to be on the correct layer.
So look to your layers panel.
You want to select the layer with the beard shape on it, you will see in the example image below mine if called ‘Layer 1’ I’d image due to you following this Tutorial that yours will be the same, if not just choose the second layer down from the top.
When you have that sorted and you’re on the correct layer then using your Magic Wand Tool just click on your image where the beard shape is and you will now have the shape selected.
Just as a side note, there will be a hard edge to your beard but don’t worry if it looks harsh at the start, I have a solution for that, that will make it look a lot more realistic and easy on the eye.
The look I want to go for is the week-old trim, not the fresh that second out of the chair look.
Now we are ready to start adding our hair.
Ok so the first thing to do with this is to click the little Eye Icon on the layer with the Beard Shape, you will see it just to the left of the layer, that will turn the layer off.
Then click on the layer above that which was the New Layer we created earlier.
Next zoom in, you can use whatever way to zoom in you like, the way I did it was to hold Ctrl on my keyboard and then hit the Plus and Minus keys also on the keyboard just to the right and beside the Delete Key.
Now is the magic part.
As I said we don’t use the Brush Tool for this! Instead, we use the Clone Stamp Tool!!!
The way to use this is quite simple, firstly activate it by clicking it if you know where it is or keying in on your keyboard (S), you’ll see where to find it below anyway.
Then choose your brush, mine was right at the bottom of the brush head options ‘111’ yours should be too.
Next, we hold Alt on the keyboard and then click on an area close to the area that you want to paint over, you want to choose an area that is similar or is the way you want the beard to look.
Once you do that you can start to paint on to the areas you want covered and you will see that you are actually painting the area that you sampled, but with a twist, that being the Brush Head you are using!
when done you and hit Deselect [Ctrl + D]
For now, your beard will look very harsh but we are going to fix this up very nicely and have it look very realistic!
Set your Layers opacity to 80%, you will see this in the Layers panel beside the word ‘Normal’ on the right.
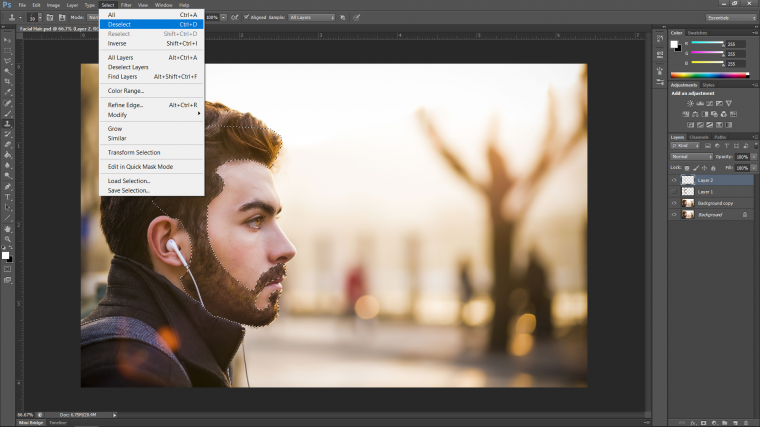
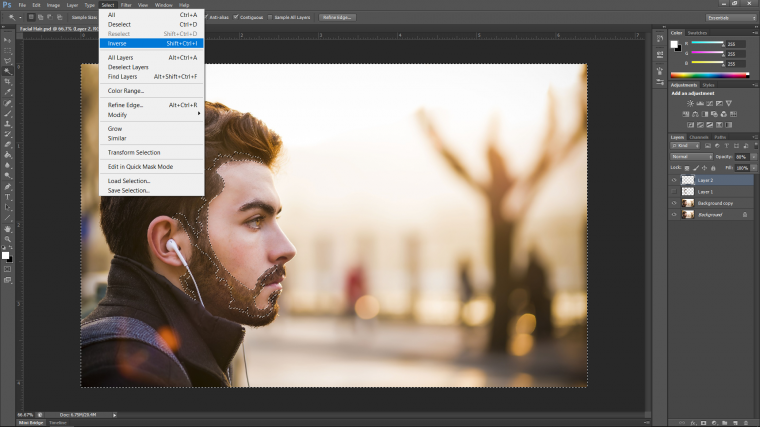
Now with your Magic Wand Tool Click on the screen outside of the beard.
Then go to Select – Inverse so the selection only covers the beard itself.
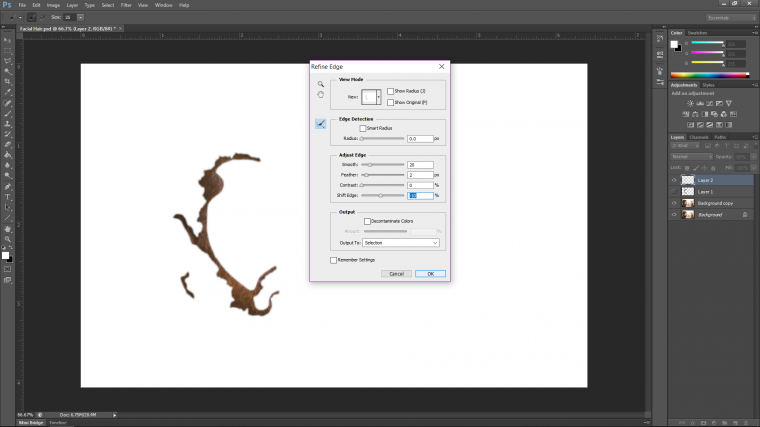
The next part is to use Refine Edge, you can see it at the top of your screen roughly in the middle, click on that.
The settings that I want to use for mine are as follow [Note: yours may differ so go with your gut and what feels right]
I want Smooth to be 20
Feather to be 2px
Zero for contrast
Shift Edge should be minus [Note minus so you are moving the slider to the left] until it is -10%
Now you can hit Ok and then Deselect.
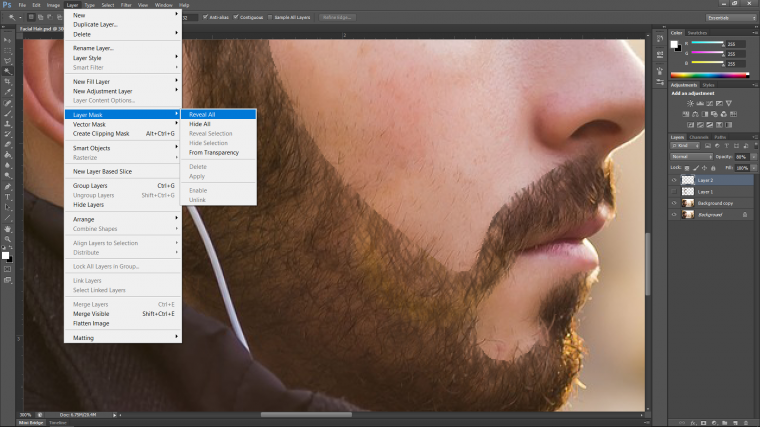
Next, we are going to create a mask.
You do this by going to Layer – Layer Mask – Reveal All
You will now see a little white box in that layers thumbnail in the layers panel again to the right-hand side.
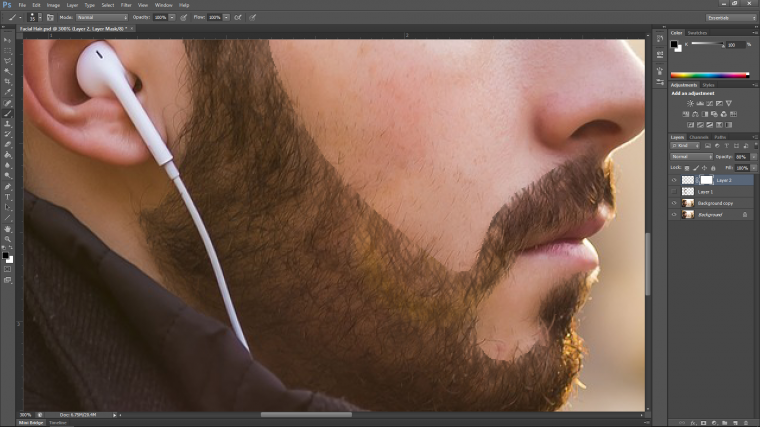
Now as before but with the Brush Tool Now (B) choose your Hair Brush Head again.
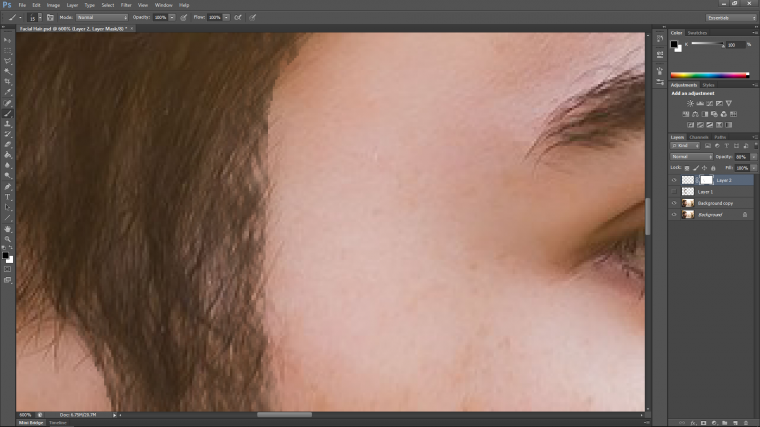
Now as we did before with the Clone Tool we are going to apply the Brush Head again only this time just concentrate on the hard edges.
So go along all those hard edges and get right of them by continuously click with the mouse, remember to keep changing the size of your Brush with the plus and minus keys as we did before and if you want to move around your image hold the Space Bar and click and drag before releasing and continuing on with the work.
Use your best judgement to make this look real or at the least pass.
When I was done I dropped the opacity once more to 50% from 80%, I did this only because I felt it would benefit my image, yours may not need this.
Graduated from college in 2002 with a degree in Art & Design, I started exploring my way in Graphic Design and Professional Post Production. Full-time freelancer since 2011.


 Facebook
 Google +
Comments (0)
There are no comments yet.